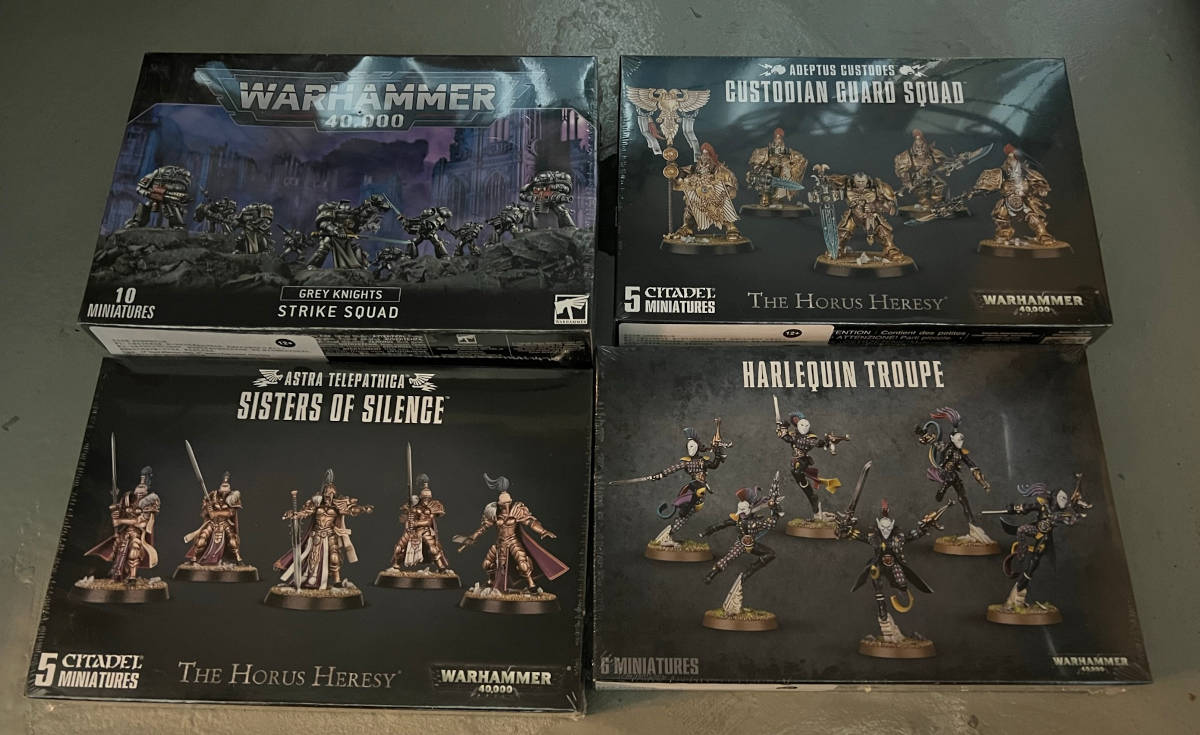
My friendly local game store had an end of year sale and since I’ve done such a good job on my backlog I think it’s okay to pick up a few more future Kill Teams.
Grey Knights - Strike Squad
Custodian Guard Squad
Sisters of Silence
Harlequin Troupe
Annoyingly, the harlequins box is not enough models for a full troupe in Kill Team, so I’ve order some 3rd party prints to fill the remaining spots.
The Grey Knights can be Grey Knights, but I was also keen to have some renegade space marines and thought the Grey Knights might suit acting as Relictors. Both are grey and have a thing for demons.
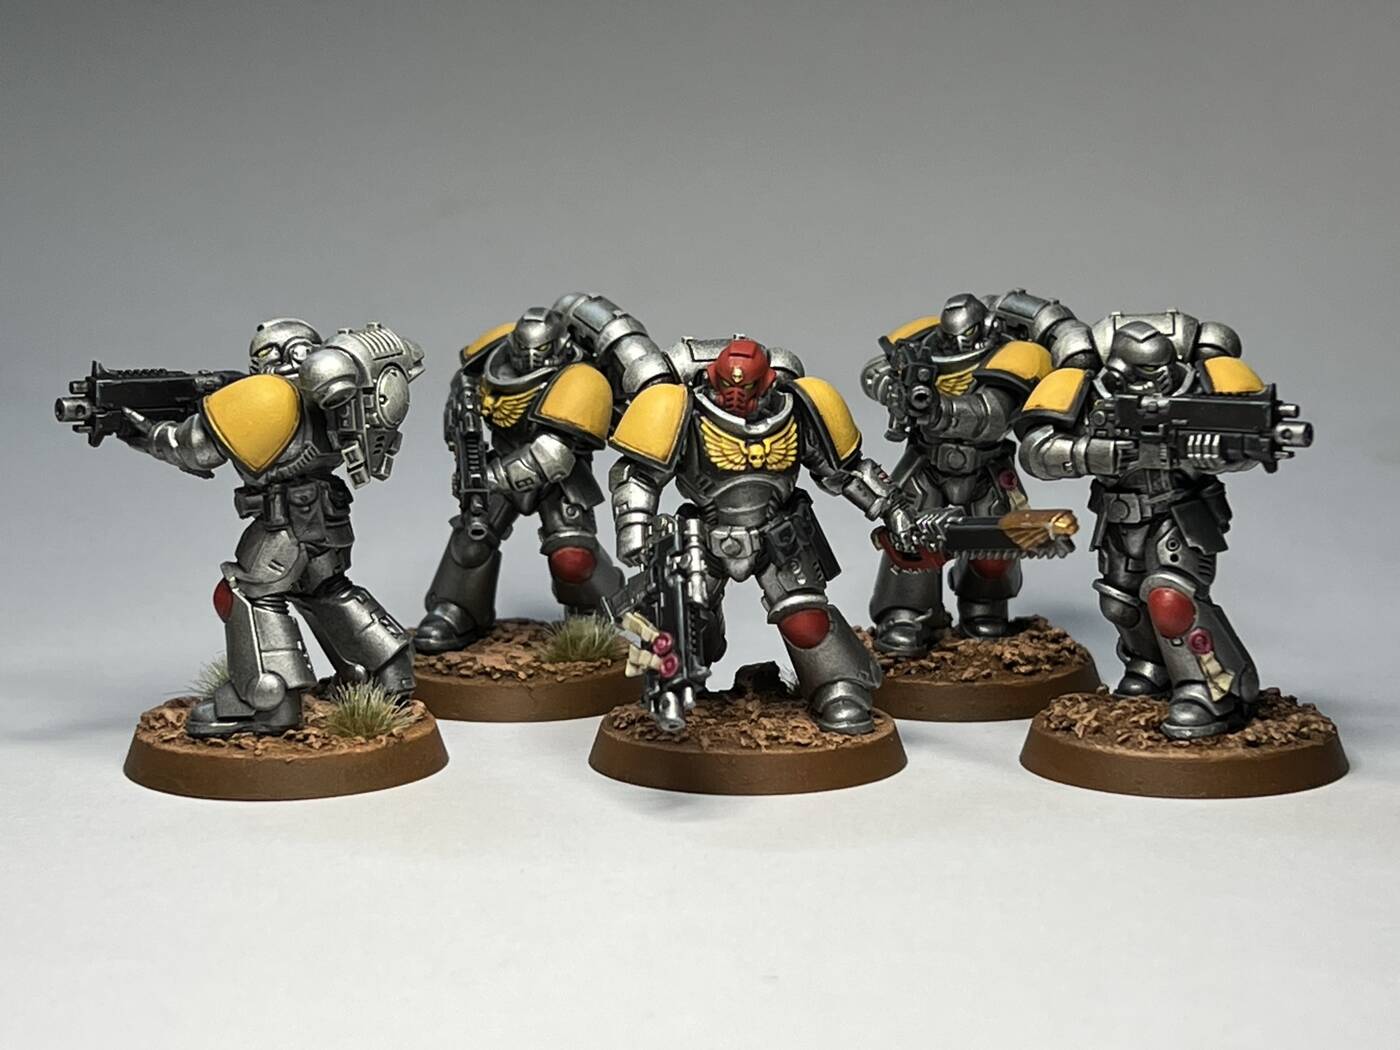
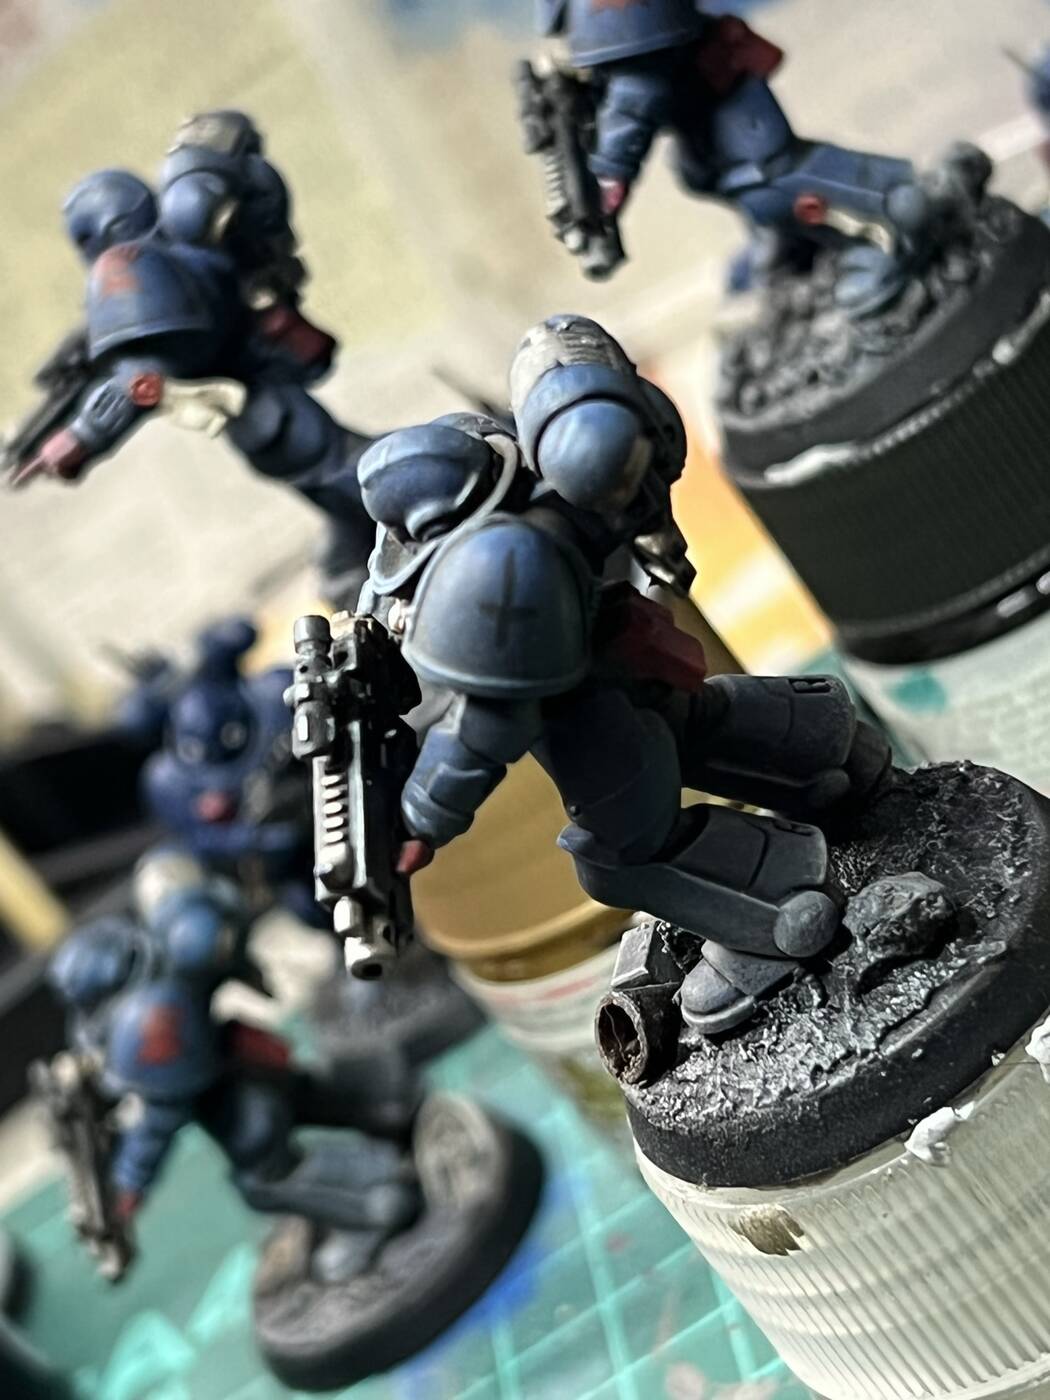
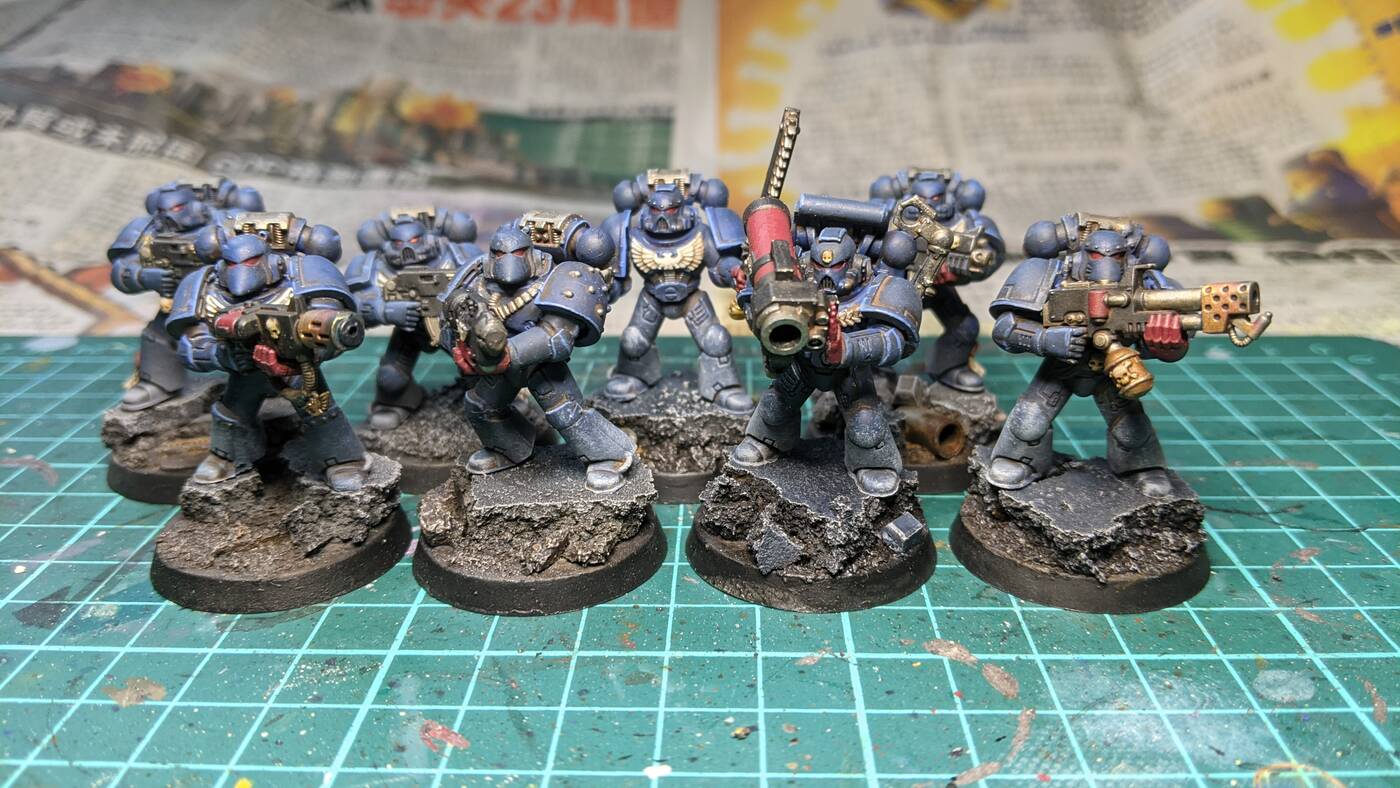
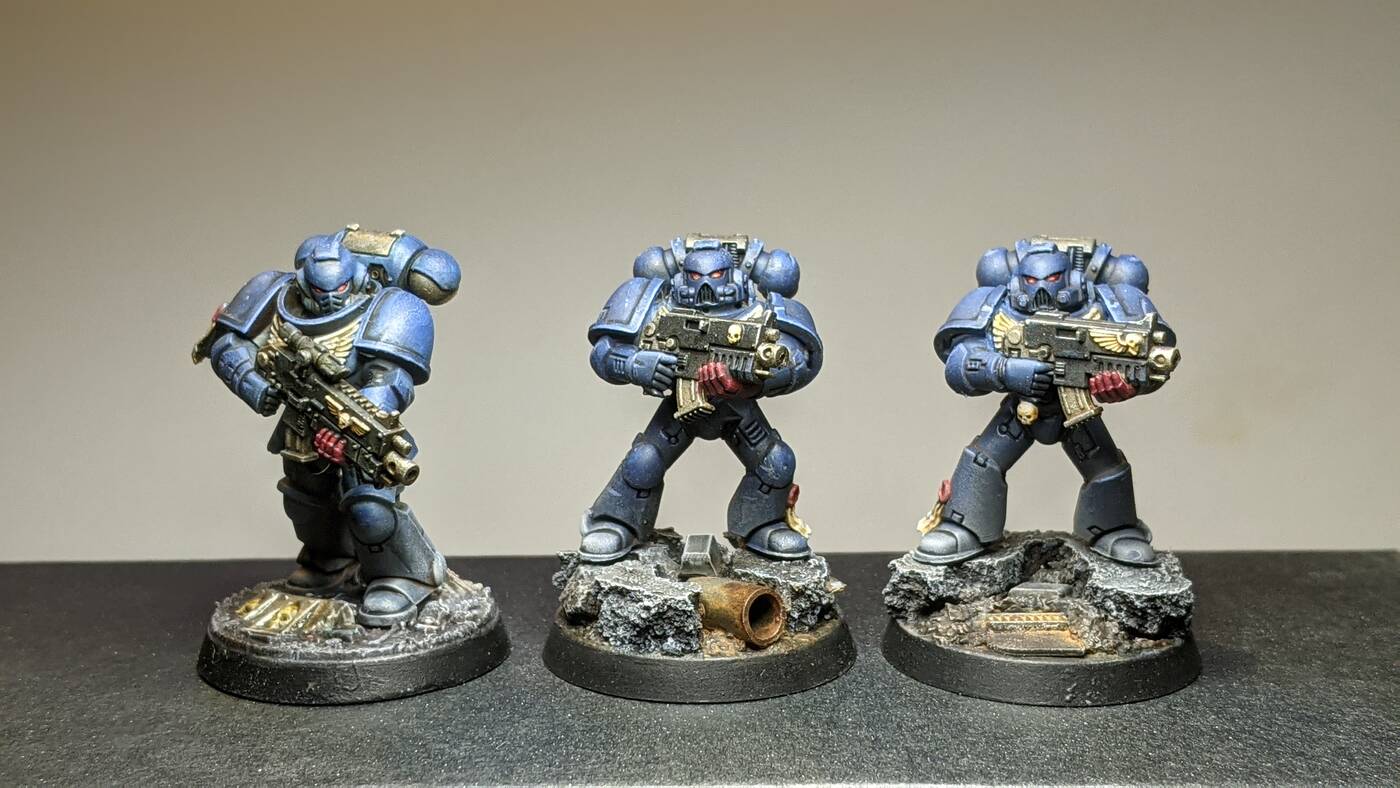
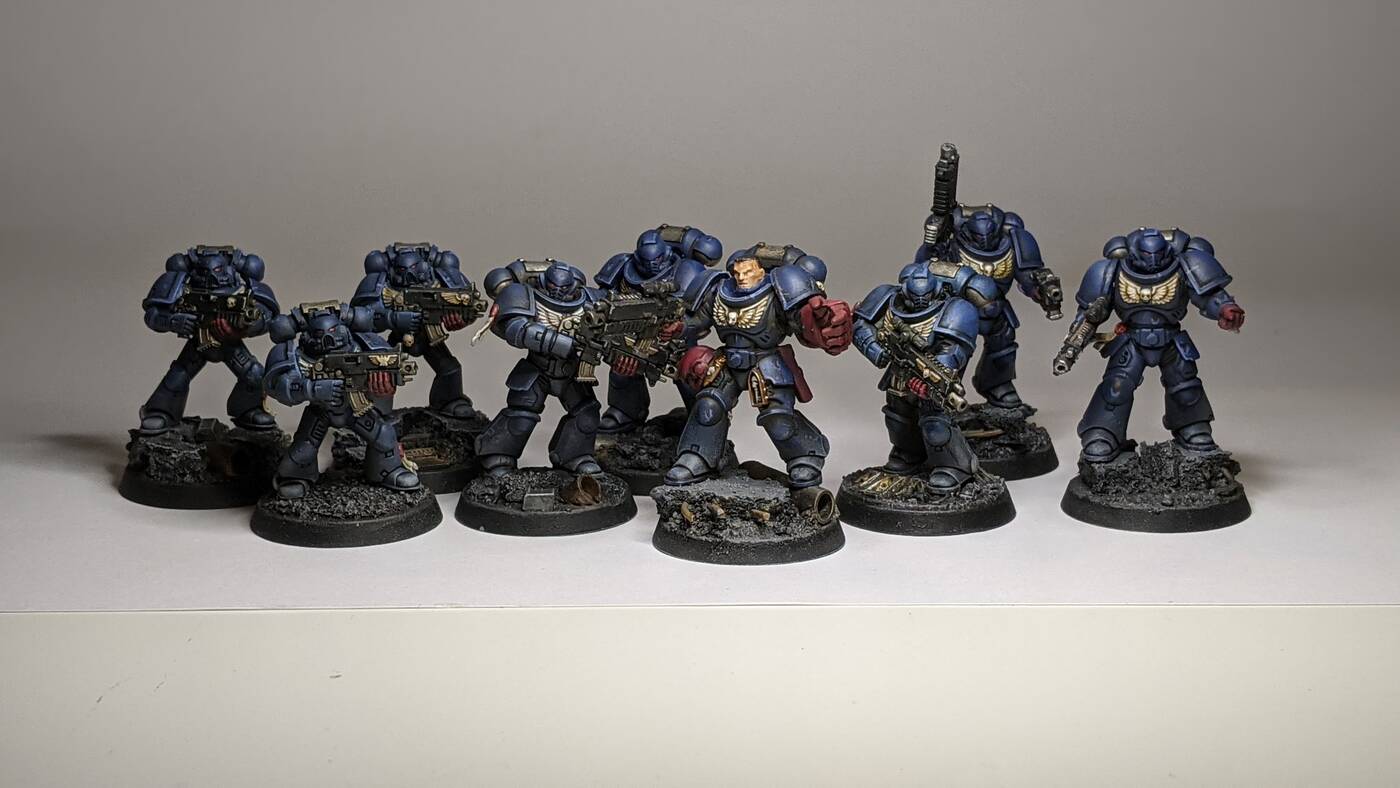
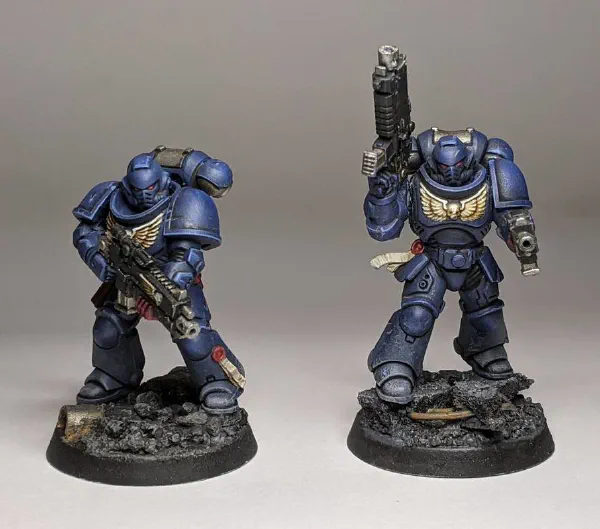
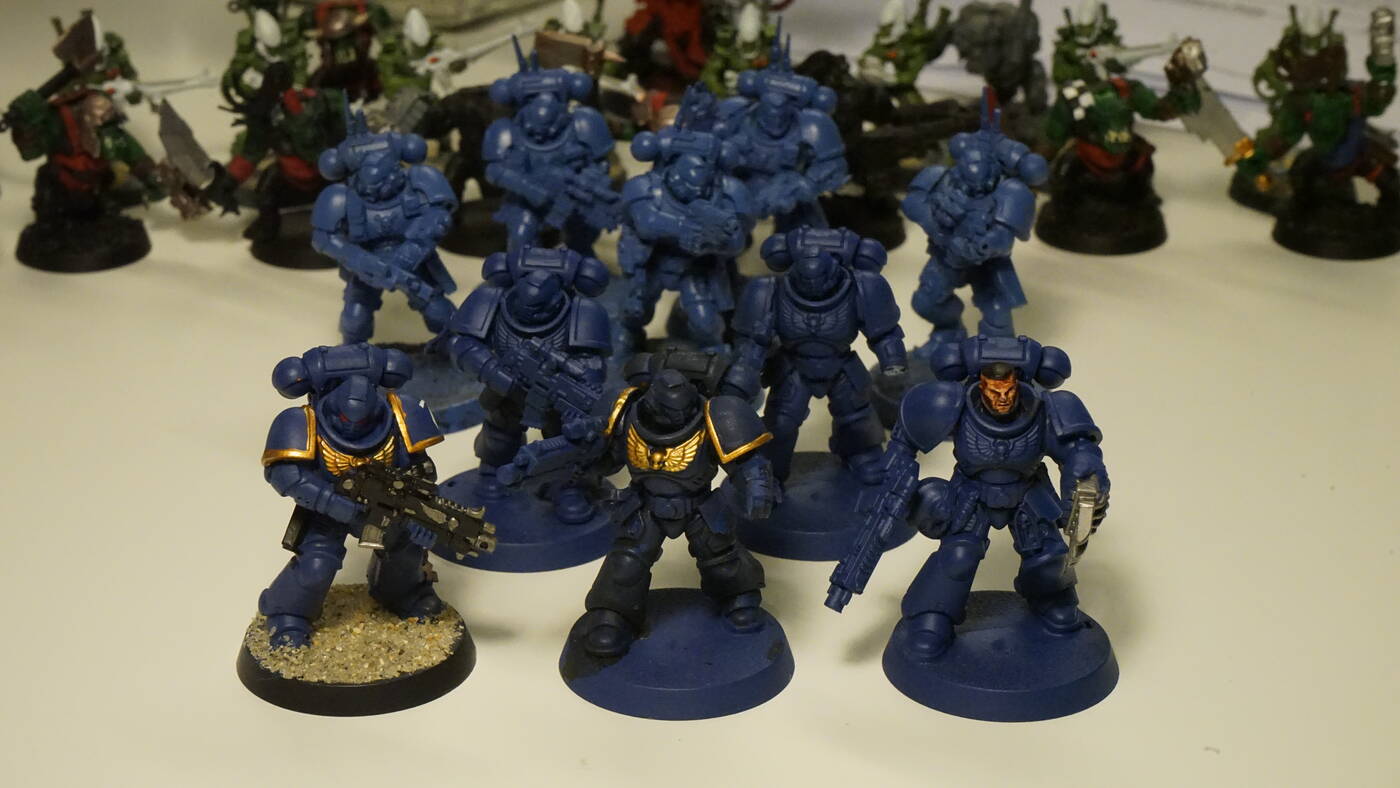
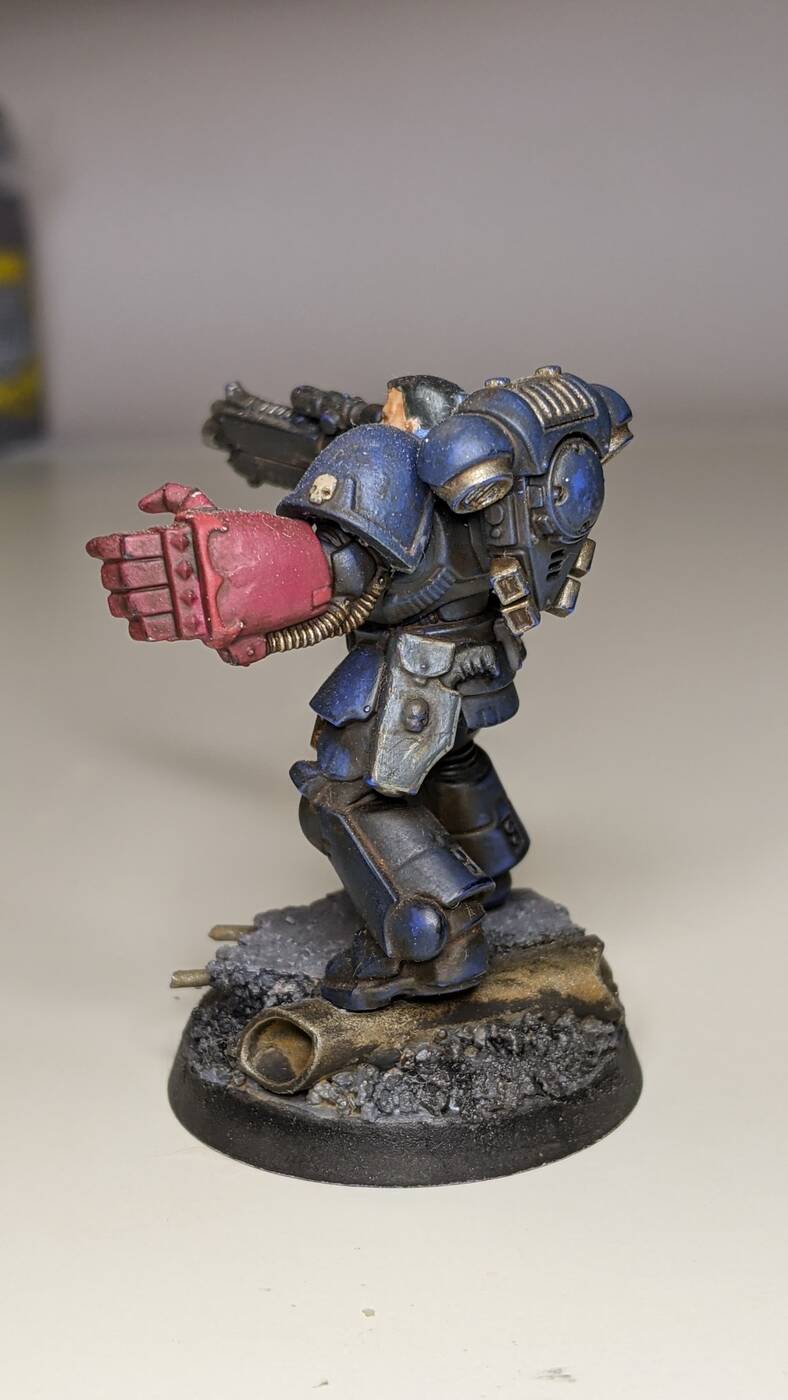
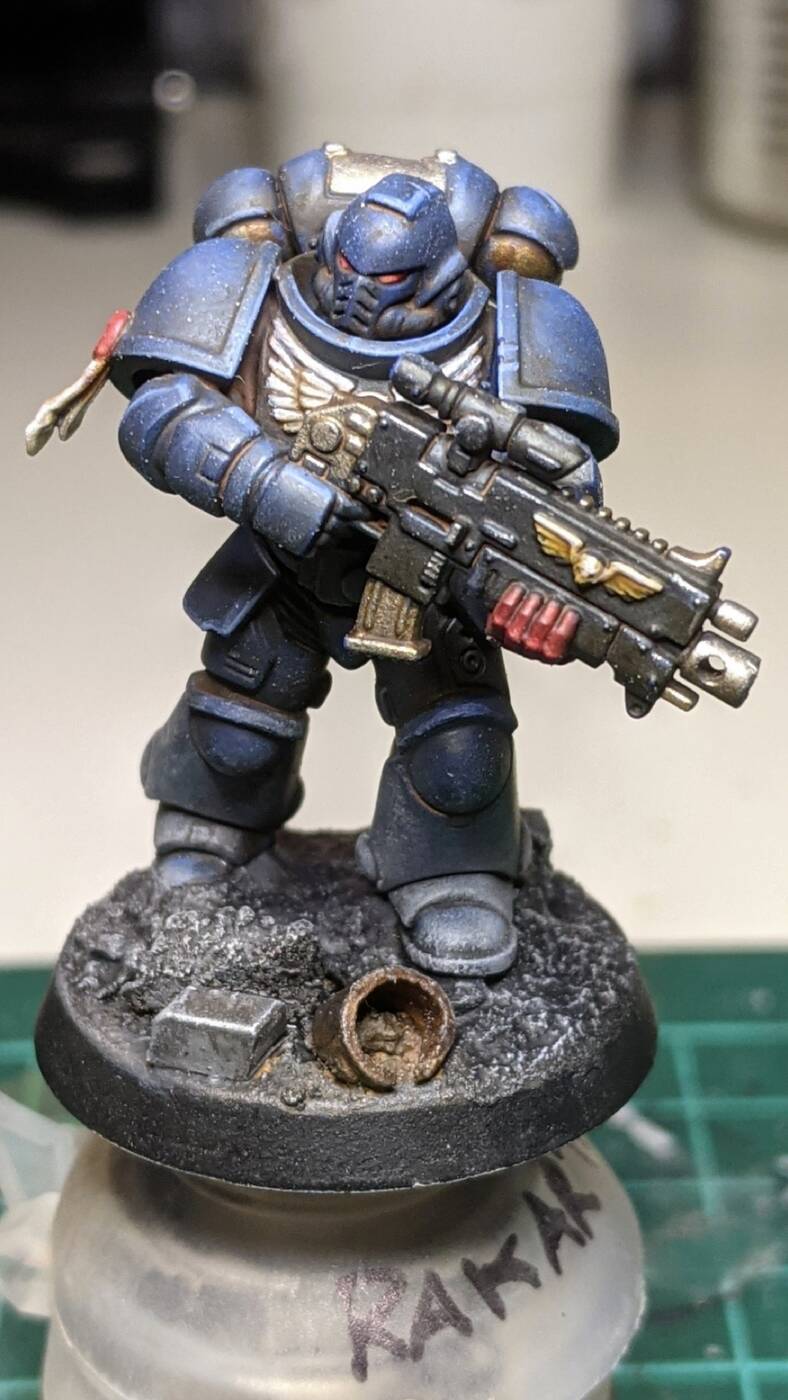
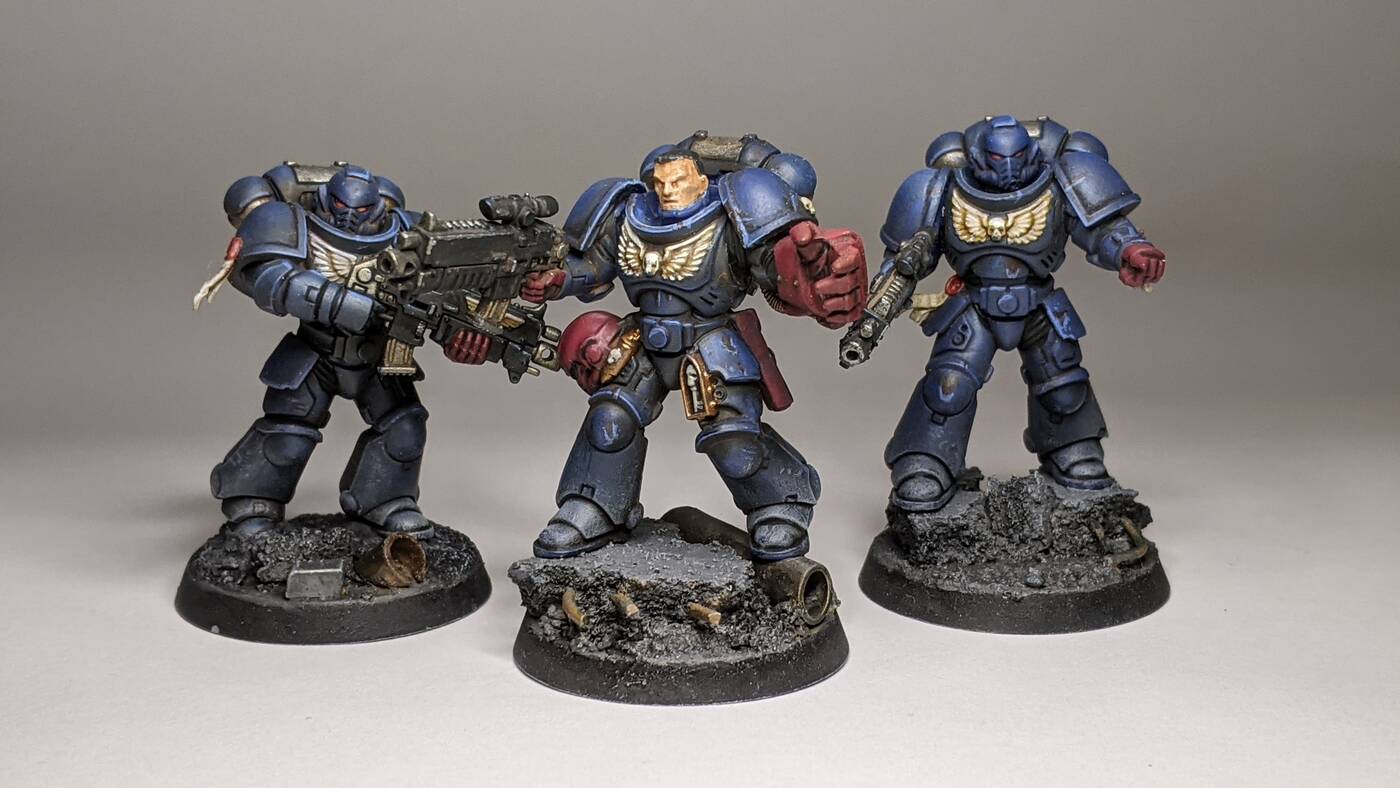
I had some left over Primaris space marine sprus and decided I’ve got enough blue, time for something different.
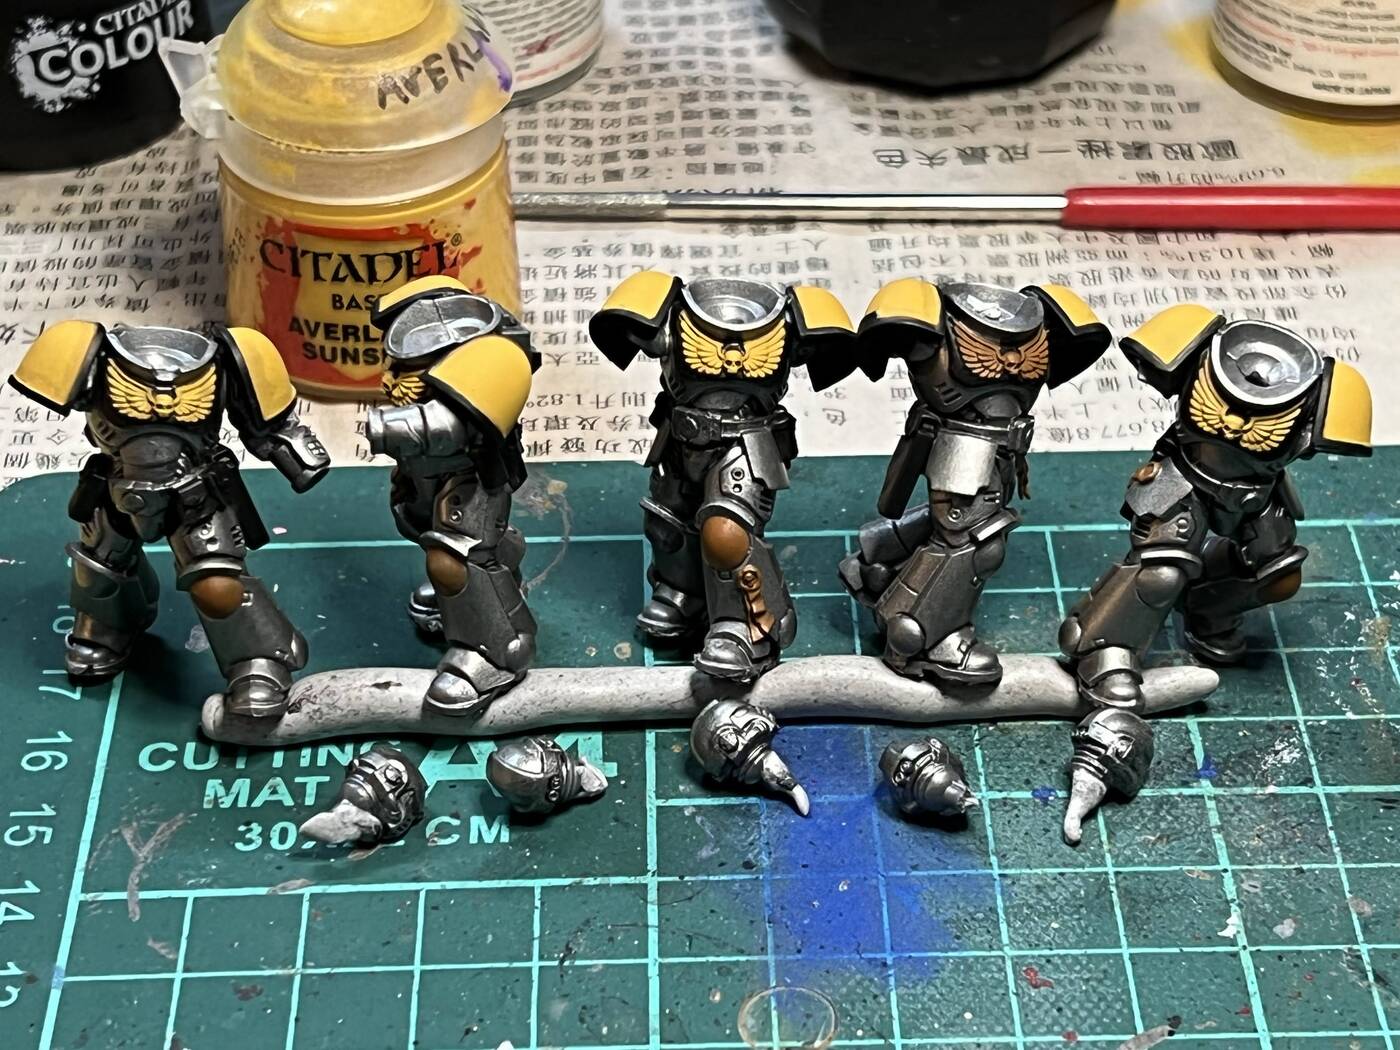
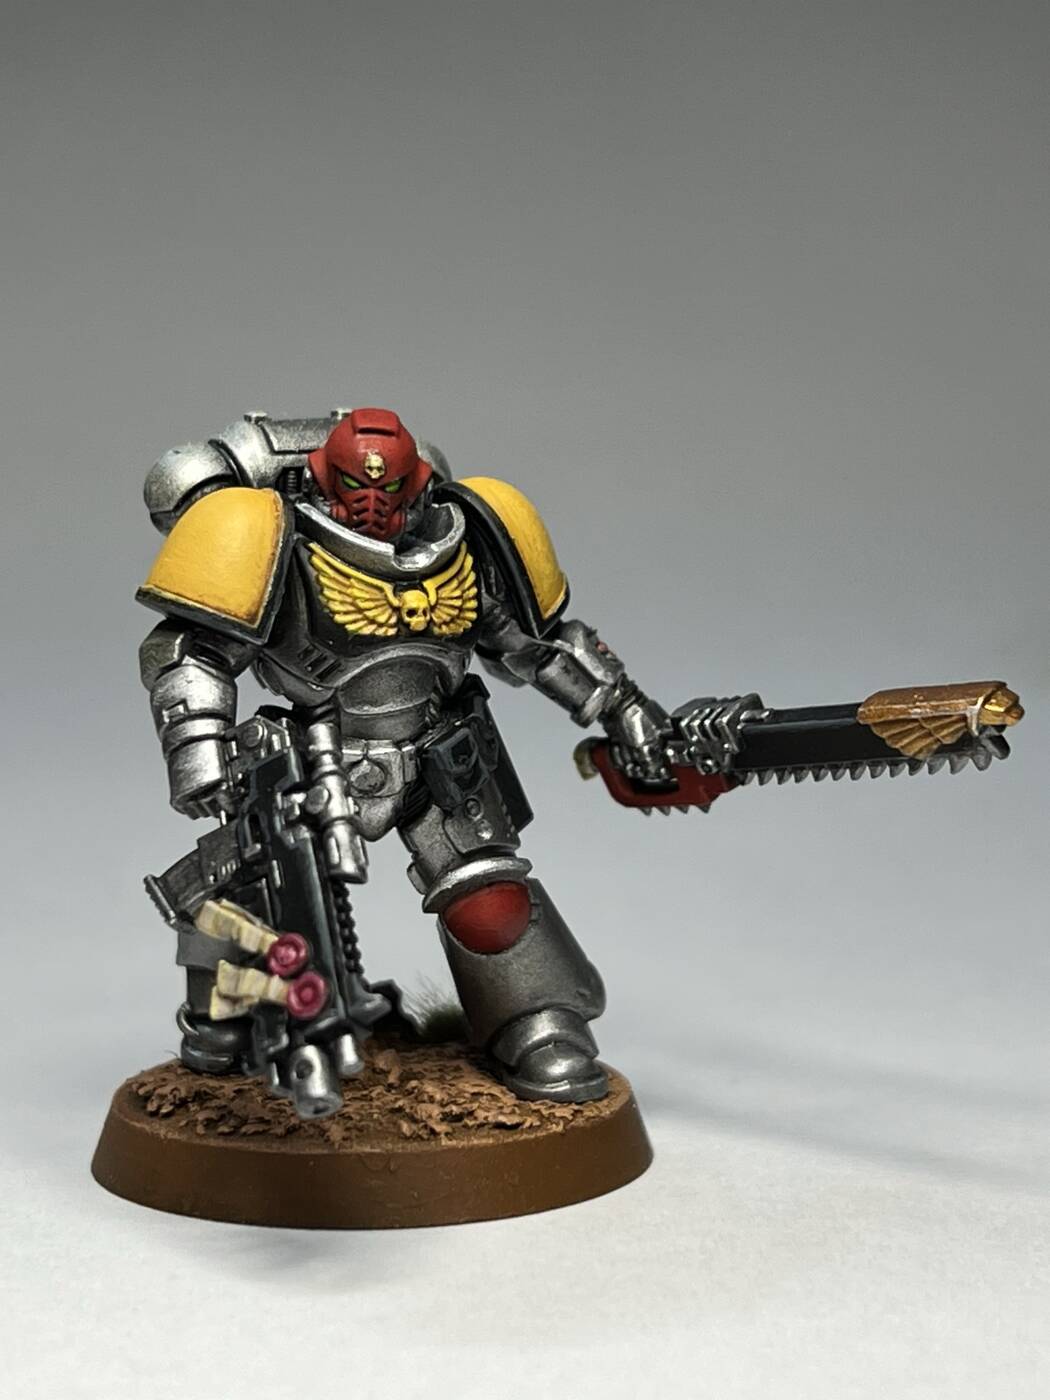
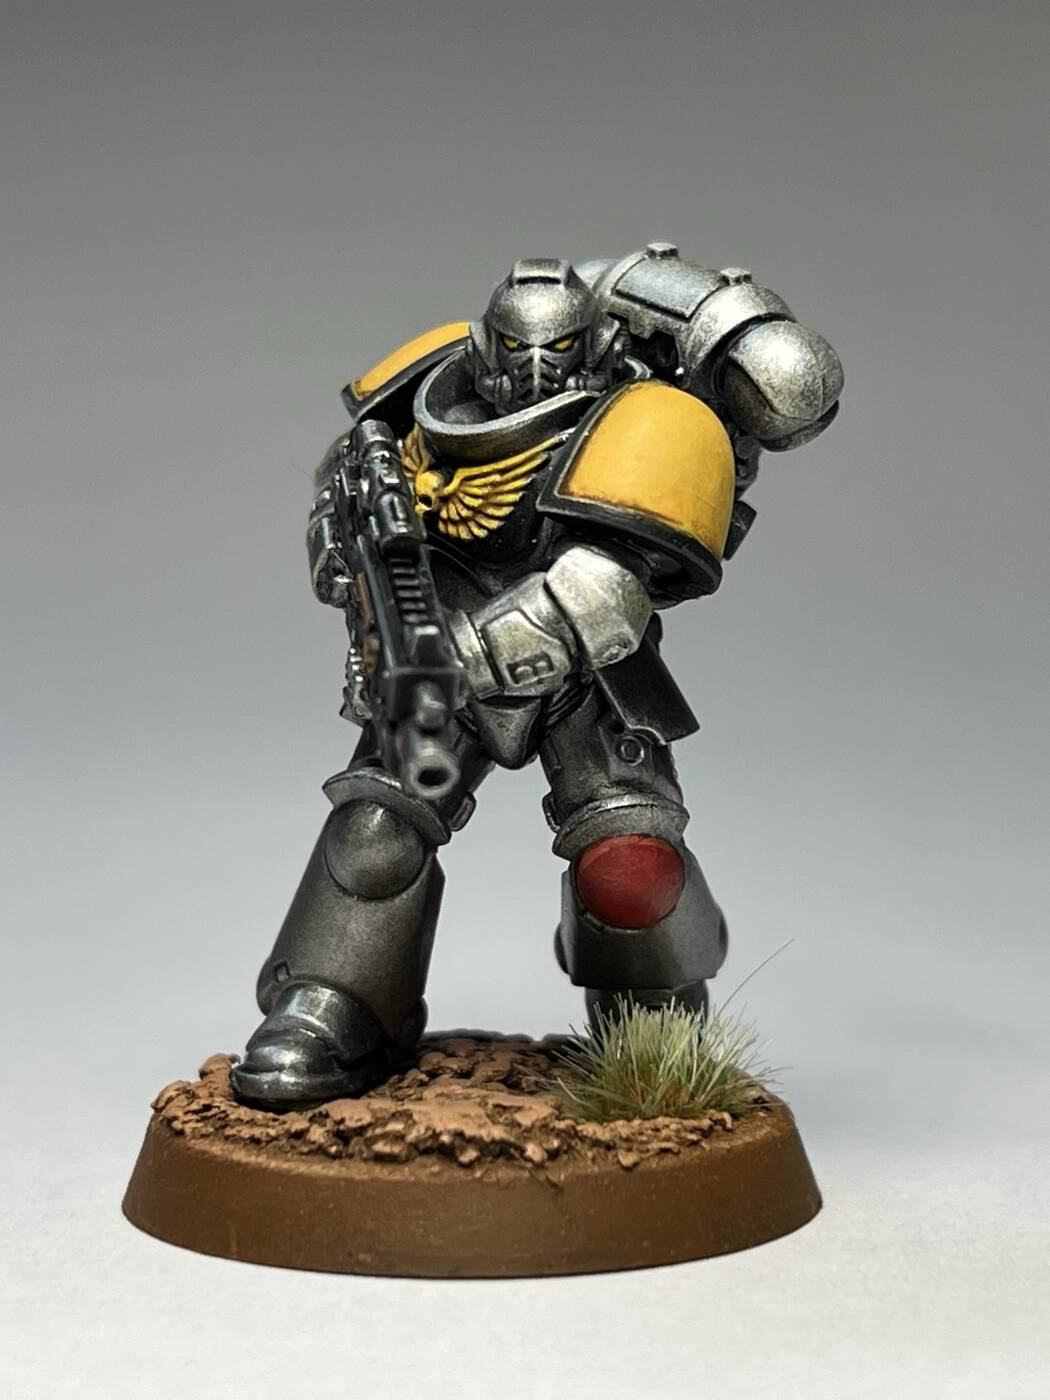
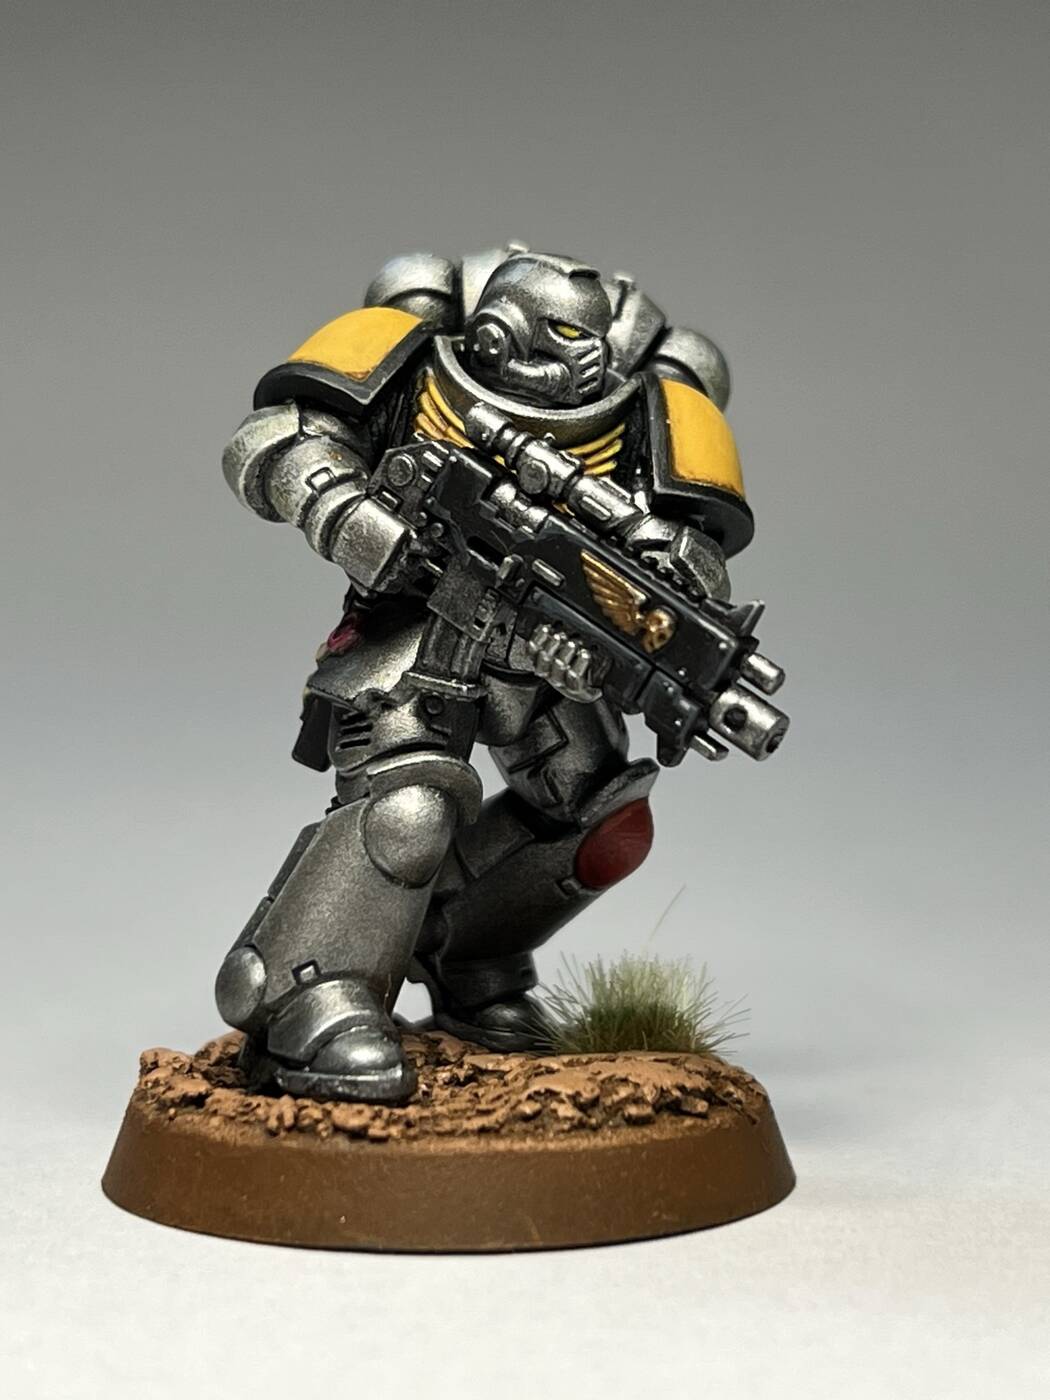
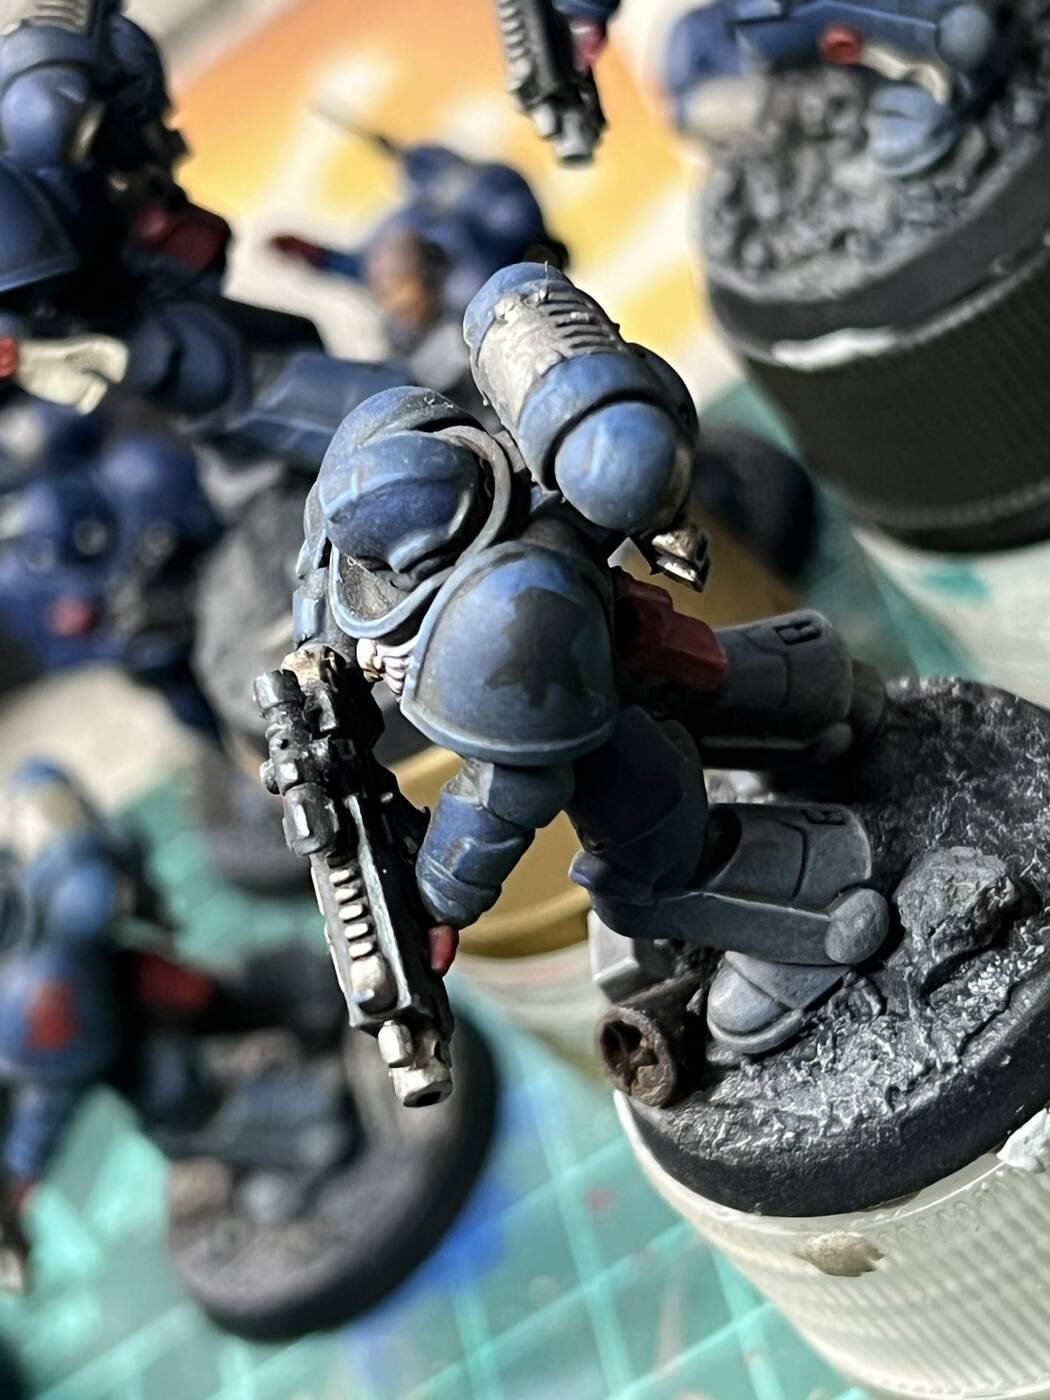
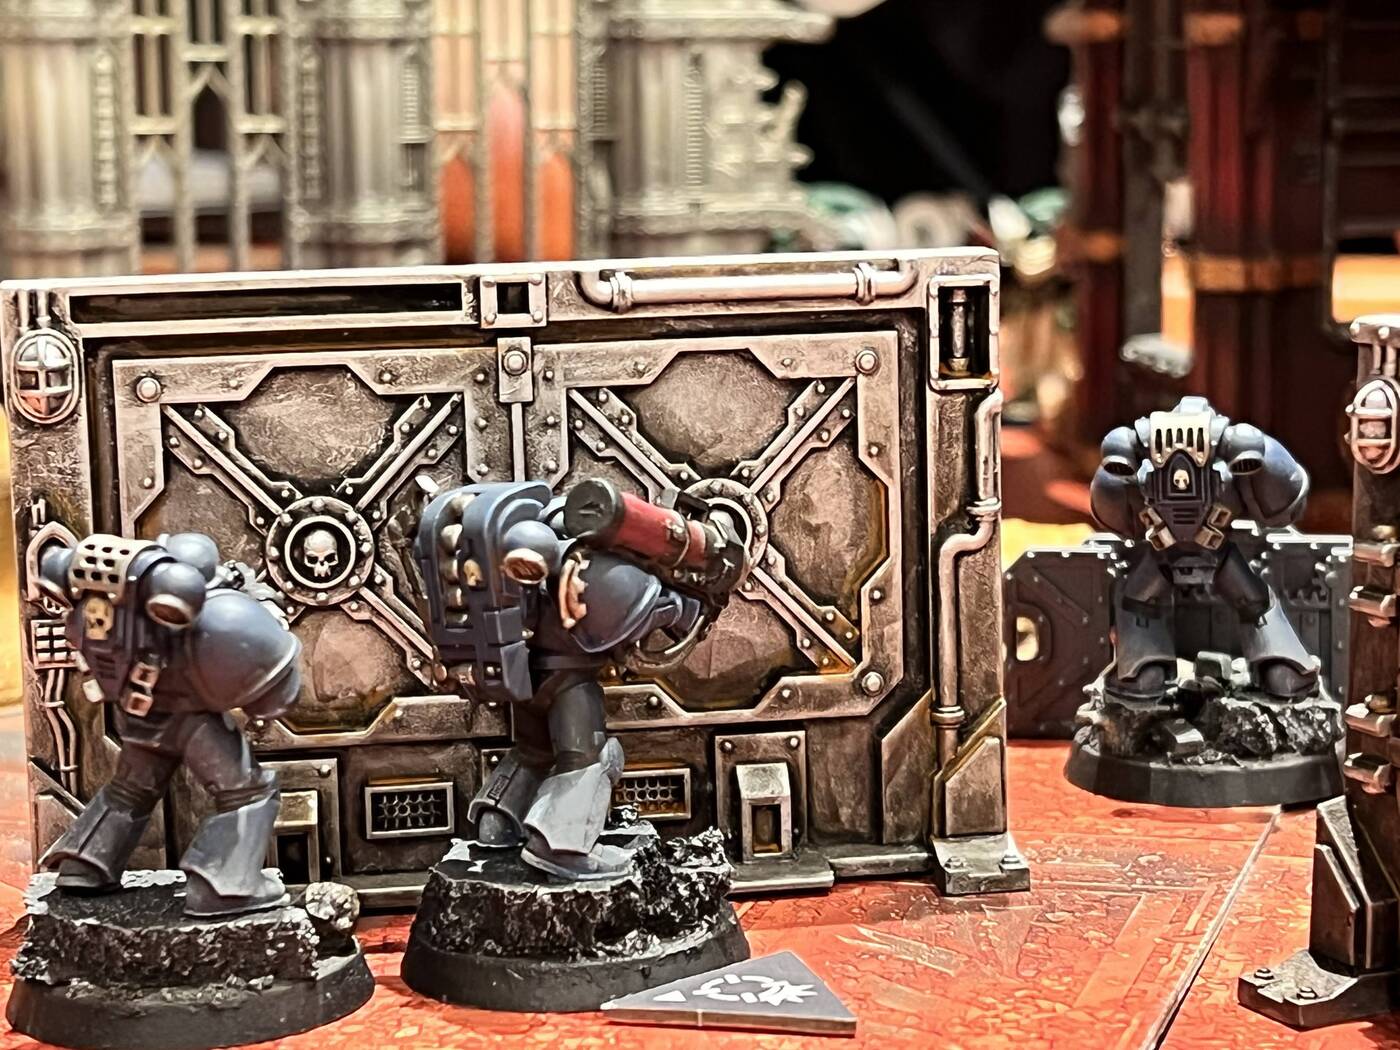
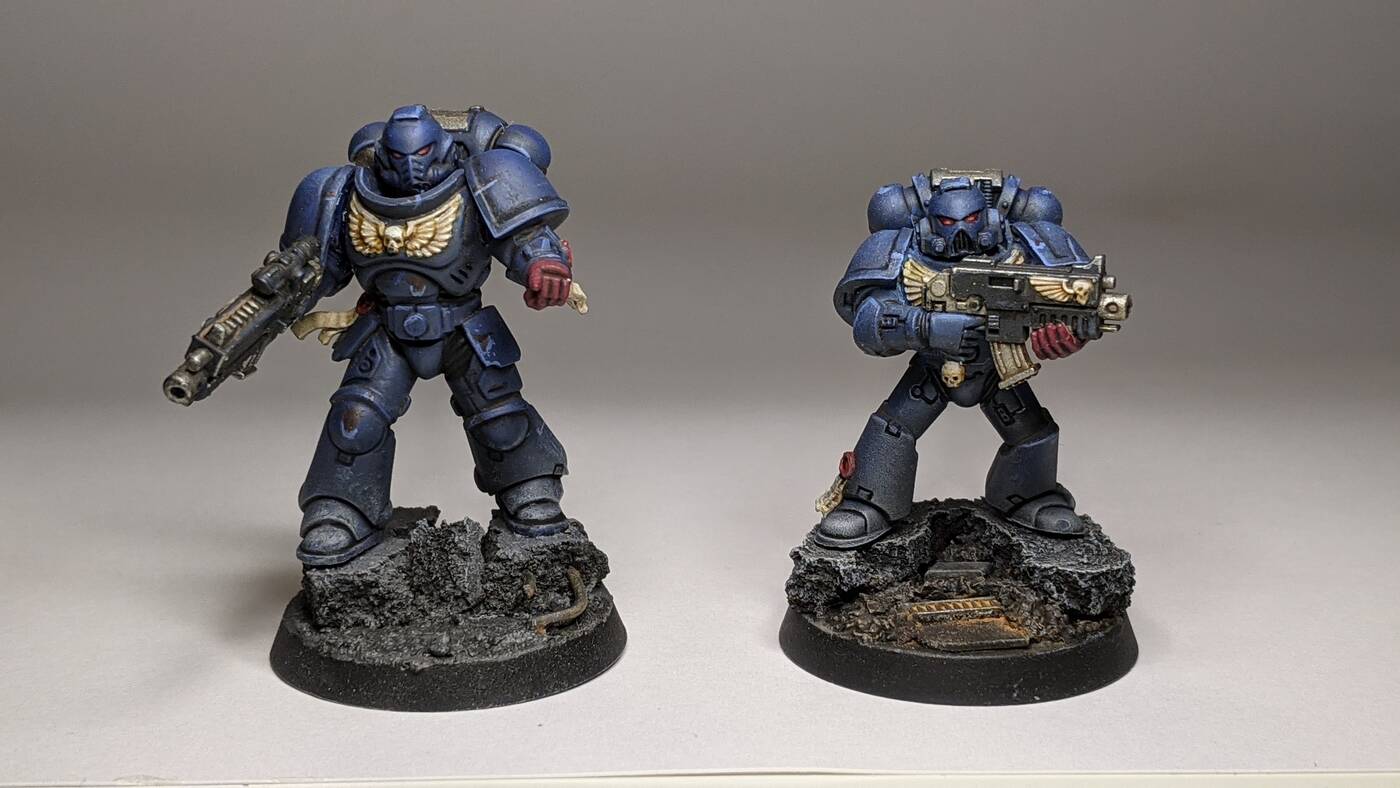
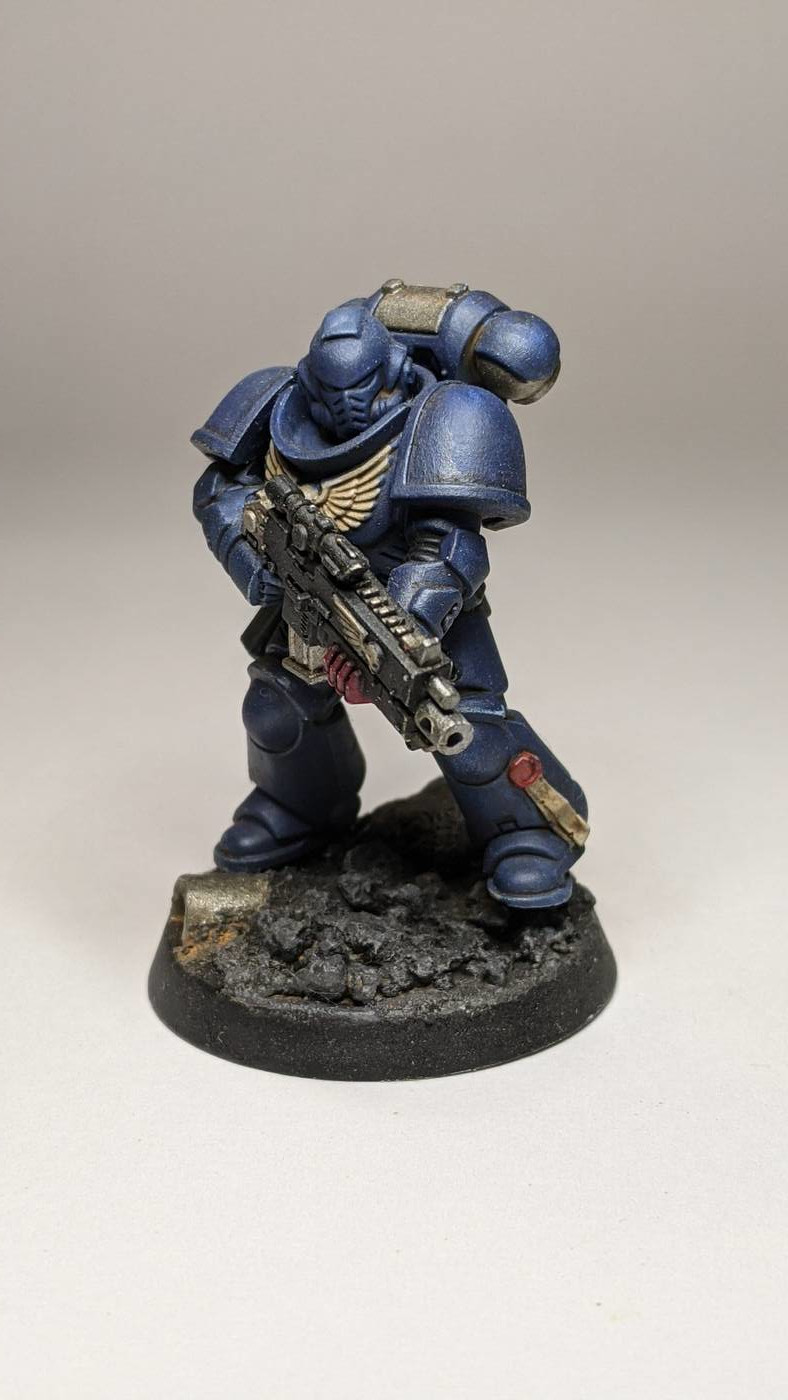
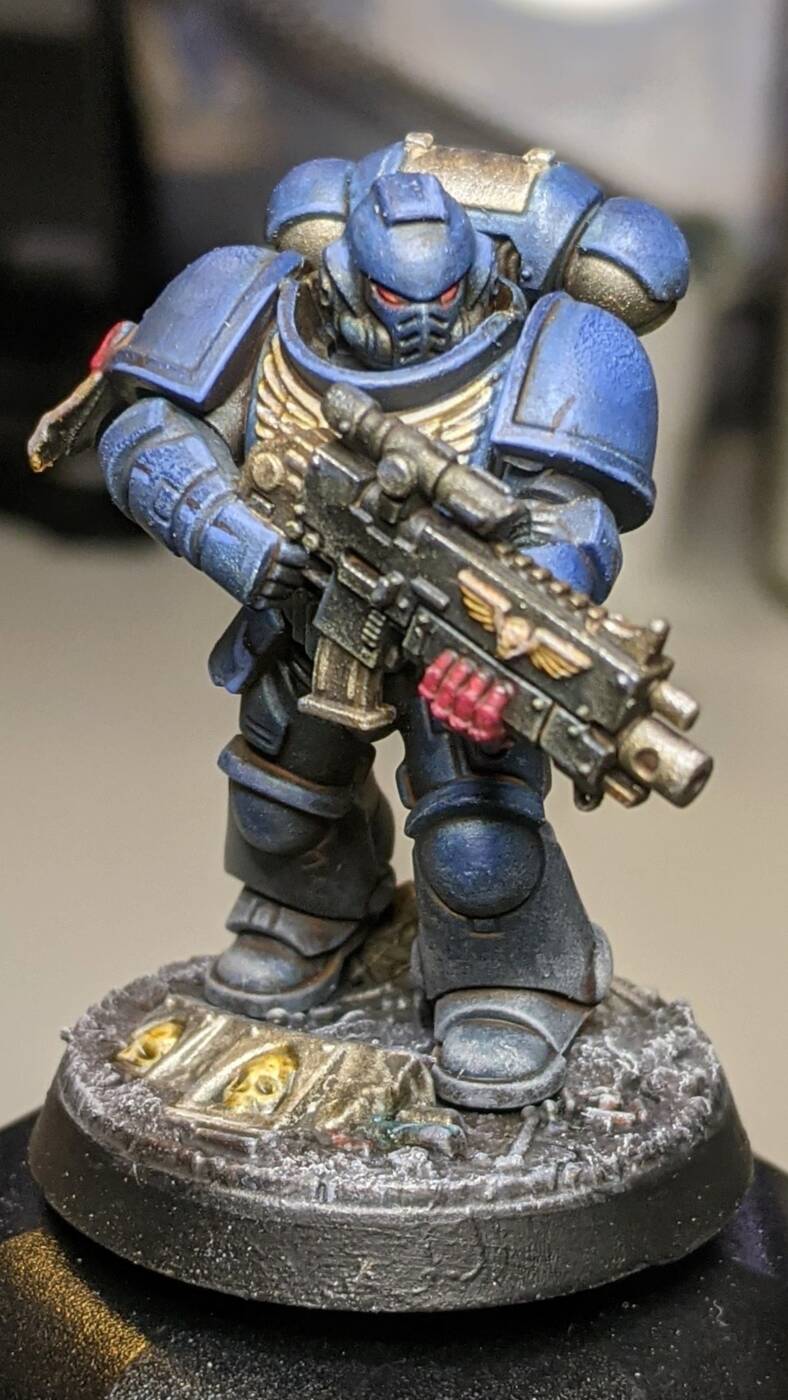
I flicked through some recent White Dwarf magazines and found a few chapters I’d like to do in the future, but for this batch I settled on Silver Templars.
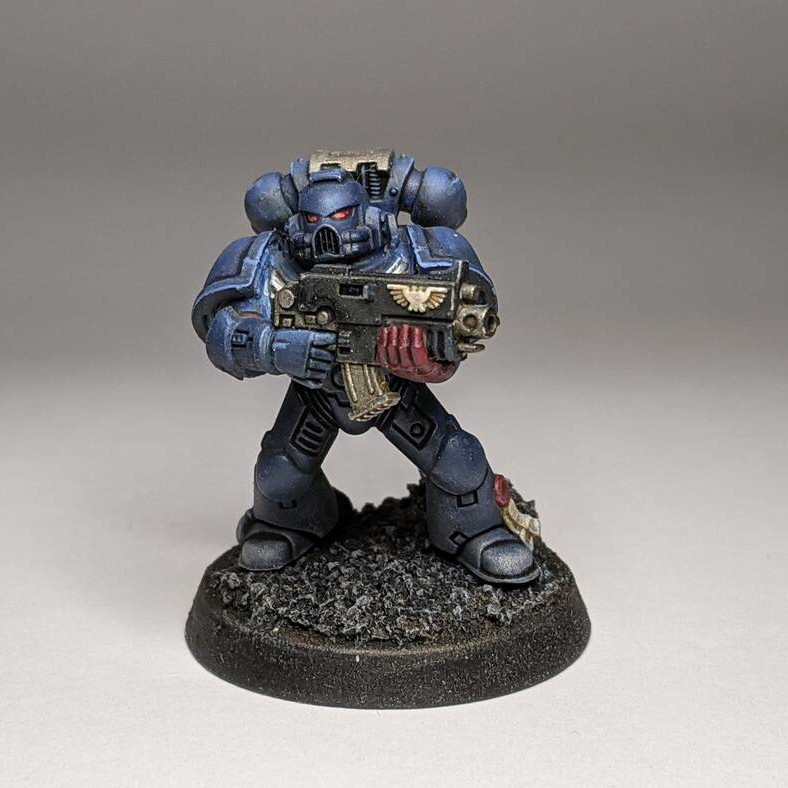
The paint scheme was simple, easy and looks quite striking.
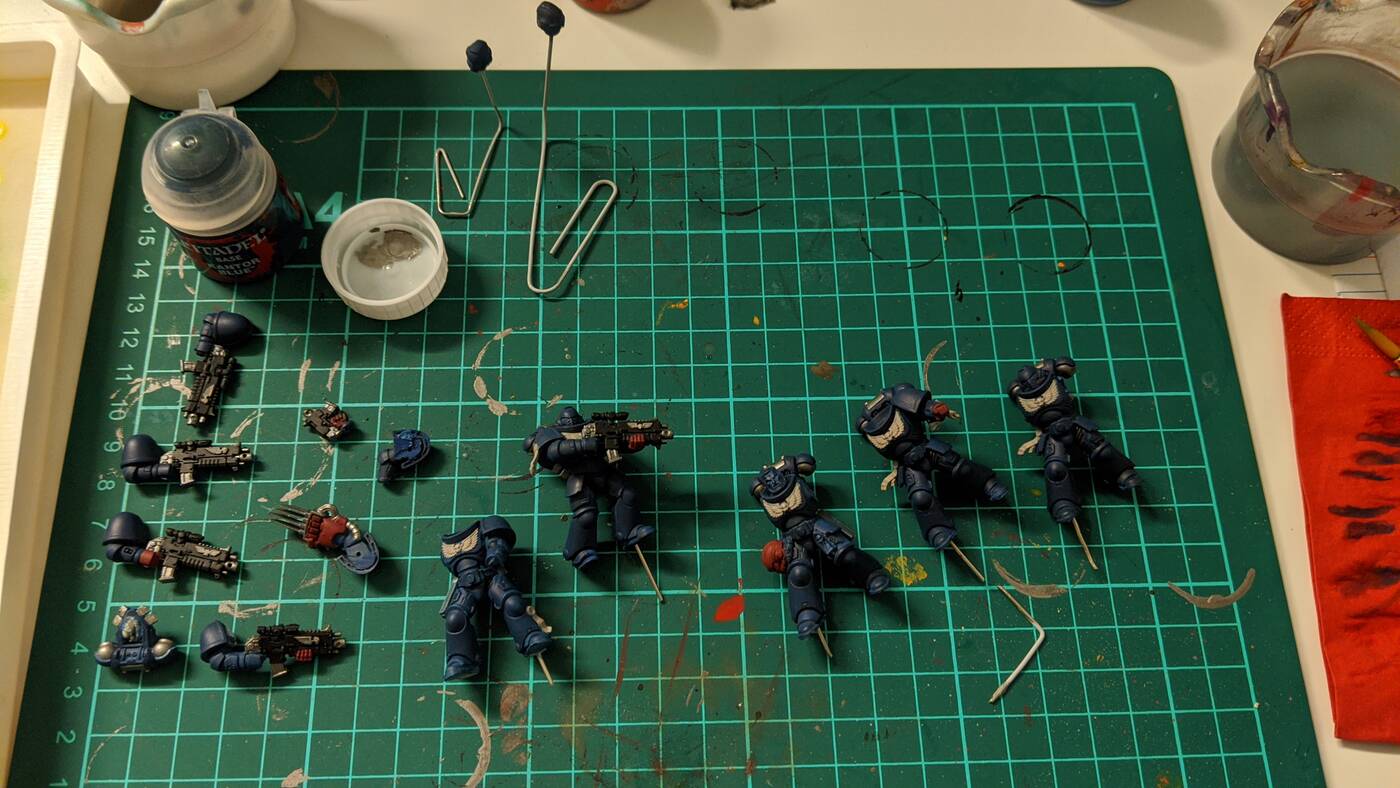
The sculpts are pretty standard with fixed poses. Some of these sprus are handed out for free in stores to get started painting.
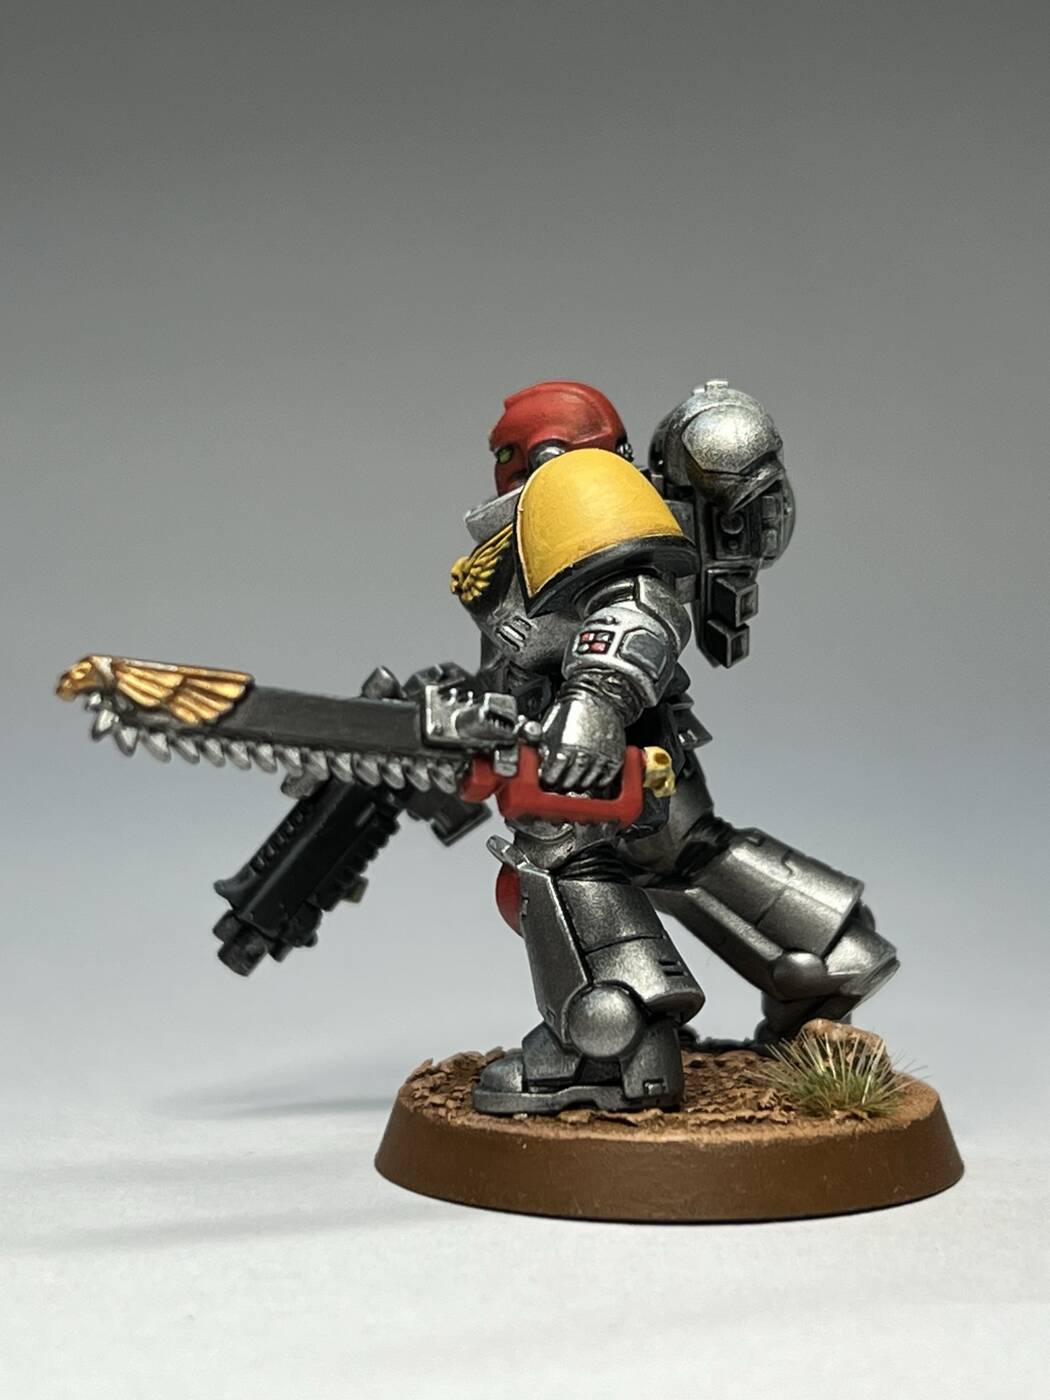
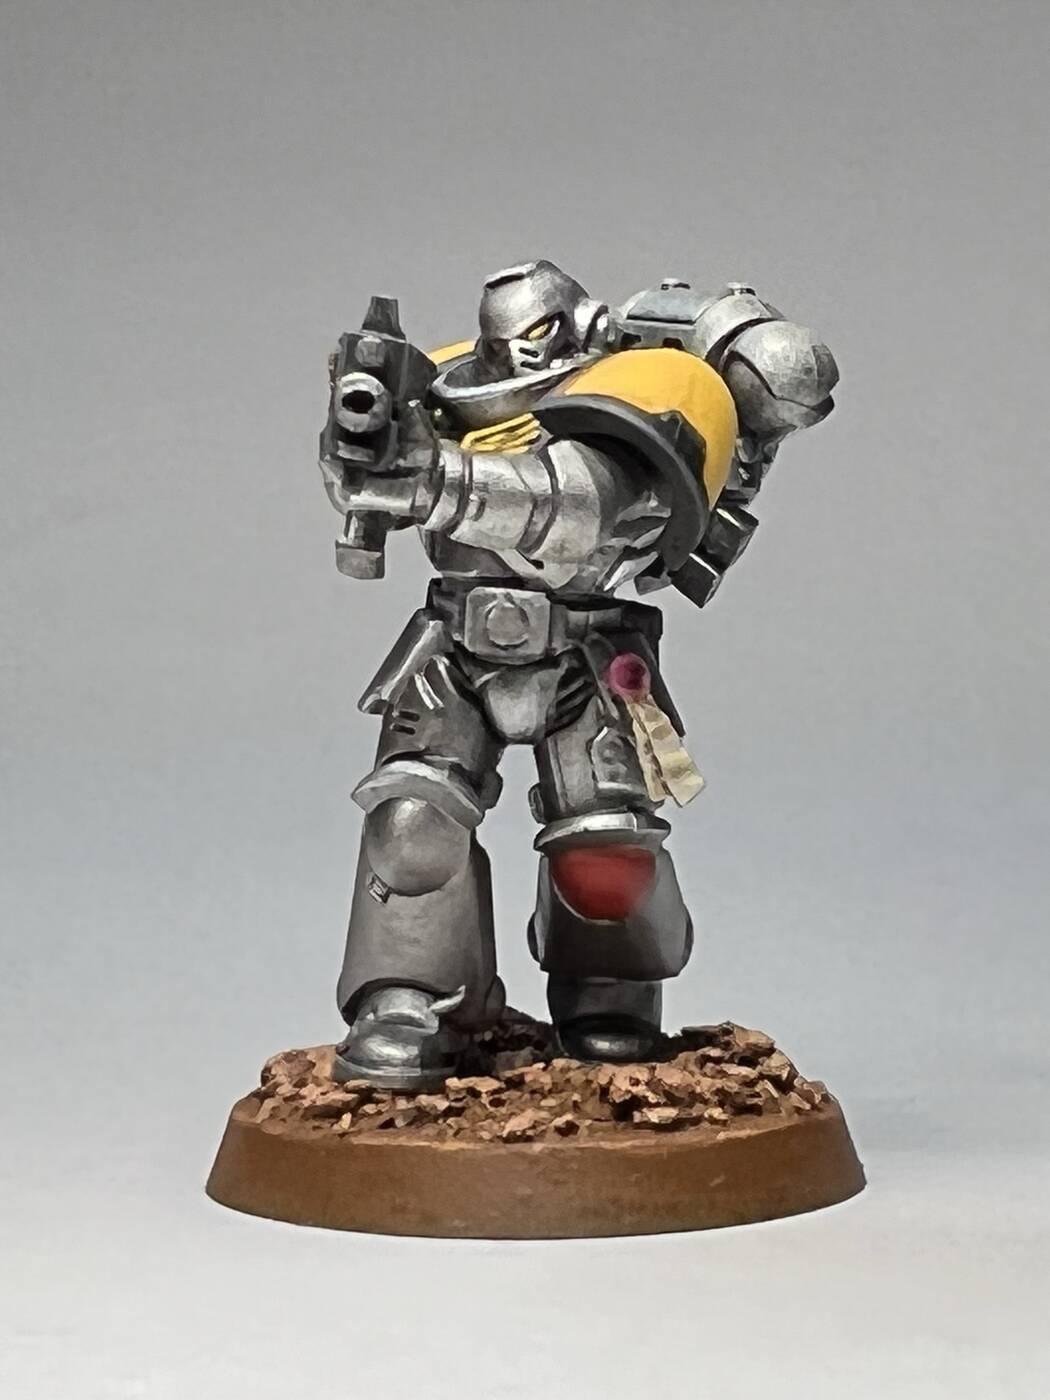
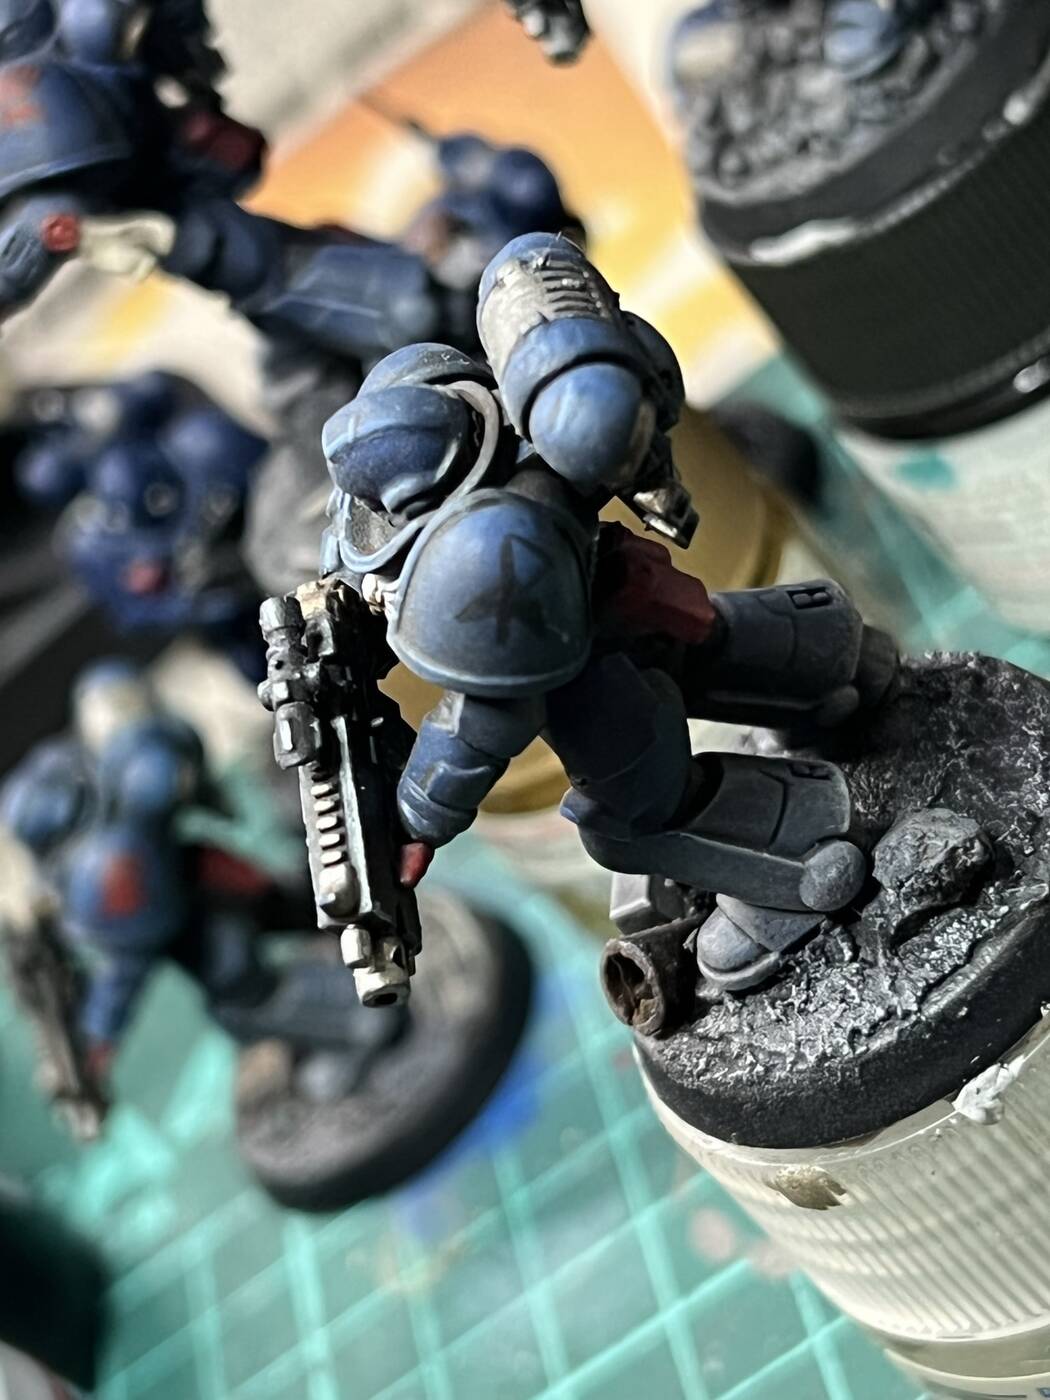
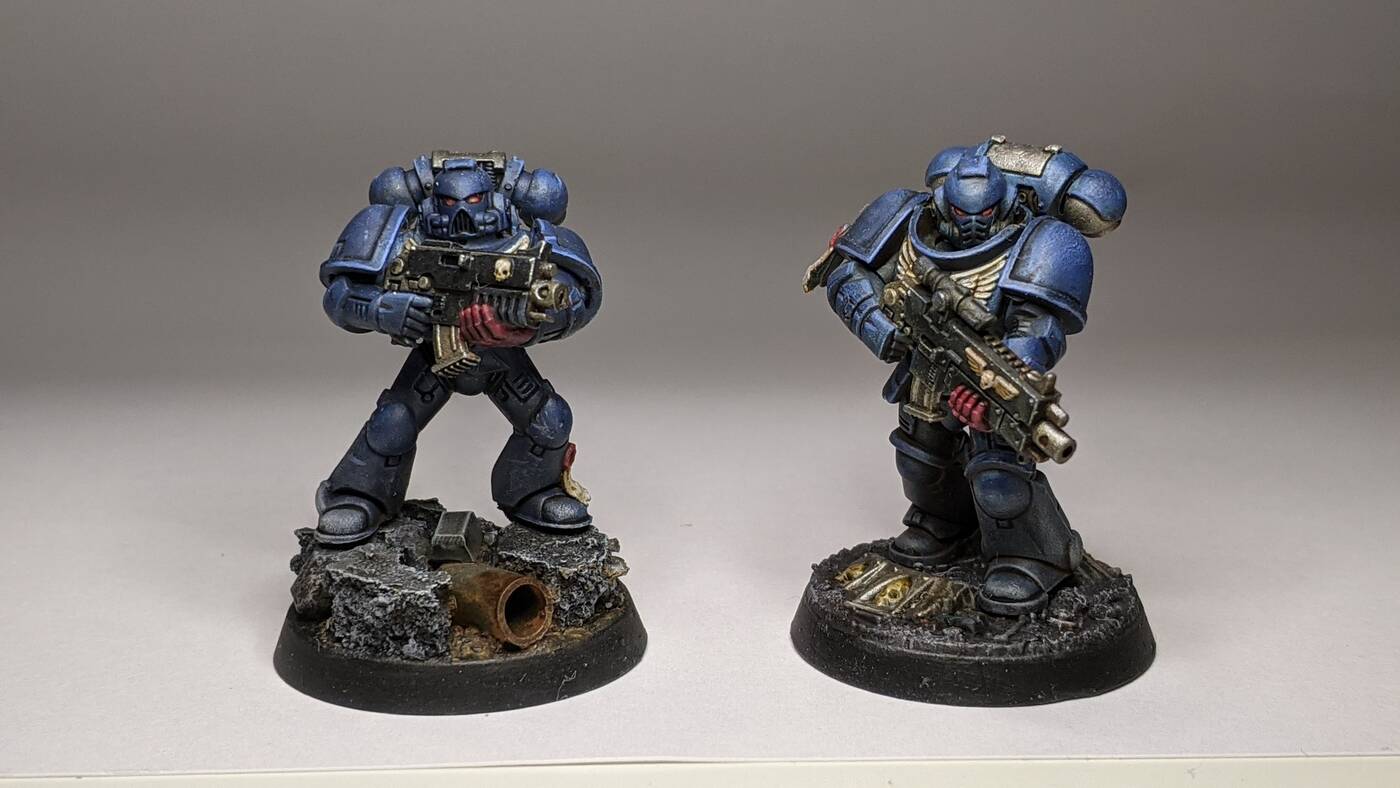
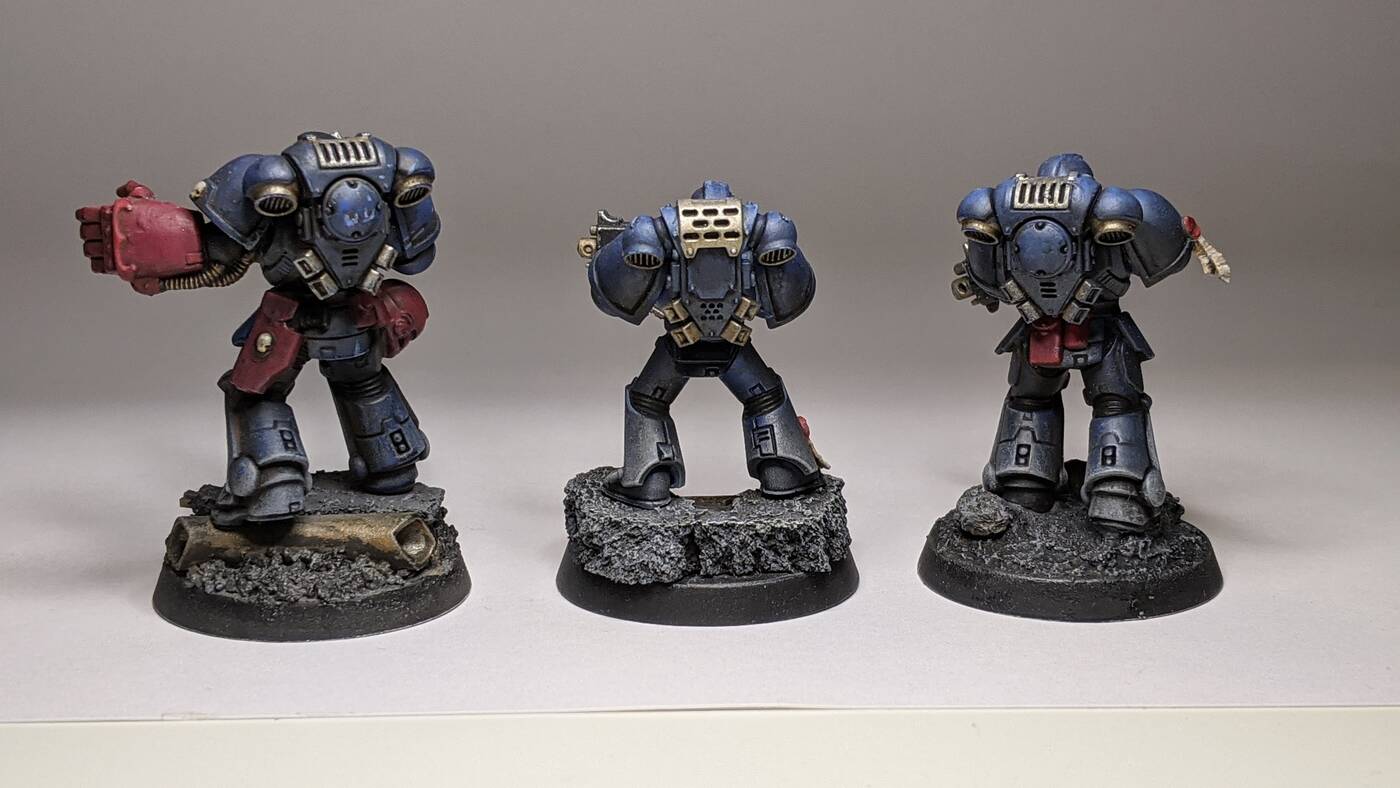
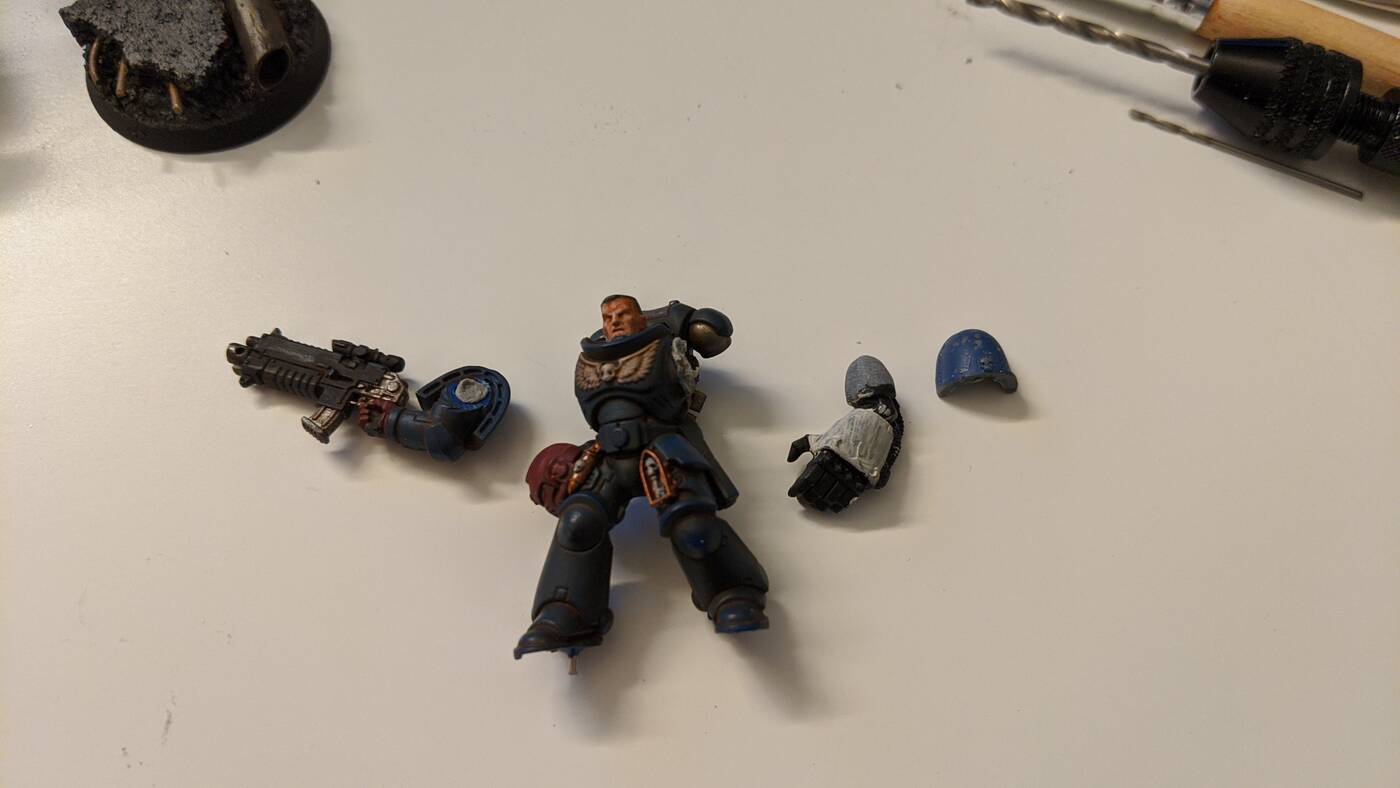
One significant change was the sergeant. I gave him a chainsword from my Sterngard Veterans box.
The chainsword had a hand already, although it was for a firstborn the size difference isn’t noticeable. Used a staple cut short to help pin the hand to the arm for strength.
Also added a little greenstuff at the join, which I drew lines in to look like the undersuit seen at joins to help hide the transition.
With these models completed, I’ve almost finish my backlog, just the box of Sterngard Veterans left.
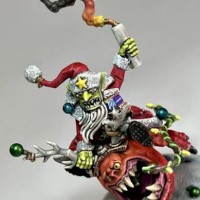
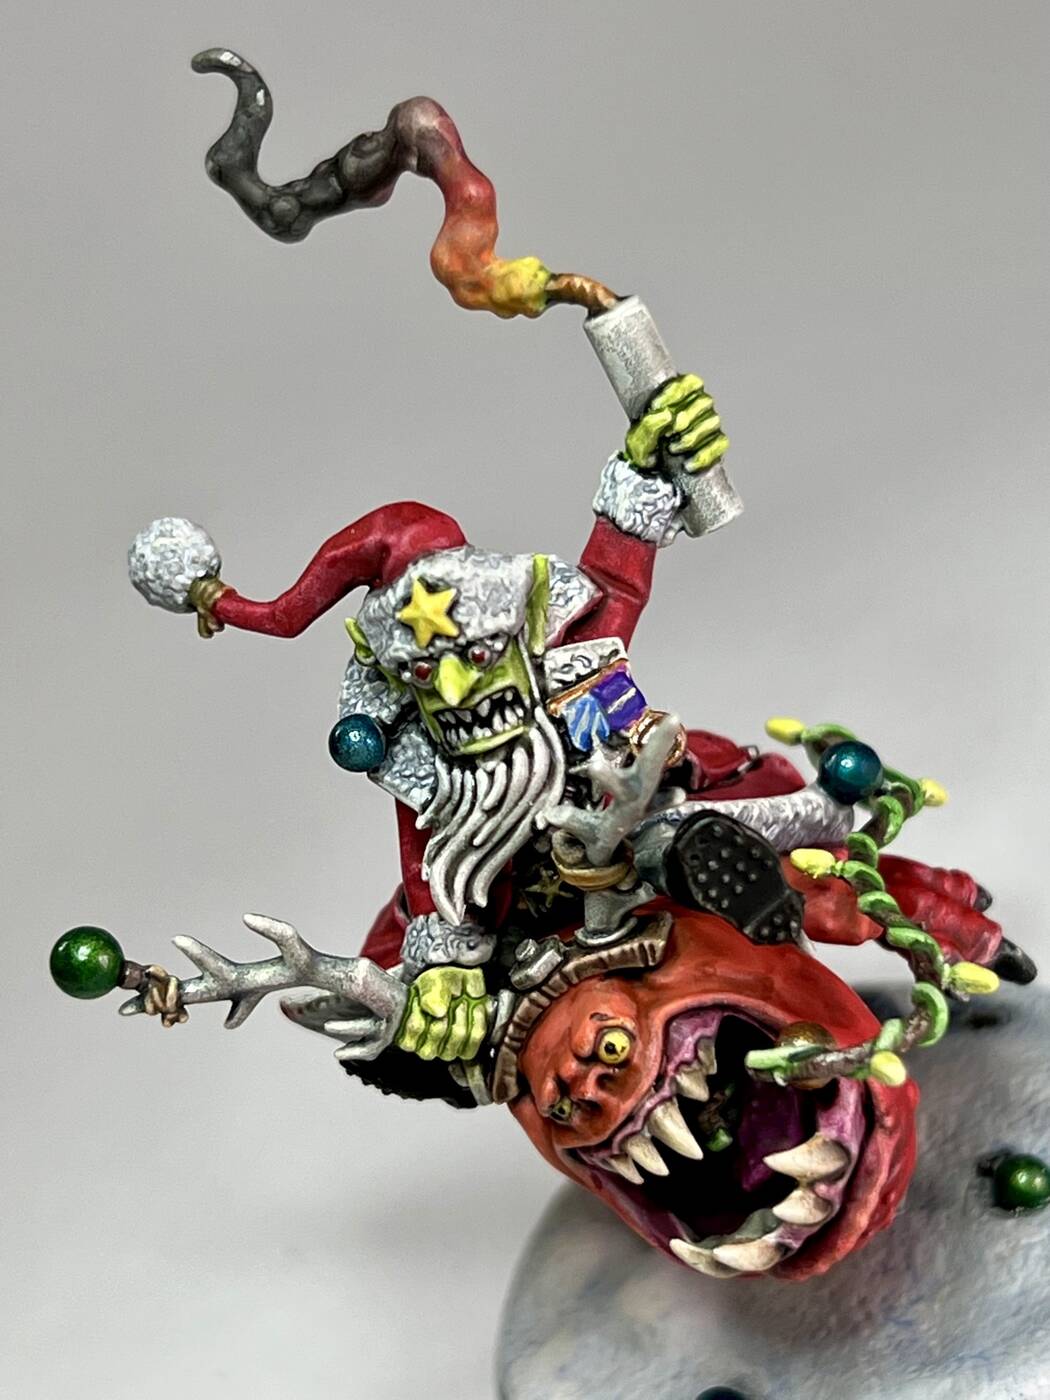
As a Christmas treat, I got Da Red Gobbo and Bounca.
I don’t collect greenskins, but the limited edition model looked too good to pass up.
I used Dana Howl’s Glazing and Underpainting technique.
I like the result, however, though the red coat and Bounca are different they are still perhaps too similar.
If I were to make changes, I would probably try and make them more distinct, perhaps a darker red coat and more orange in Bounca.
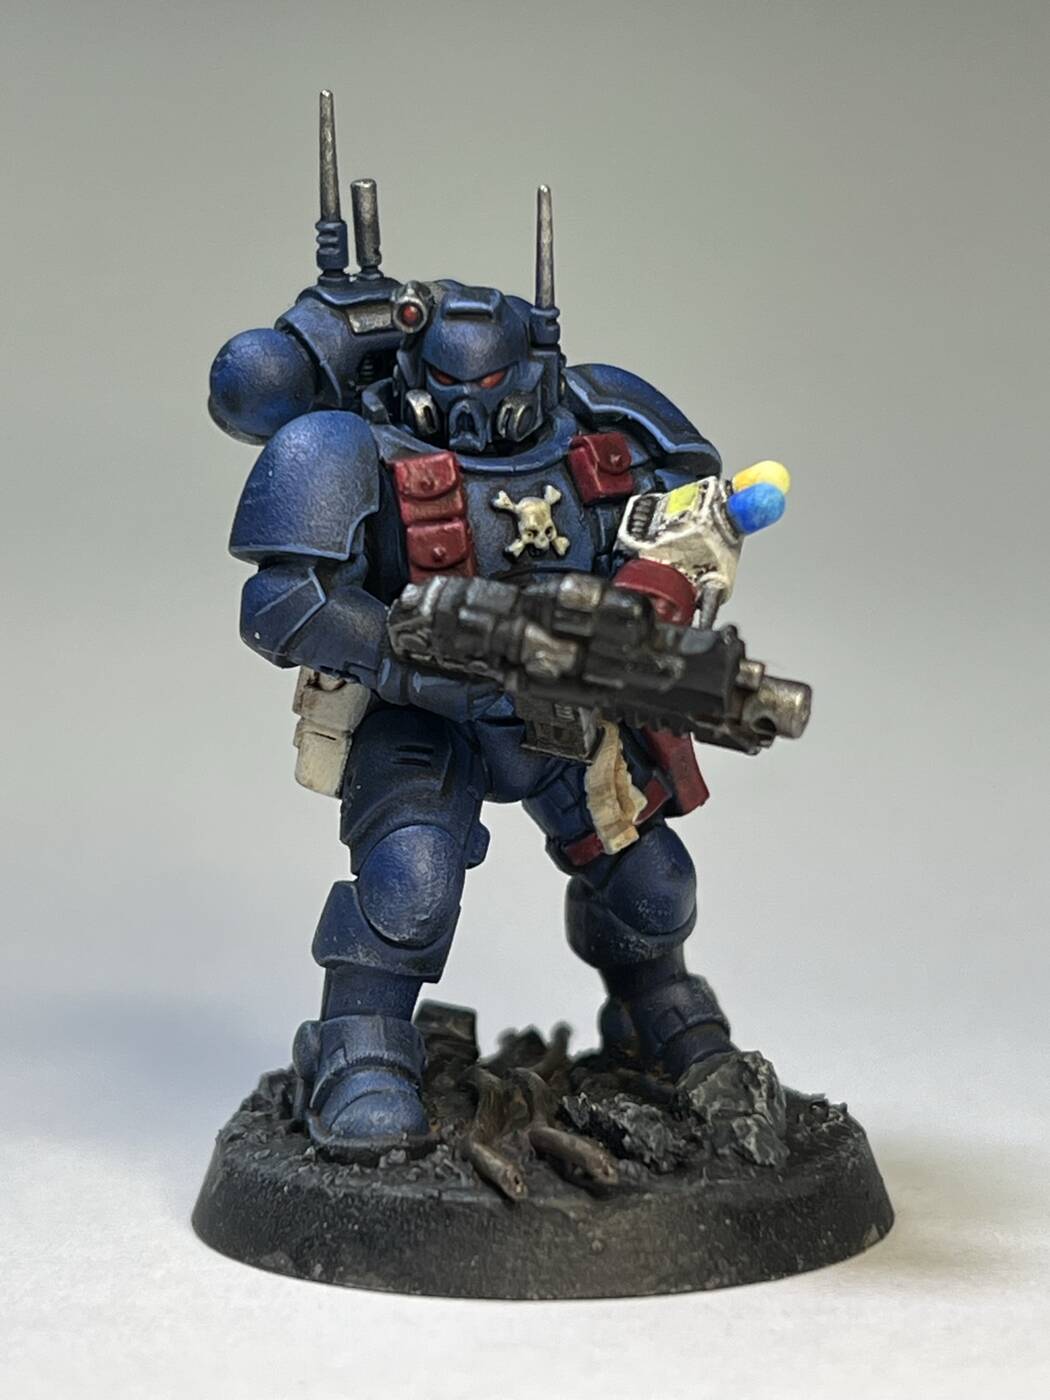
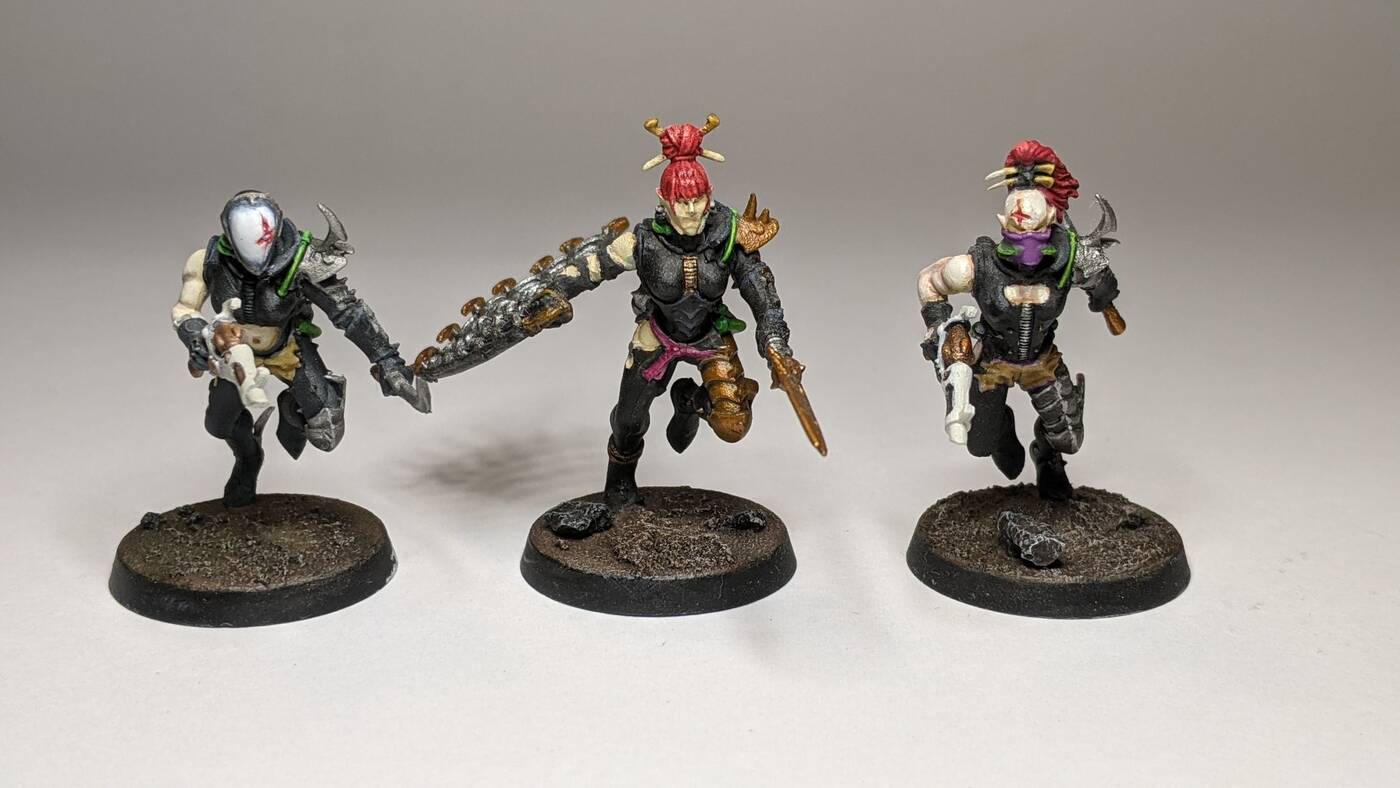
Probably the first models I got from Ebay were these infiltrators, but I didn’t paint them up until recently.
As with the other buys from Ebay, they were already posed. They weren’t pre-painted, so no stripping necessary.
I really like how they turned out.
One thing I was avoiding which I see a lot is using a leather apperance to the gun holsters and straps.
In my head cannon, using such leather wouldn’t be appropriate, it would wear and break too easily.
So for all the little pouches etc. I choose to use the crimson red.
For the medic, I used white for the device and pouch, but not really happy how that turned out.
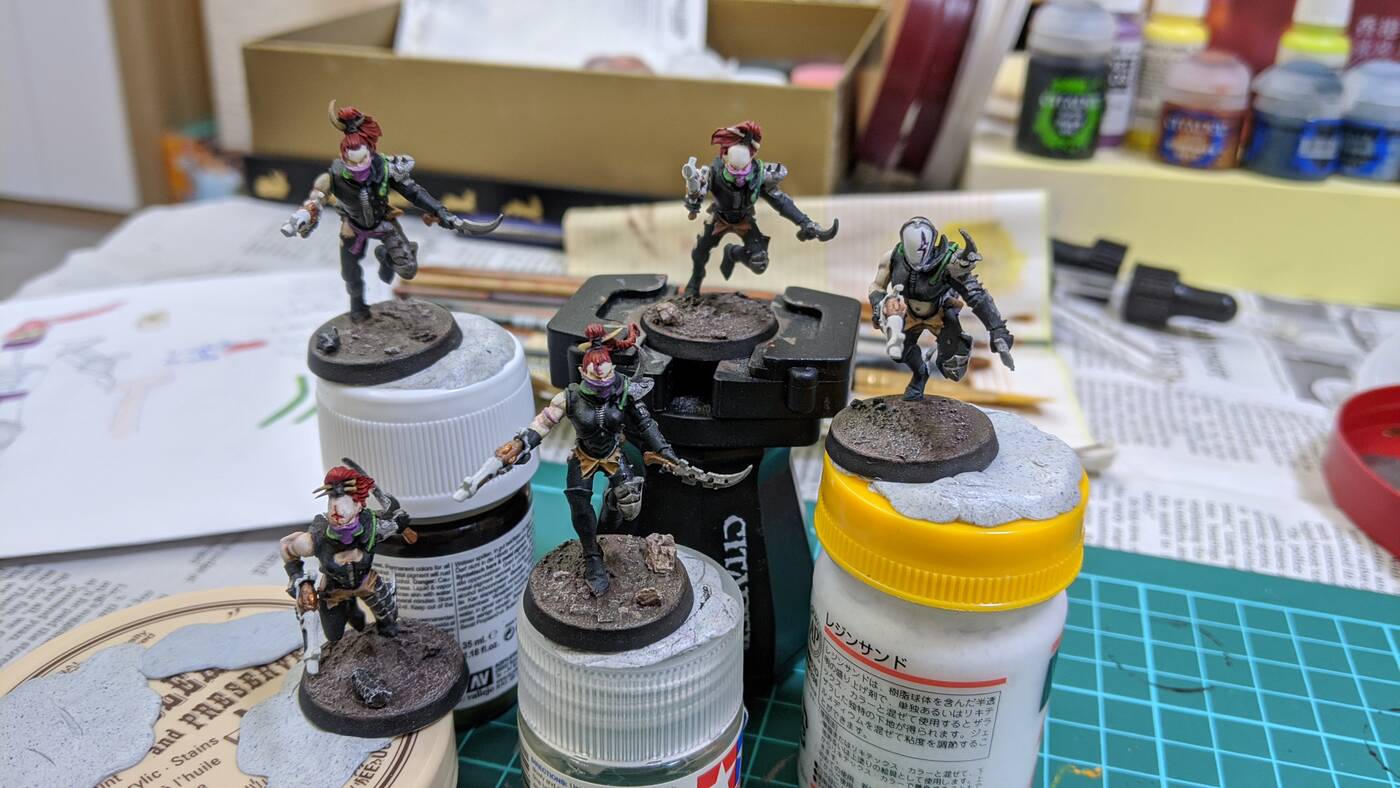
Not long after painting them, I got a game in against some Necrons.
The Emperor guided their bolters to hit hard and true, but they didn’t do well.
Transporting them to/from the game was particularly concerning, their pointy bits snap off easily.
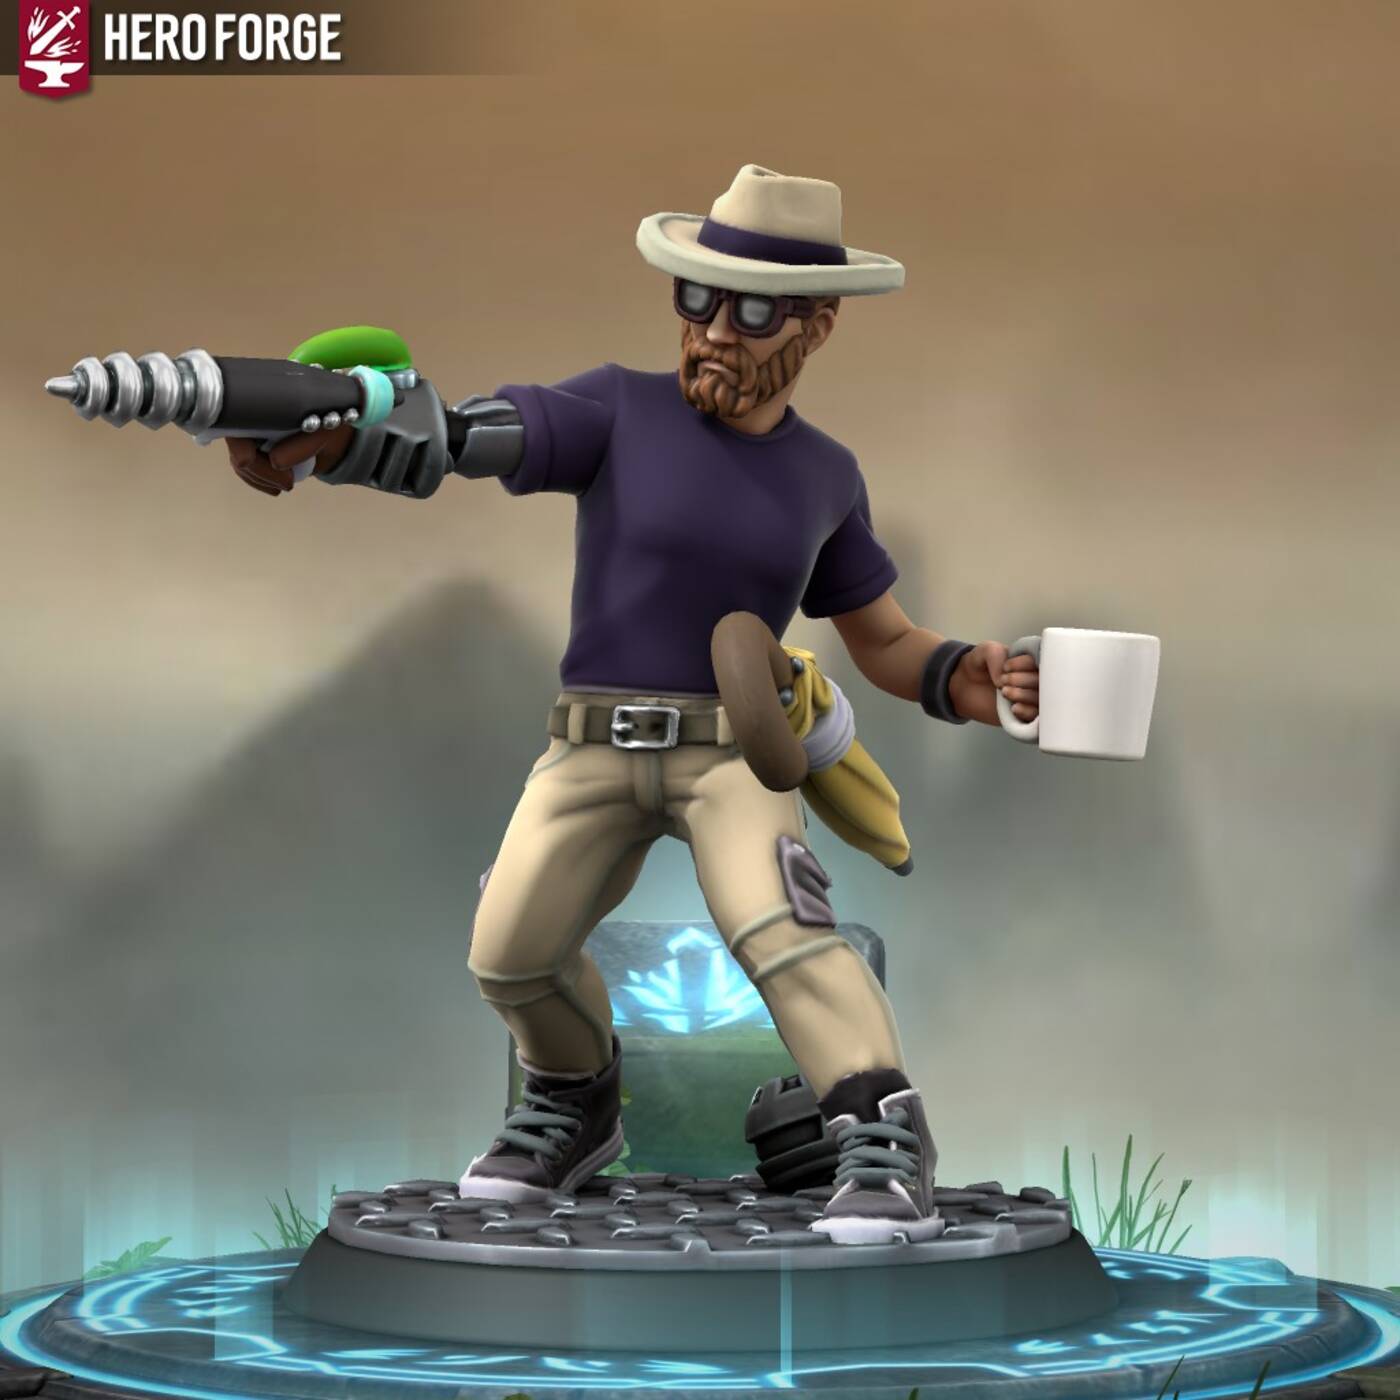
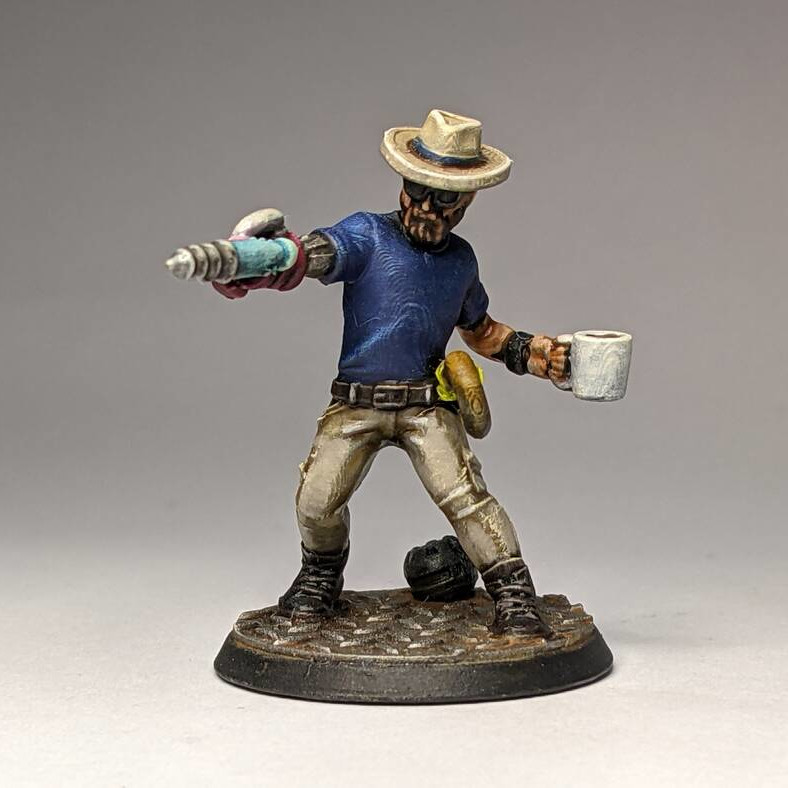
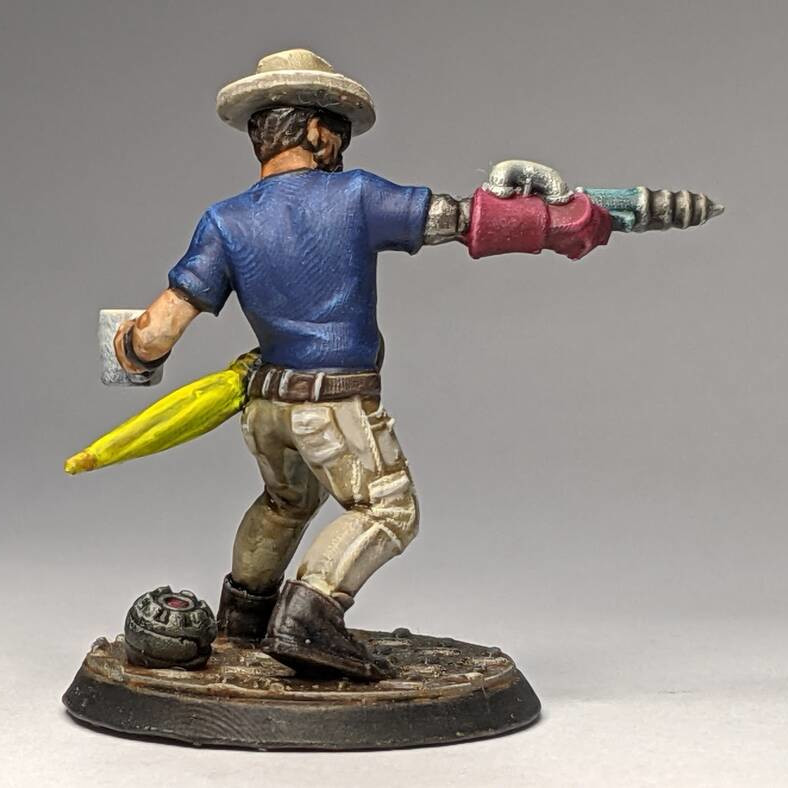
Recently I used Hero Forge to make a little hero version of me.
You can play with the service for free without signing in, which is great for engagement. You are only prompted to login / pay when you want to get a 3D print version.
I let everyone in the family make their own versions of themselves too then ordered the 3D prints.
It was quite expensive per model, but it was just a one-off. I’m not planning an army.
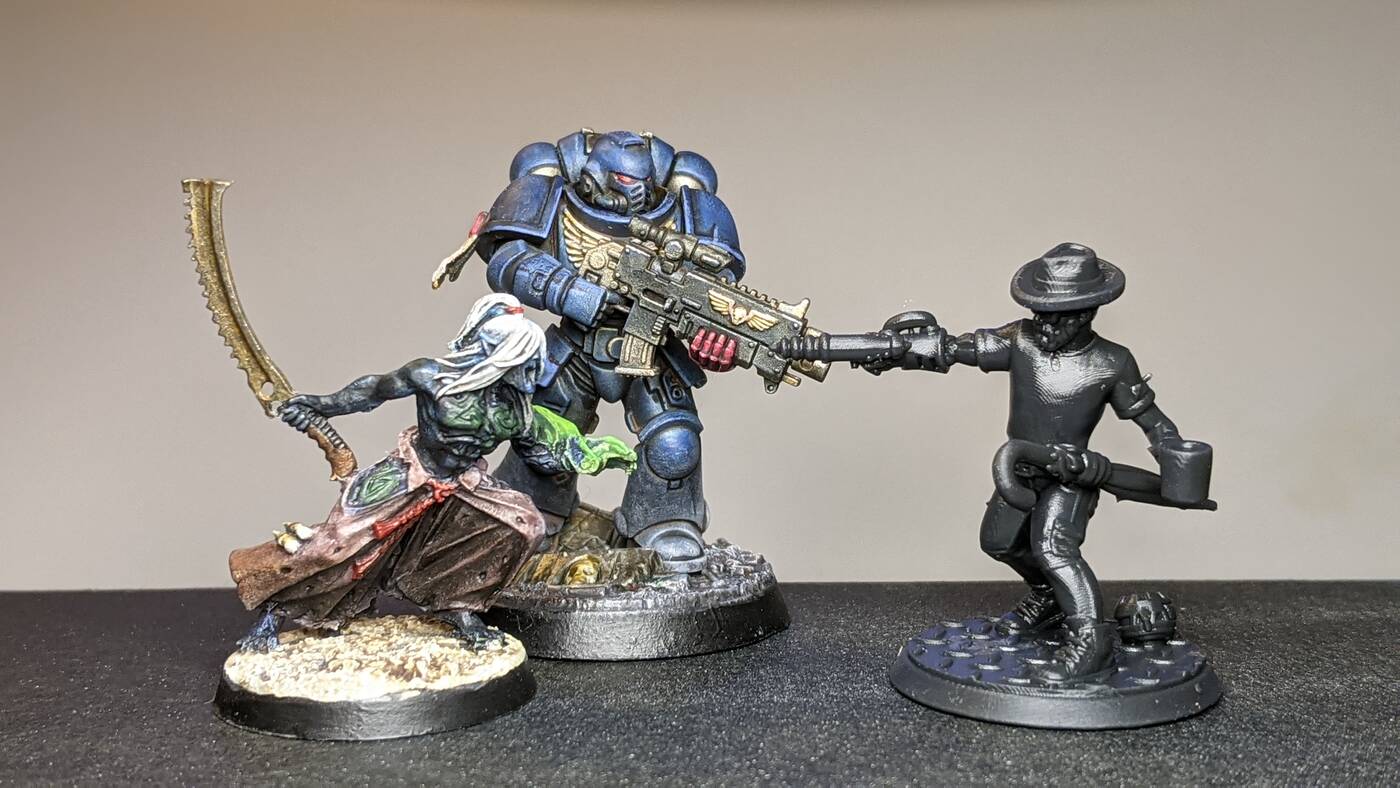
The print scale fits a regular human size in Warhammer, so I can pretend to pew pew pew the baddies.
The Hero Forge website lets you set colours, and can print in colour, but I used that just for reference and wanted everyone to paint themselves.
Even after printing, the print lines are still visible in places unfortunately, this is my first 3D print so I’ll know to clean up more before painting the next one.
For the colour scheme, I made it a little Crimson Fist-like.
Some firstborn space marines to join my Primaris Crimson Fists.
I had start them in March, and finished a few, but only recently got around to finishing them all.
These came from Ebay.
The previous owner had probably use plastic cement, melting some of the models around the joins, losing some detail.
Like the Primaris, I cut what I could with a hobby saw to adjust poses.
Firstborn have access to more weapons than Primaris, so I used some misc. bits from Ebay, plus a Sterngard Veterans set, to give them a variety of weapons.
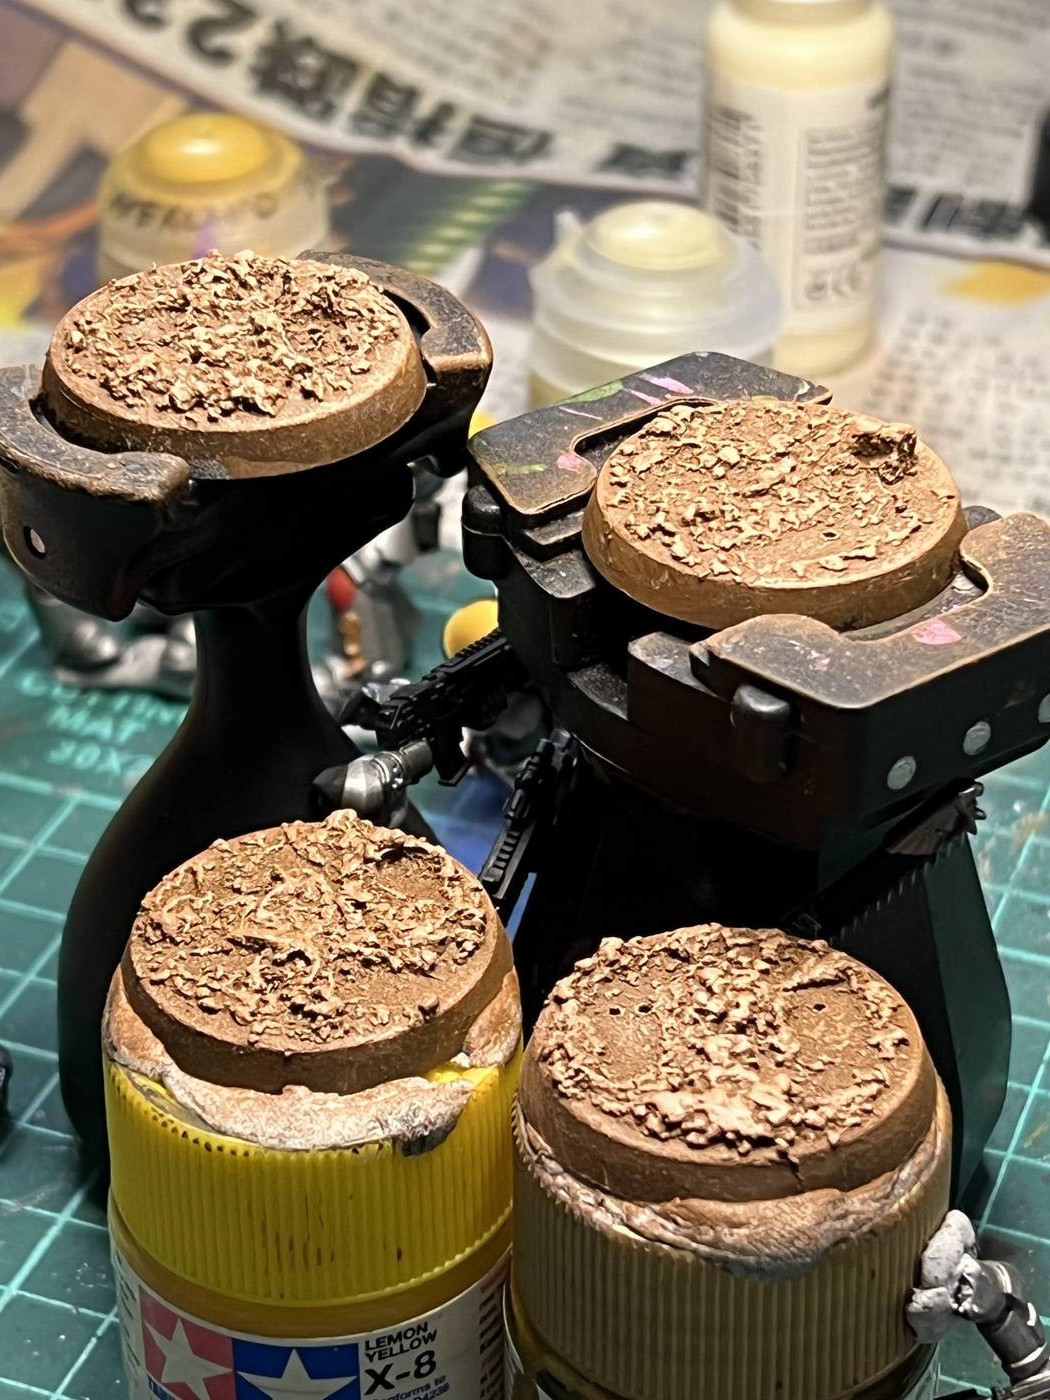
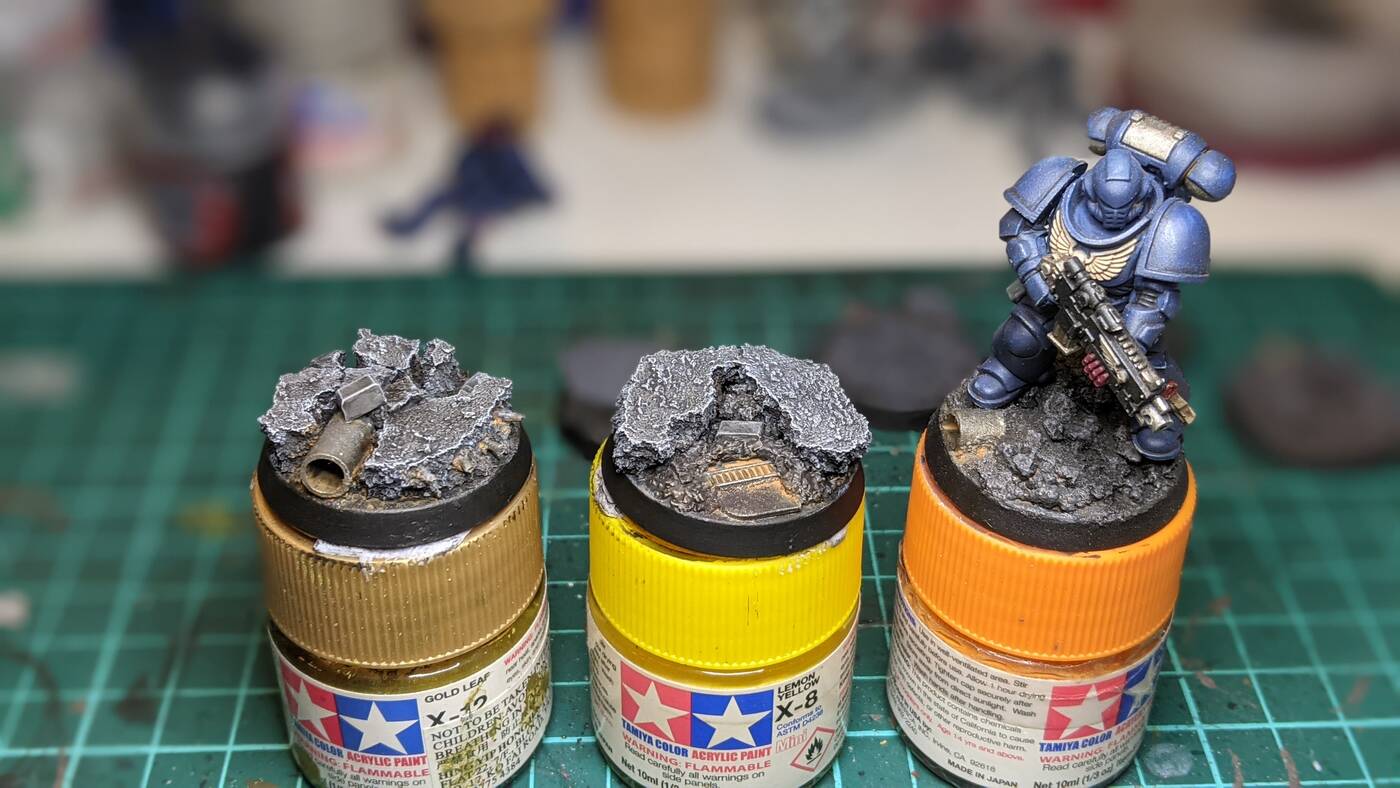
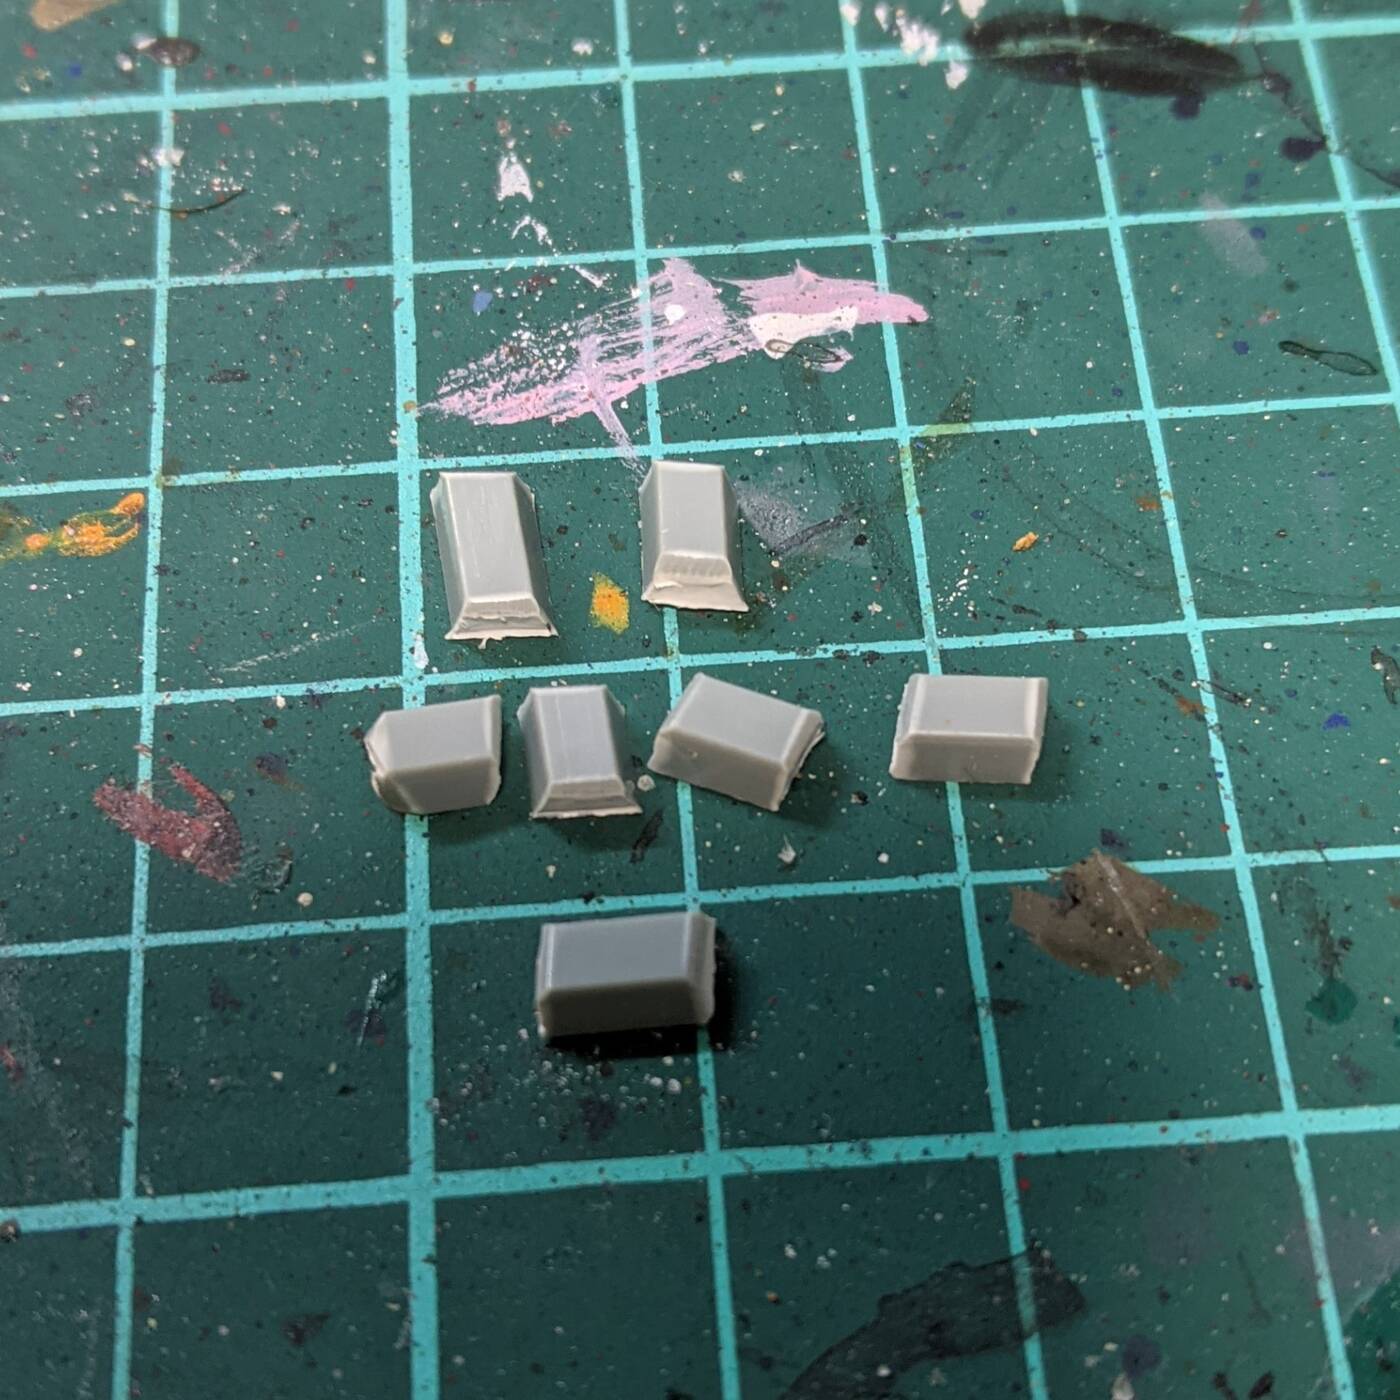
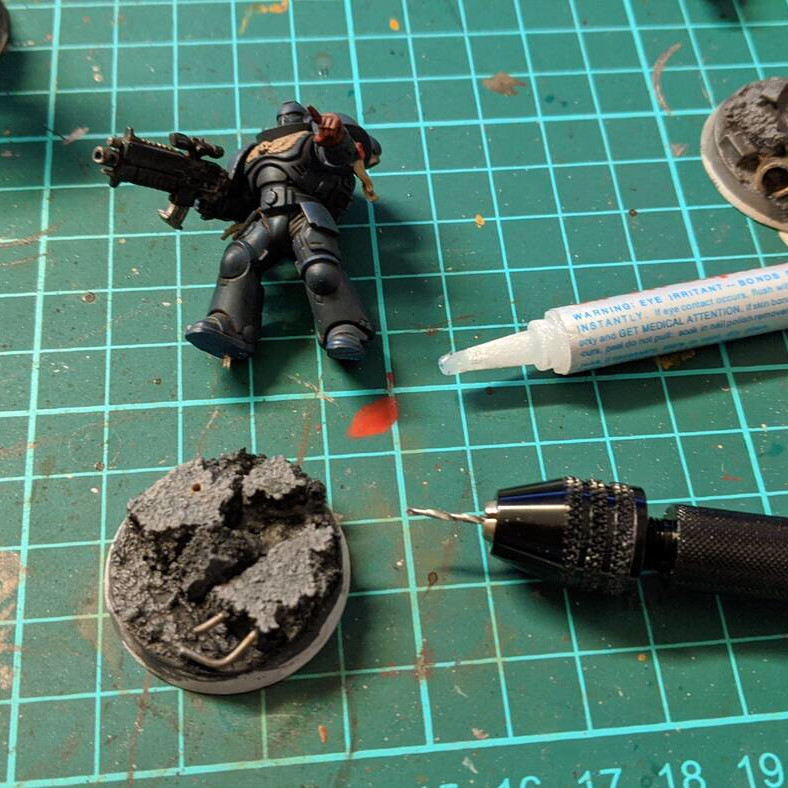
Since they are shorter than Primaris, I also used tactical rubble to make them a bit taller.
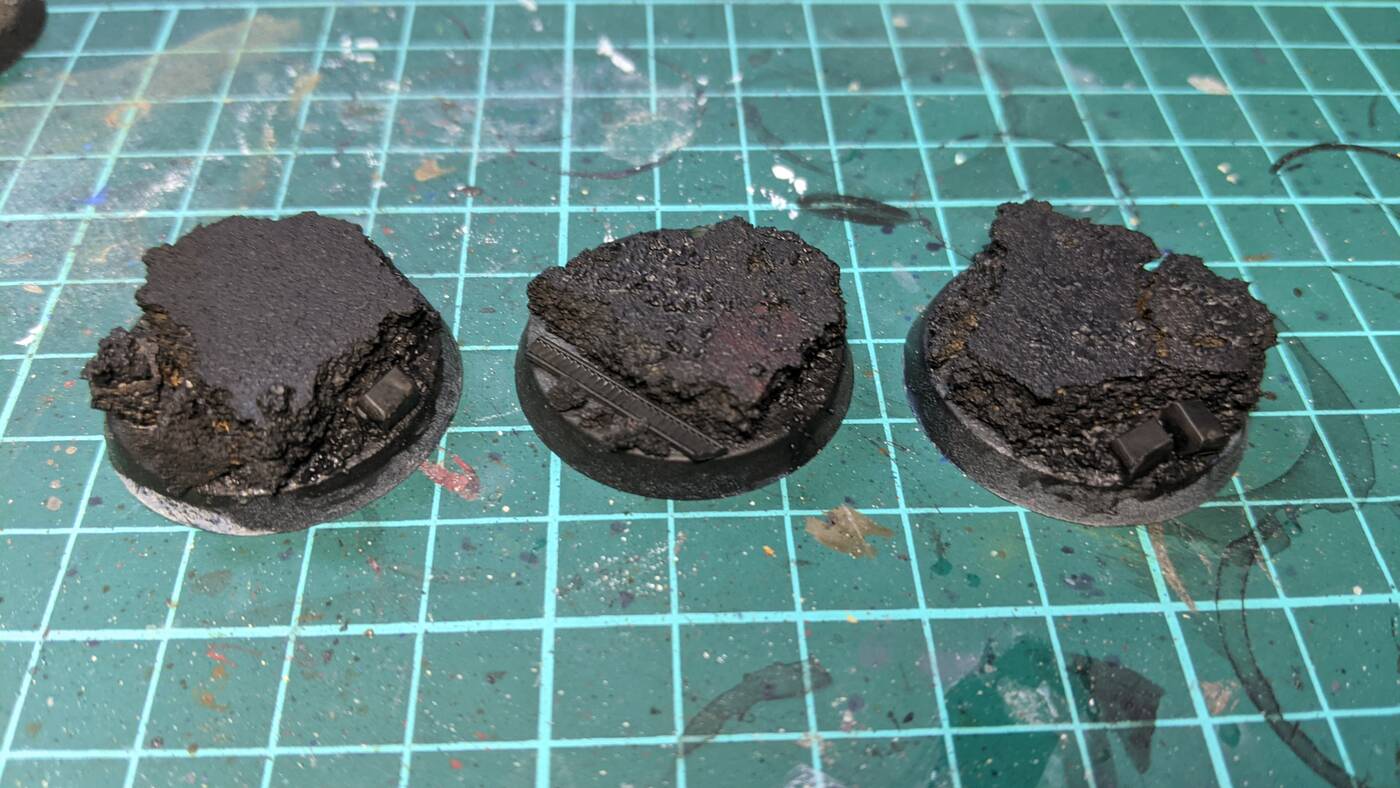
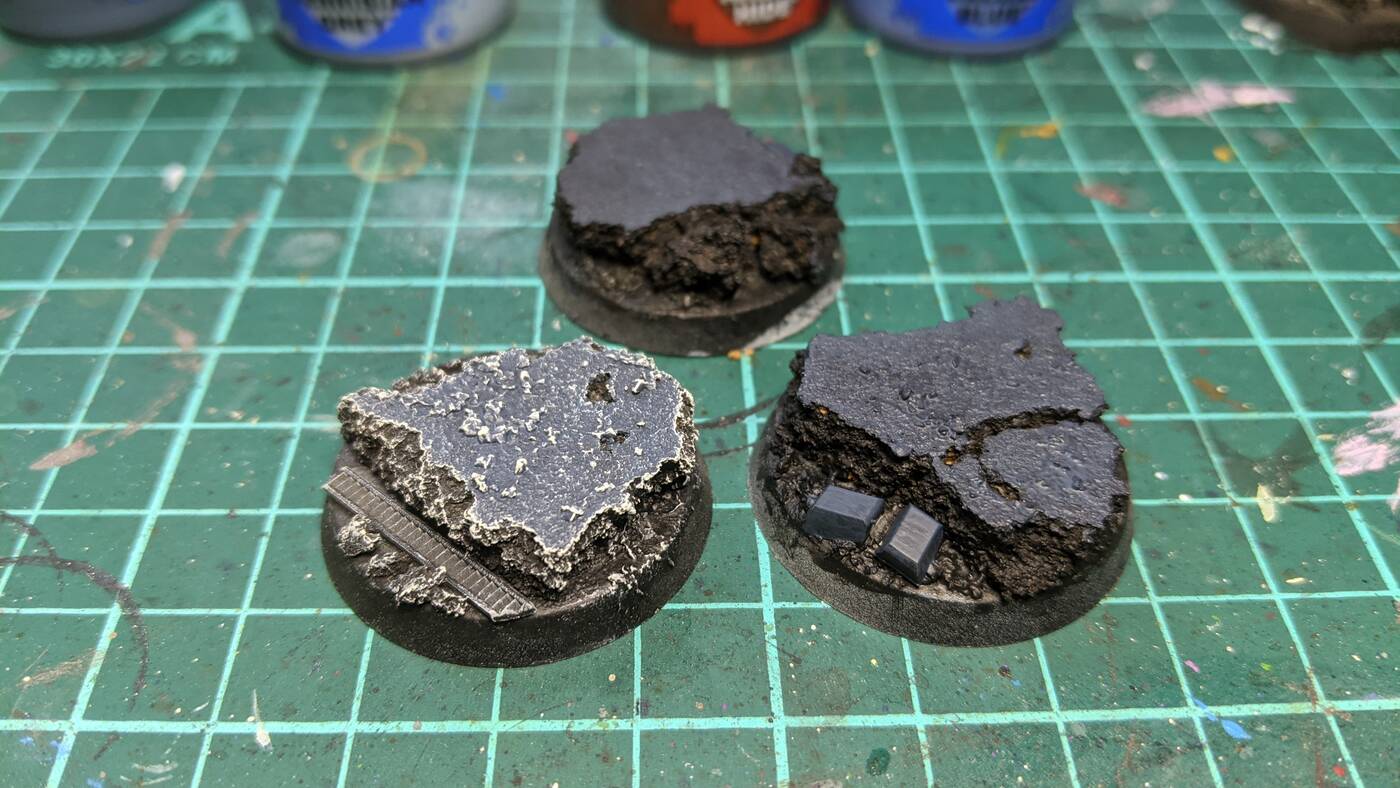
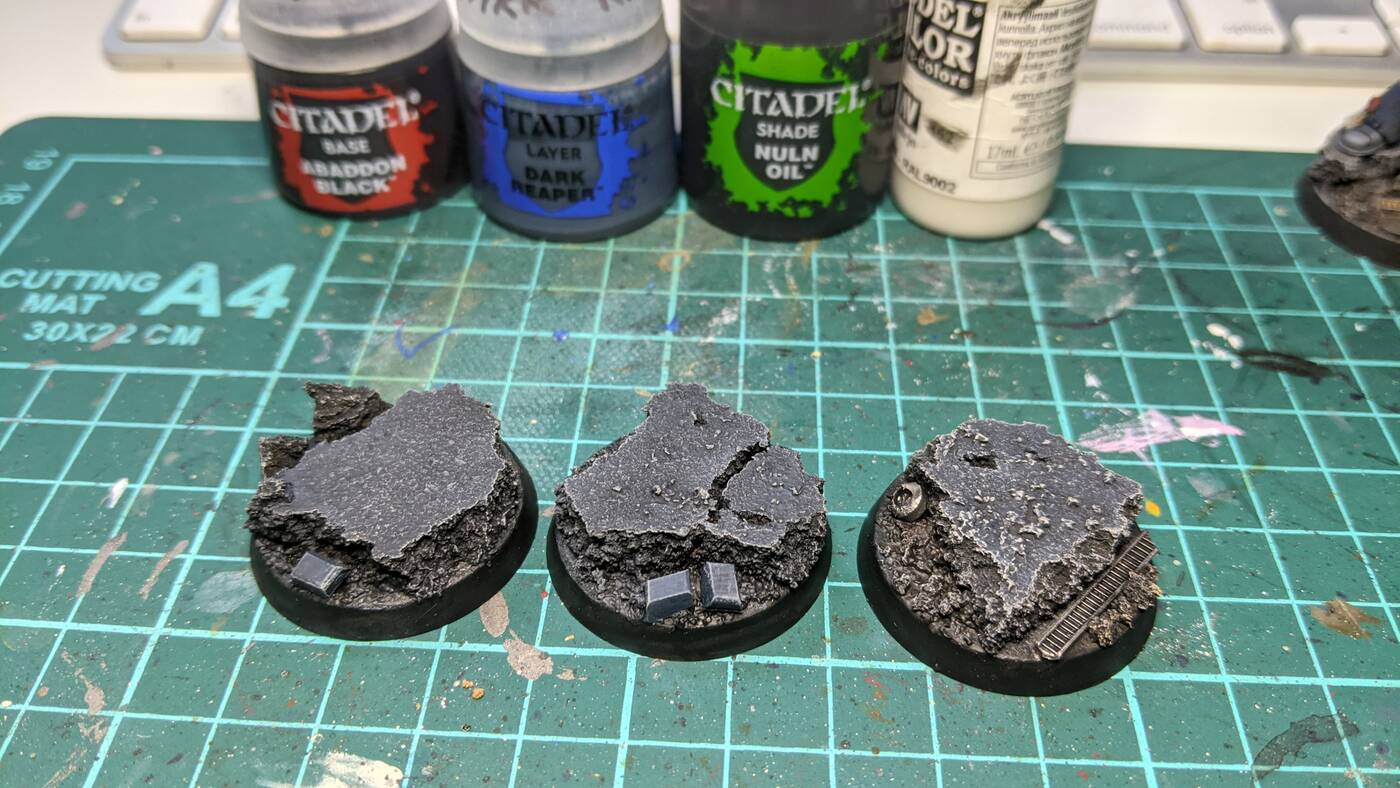
A little behind-the-scenes of the urban rubble bases for my Crimson Fists.
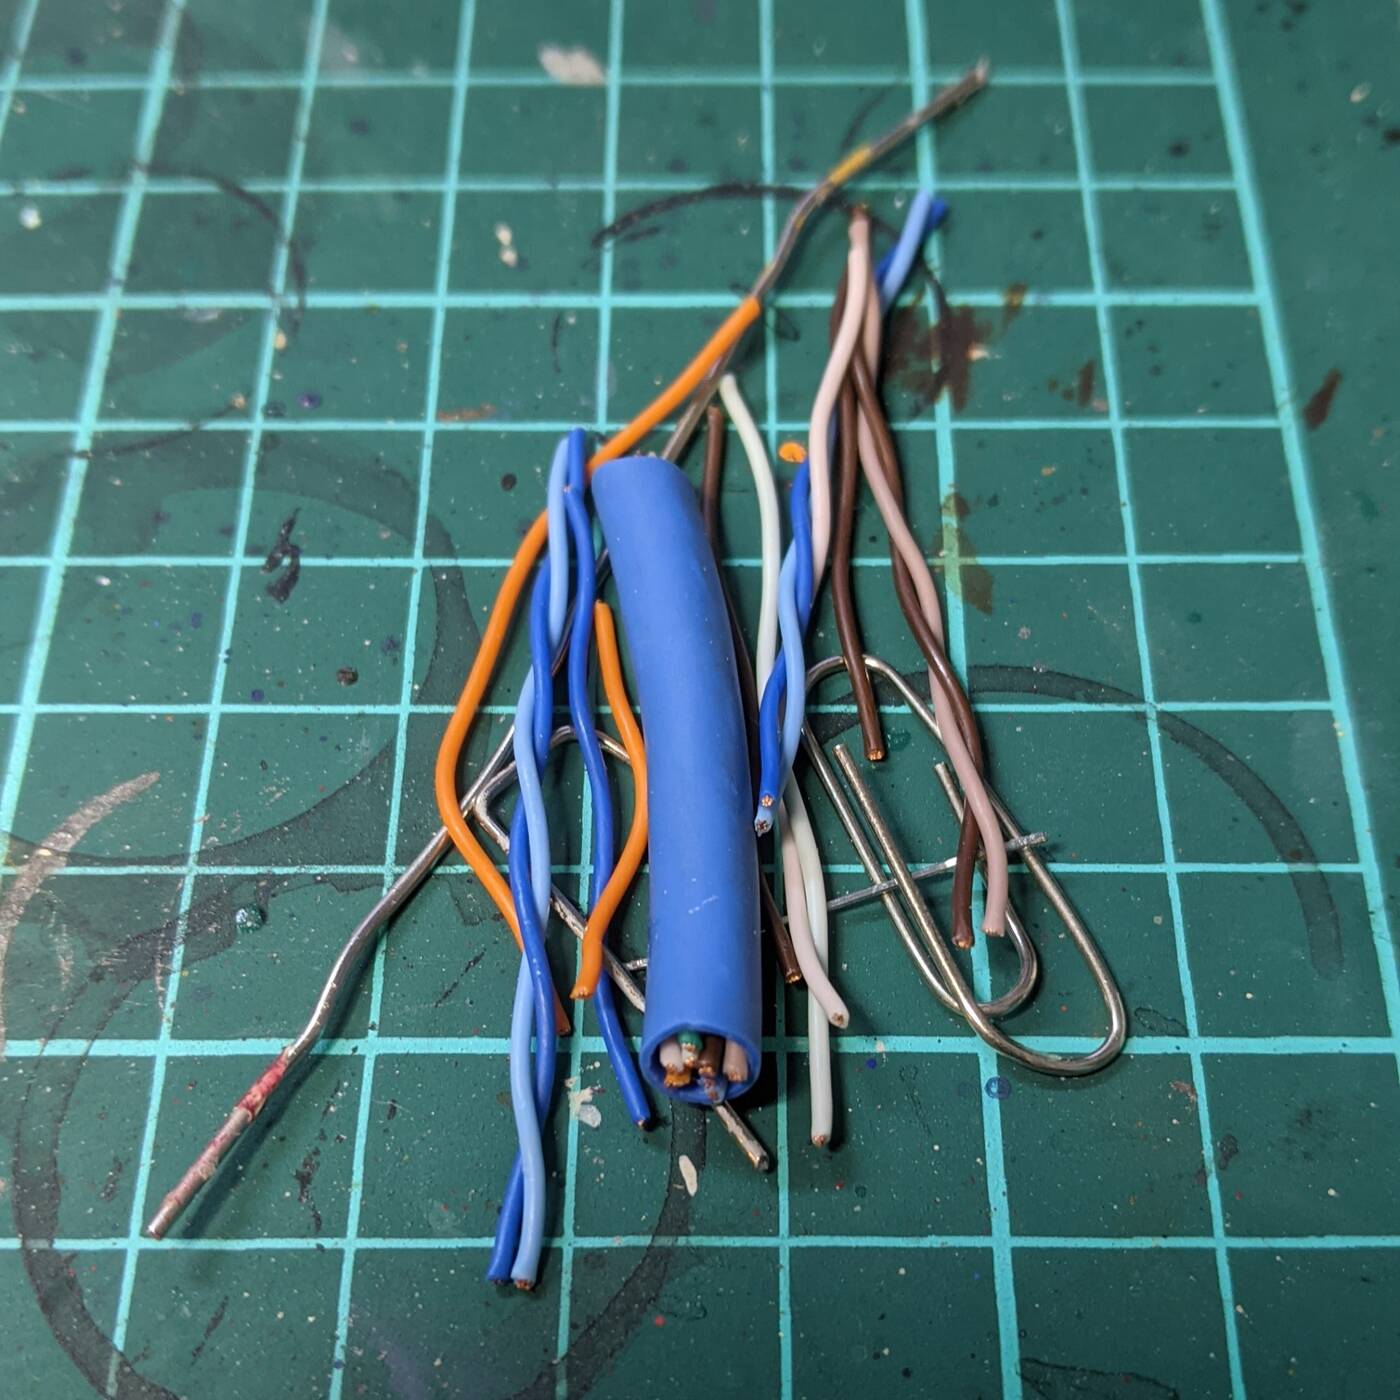
The kinds of bits I like to use:
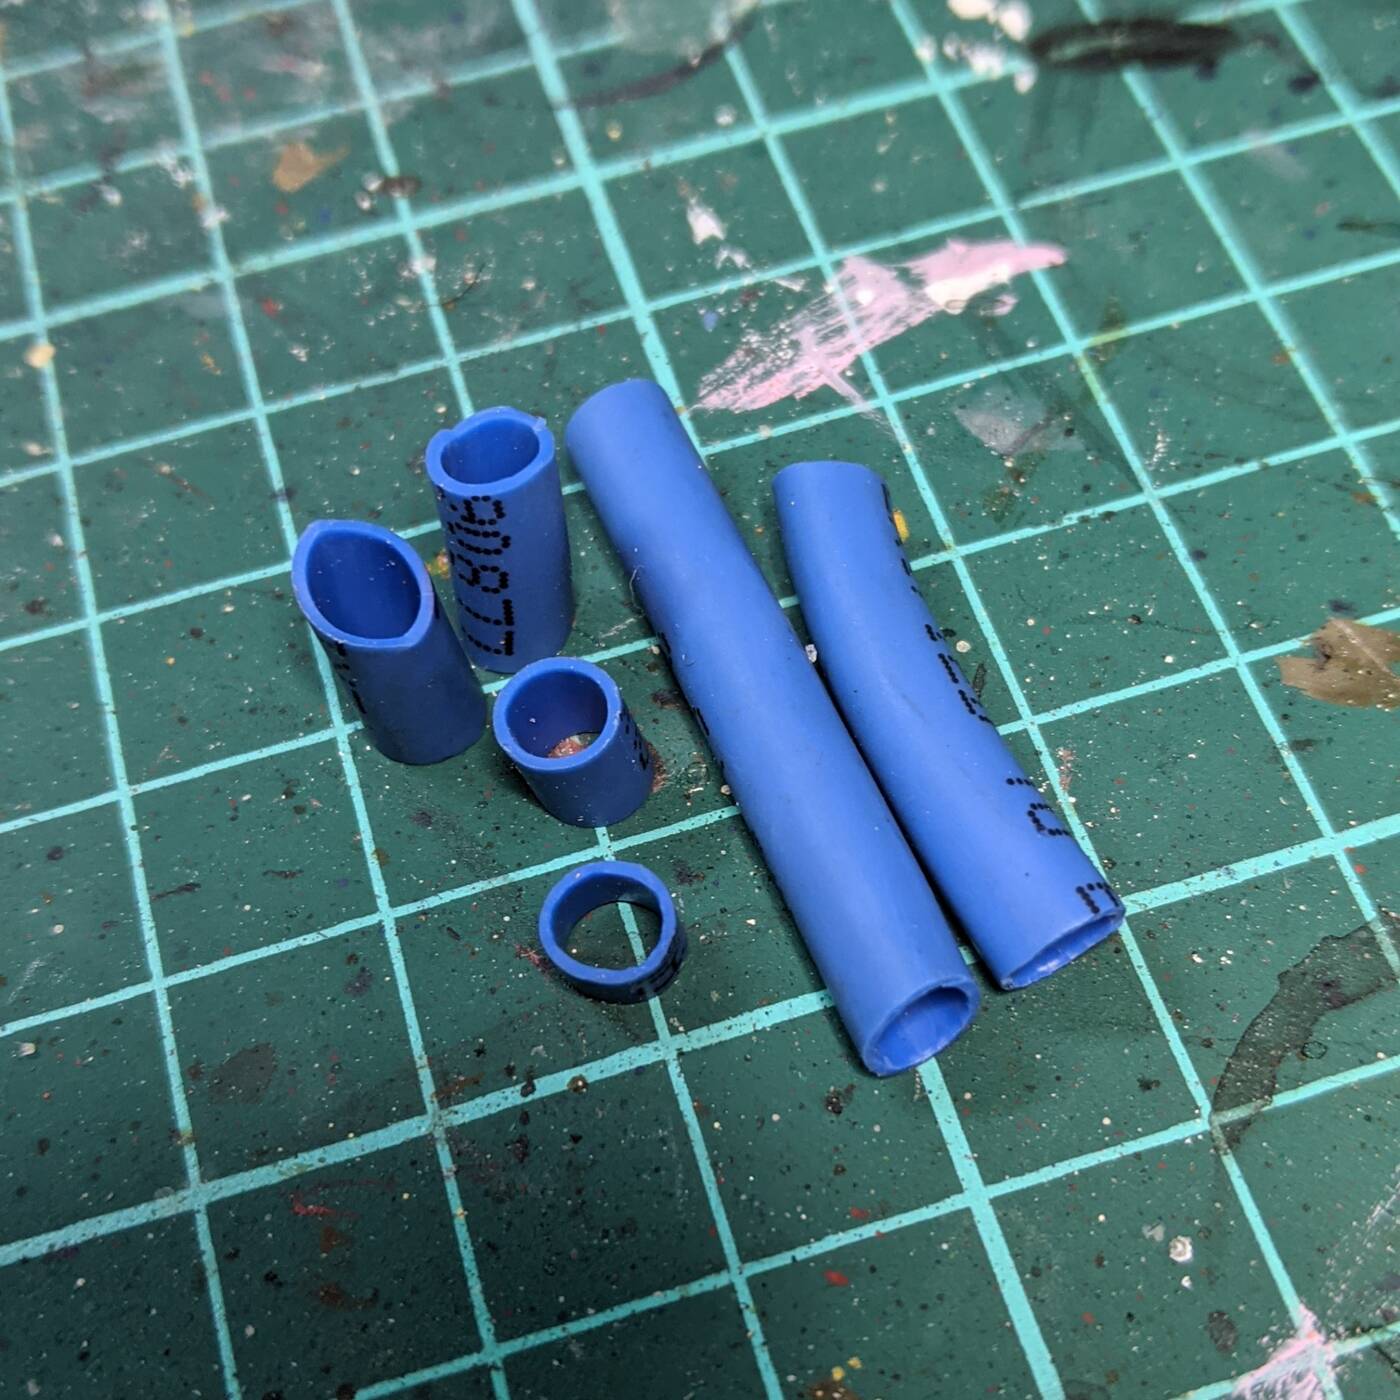
Network cable coating makes great pipes
Network cable twisted pair for cables or smaller metal pipes
Cut up paperclips for metal pipes and rebar
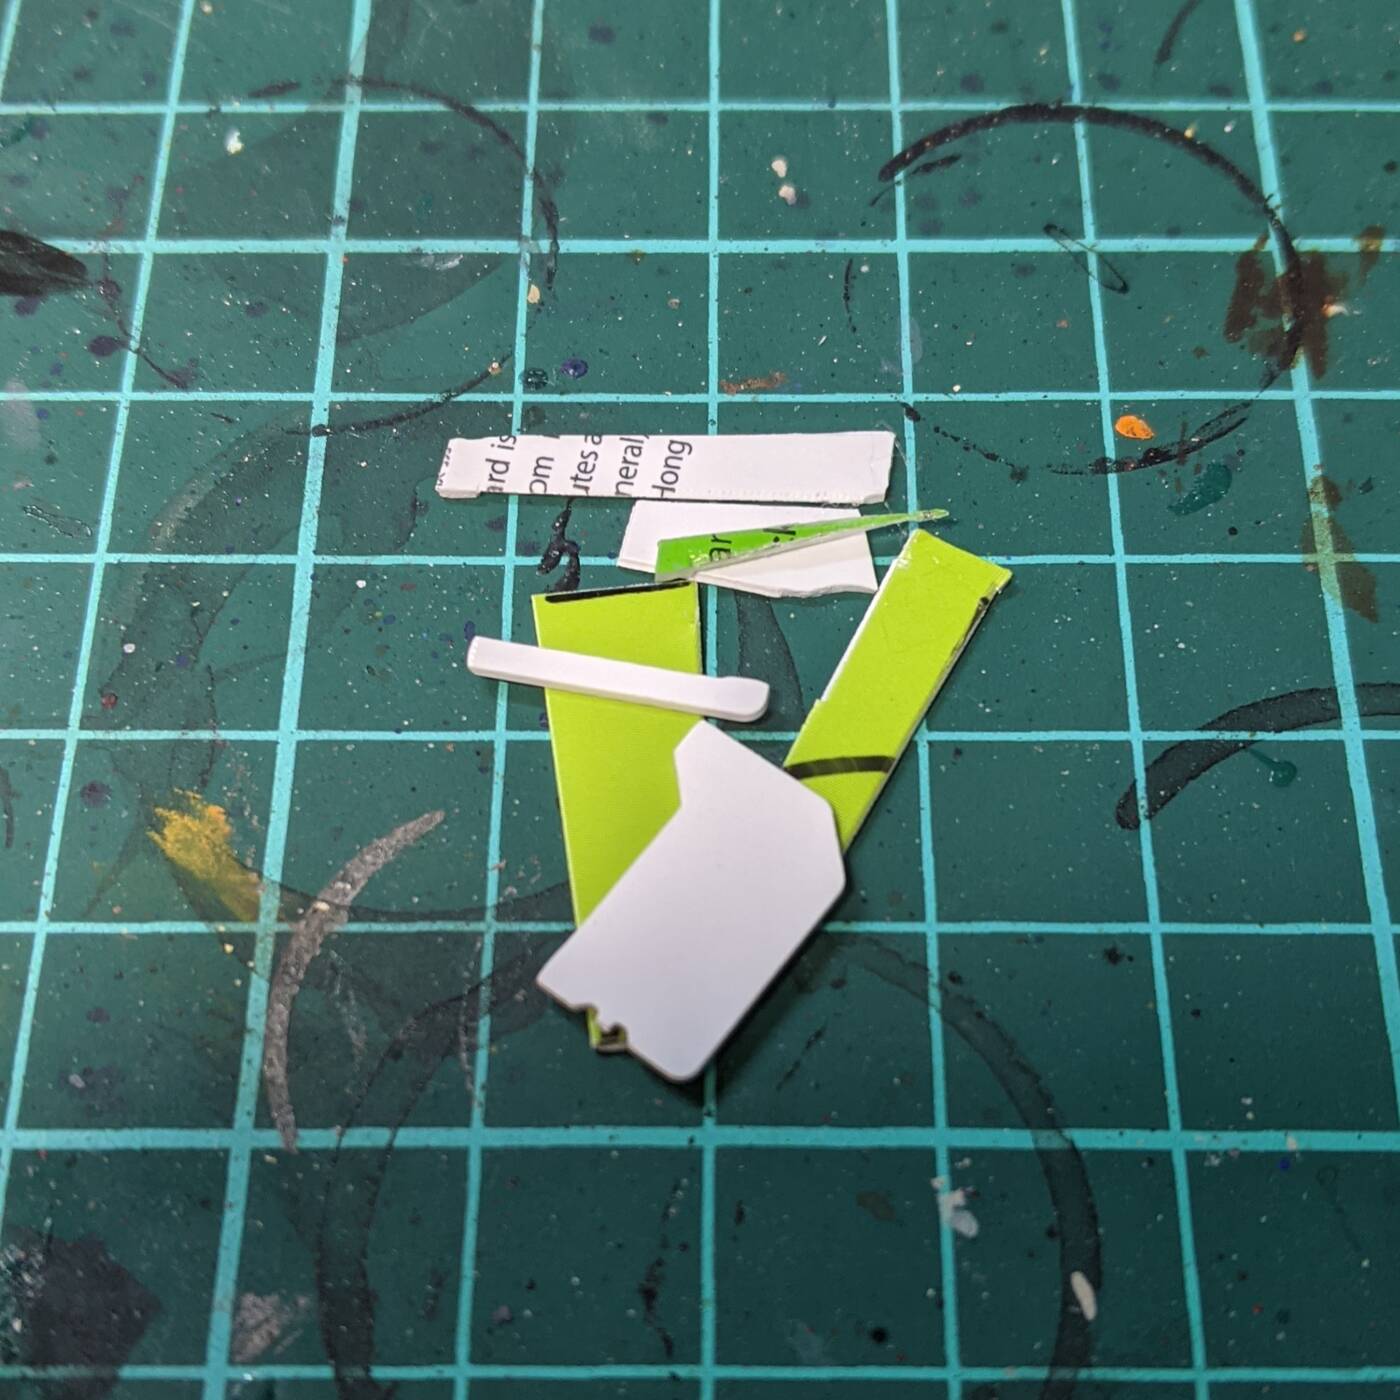
SIM card / membership card plastic for plate metal
Classic cut spru for bricks
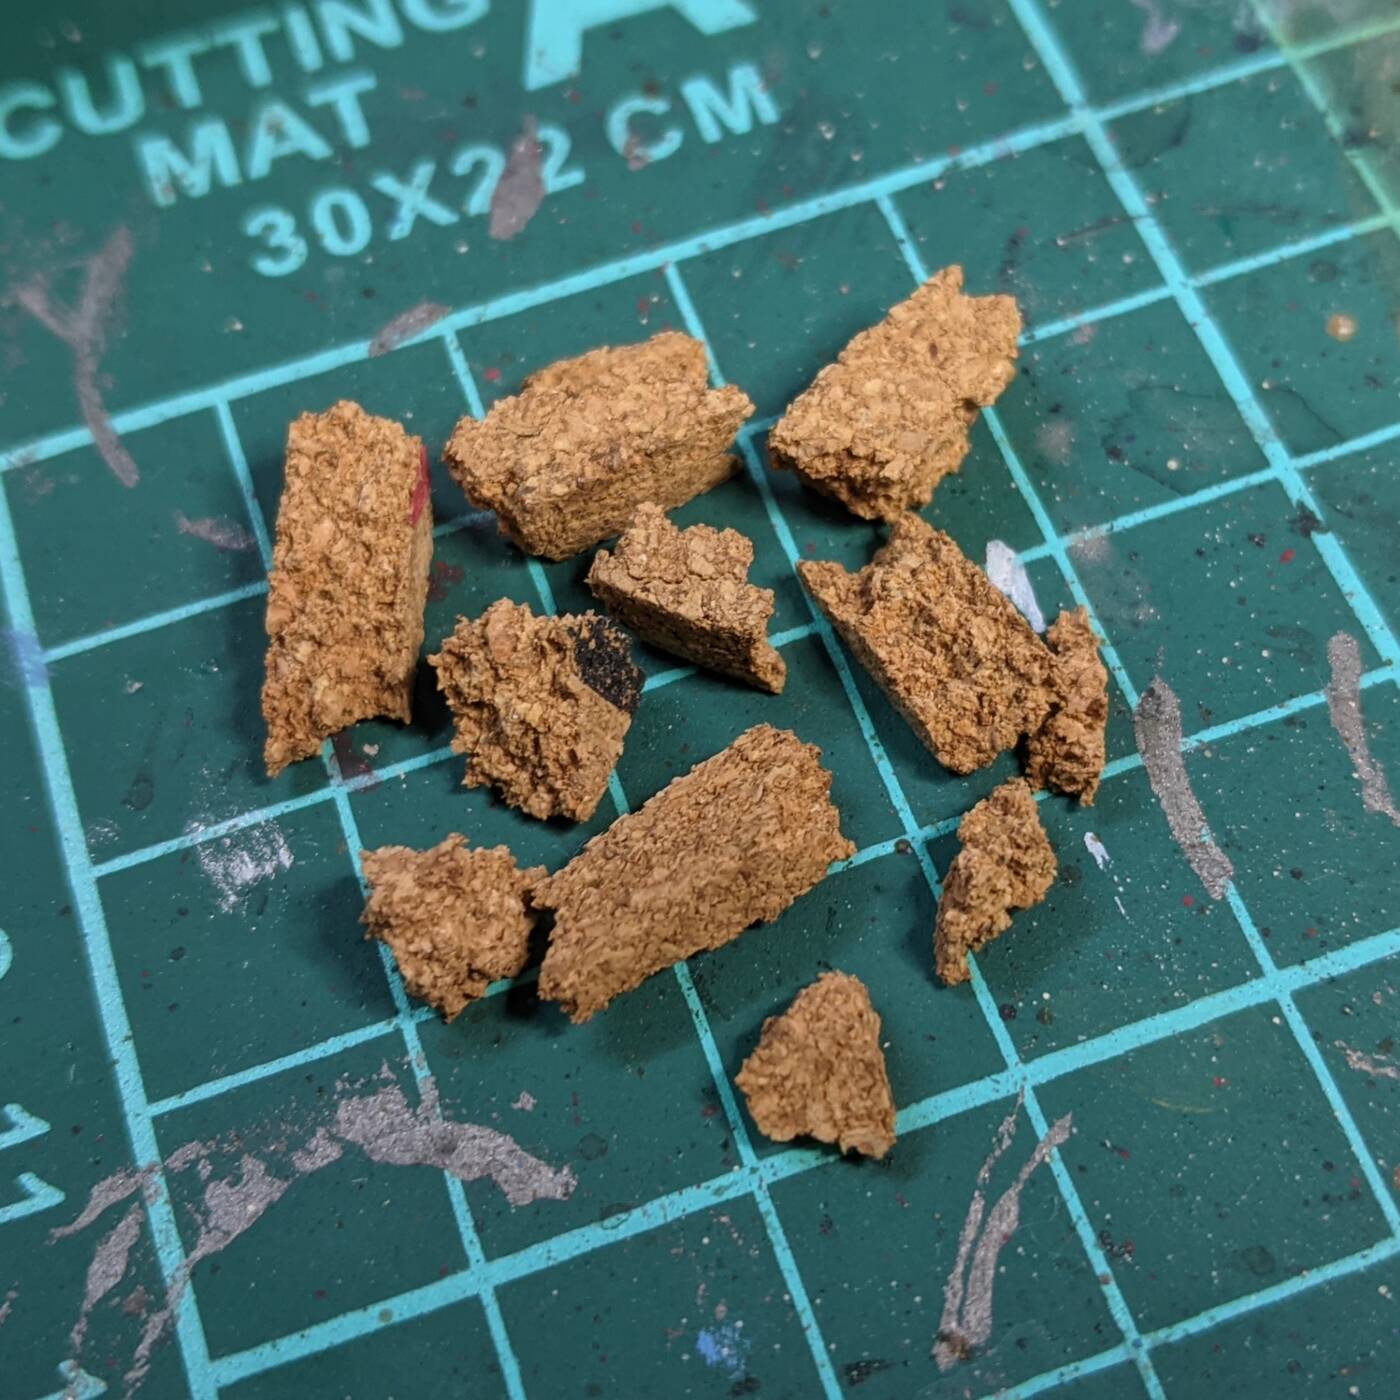
Cork for broken walls/concrete
Zip ties (various sizes)
Texture paste, sand, pebbles etc.
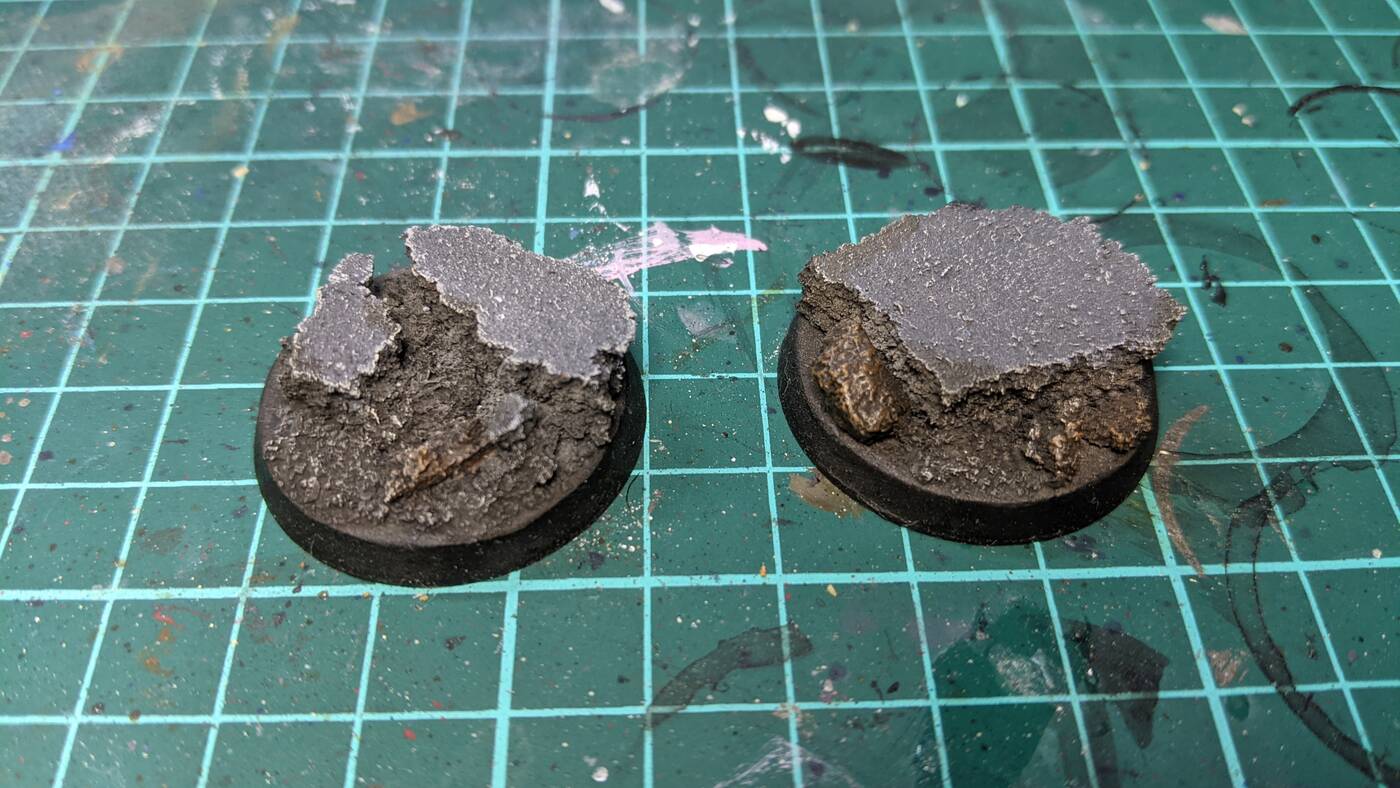
Painting is fairly simple: Black undercoat (the cork needs extra as it can soak the paint). Dry brush with various greys and whites.
Then some black wash and repeating dry brushing as needed.
Metals can have some rust effects with brown washes or rust effect enamals.
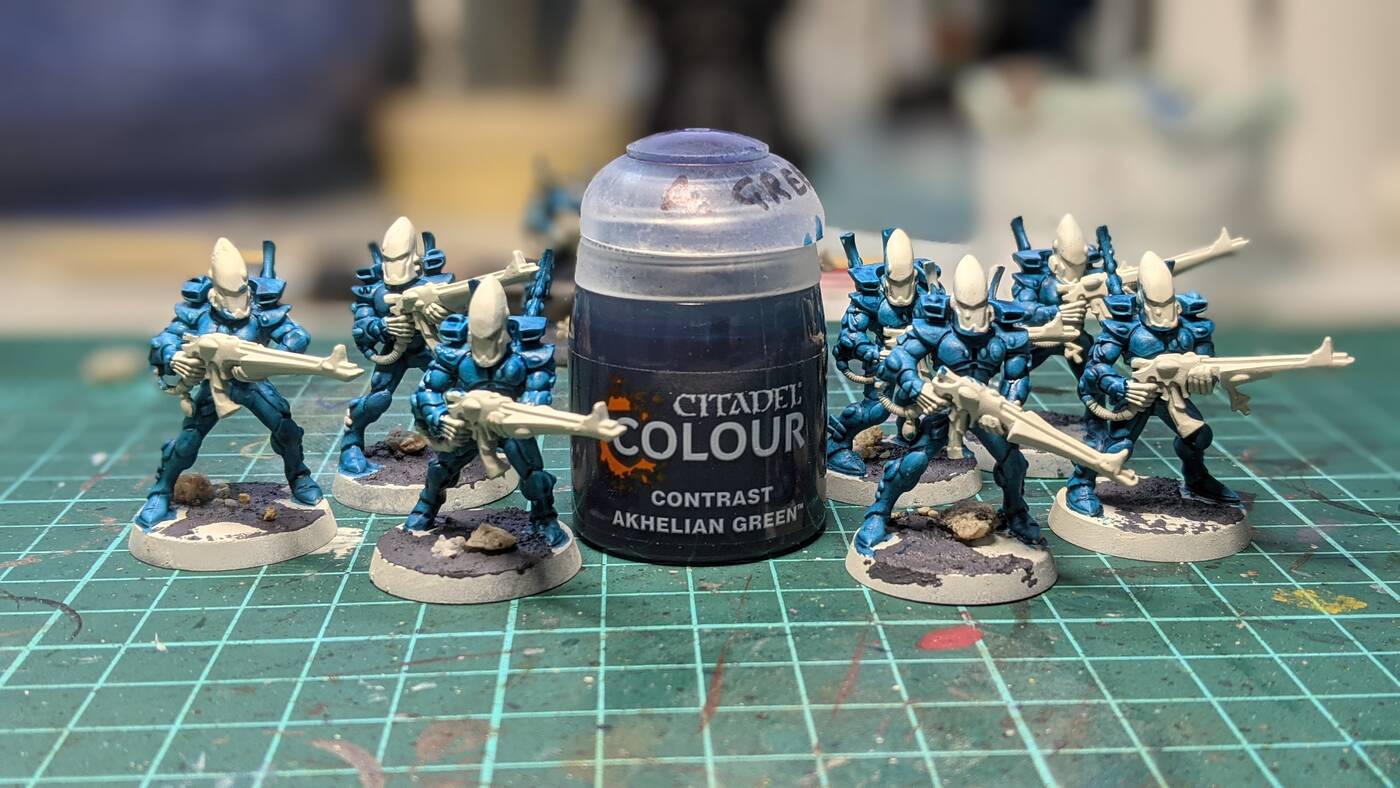
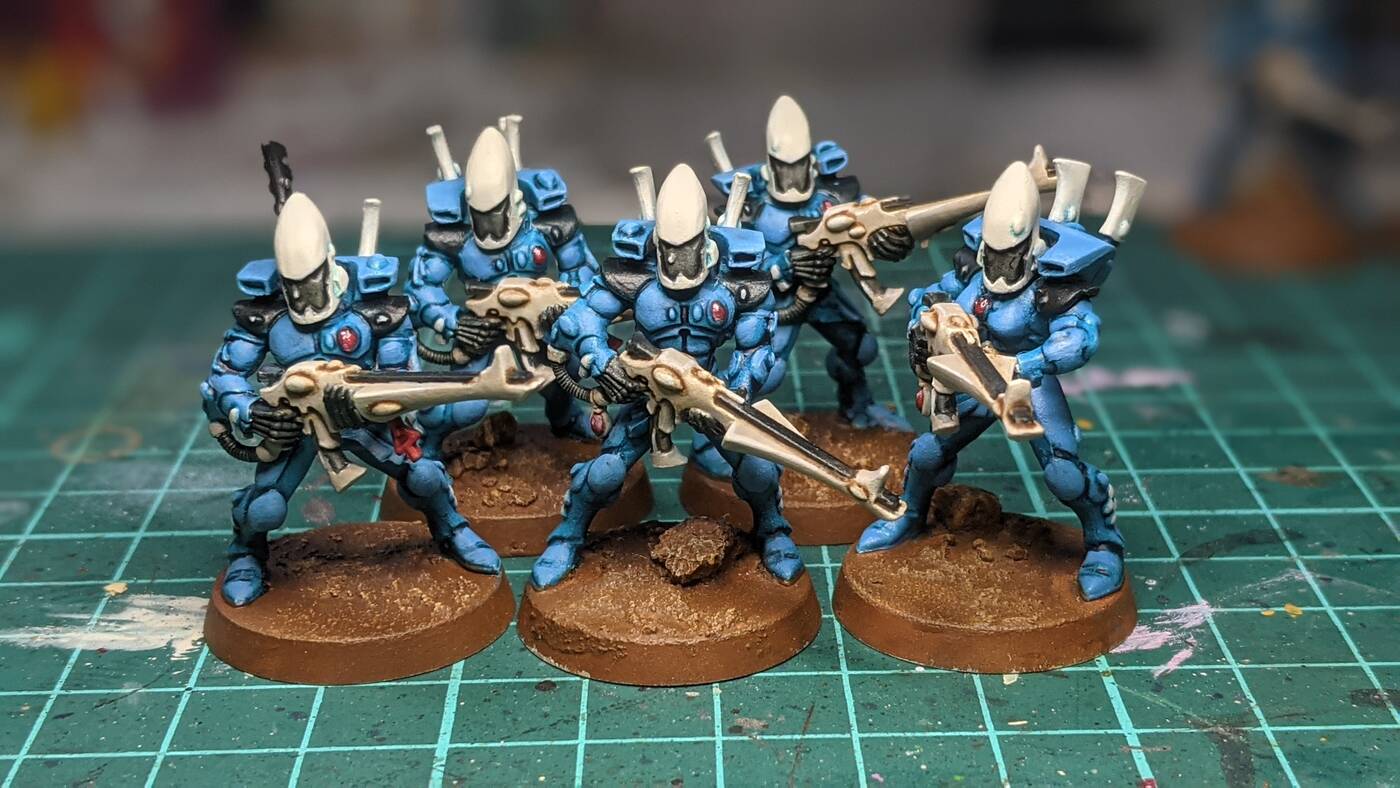
I’ve always liked the Eldar and wanted an army of my own. Particularly Craftworlds.
If I were ever to get a full army, I think it would be Eldar.
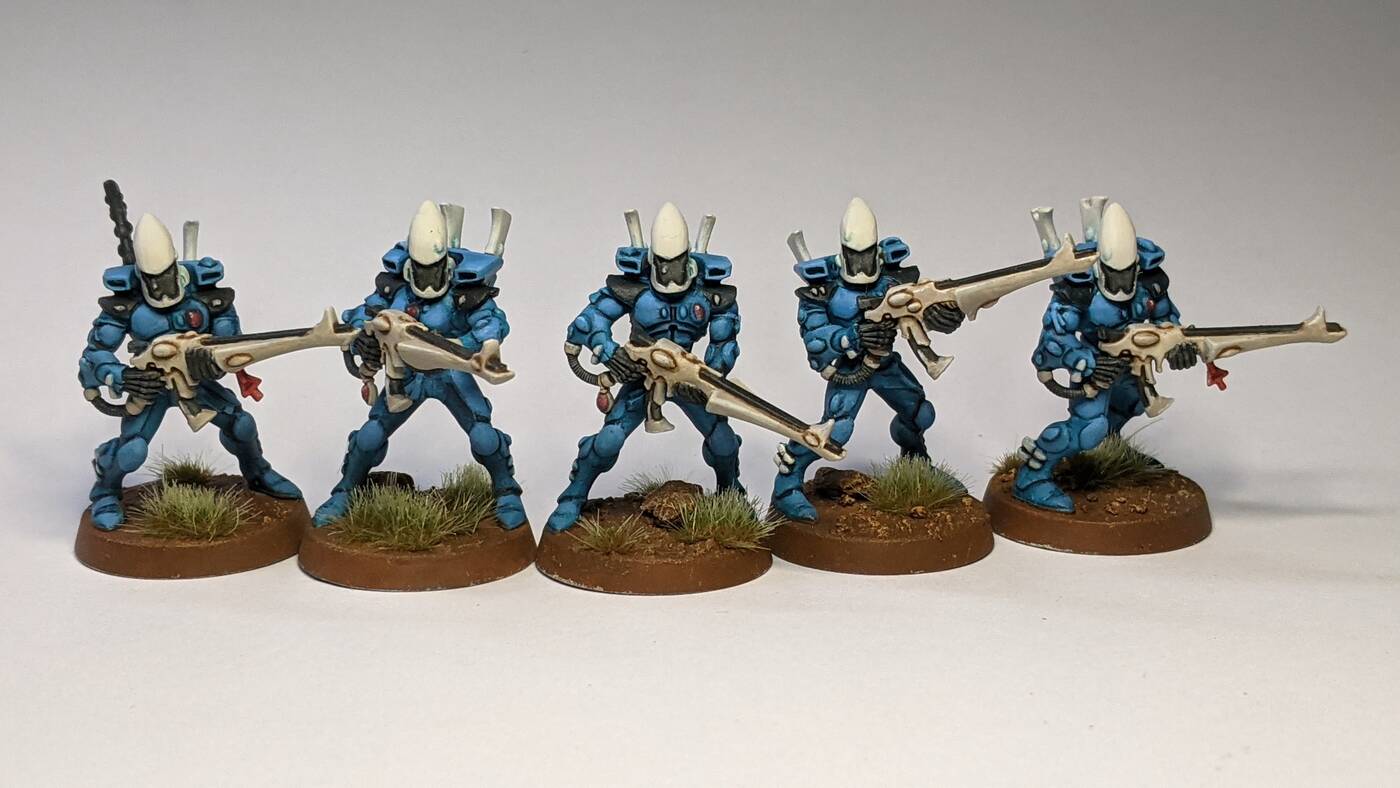
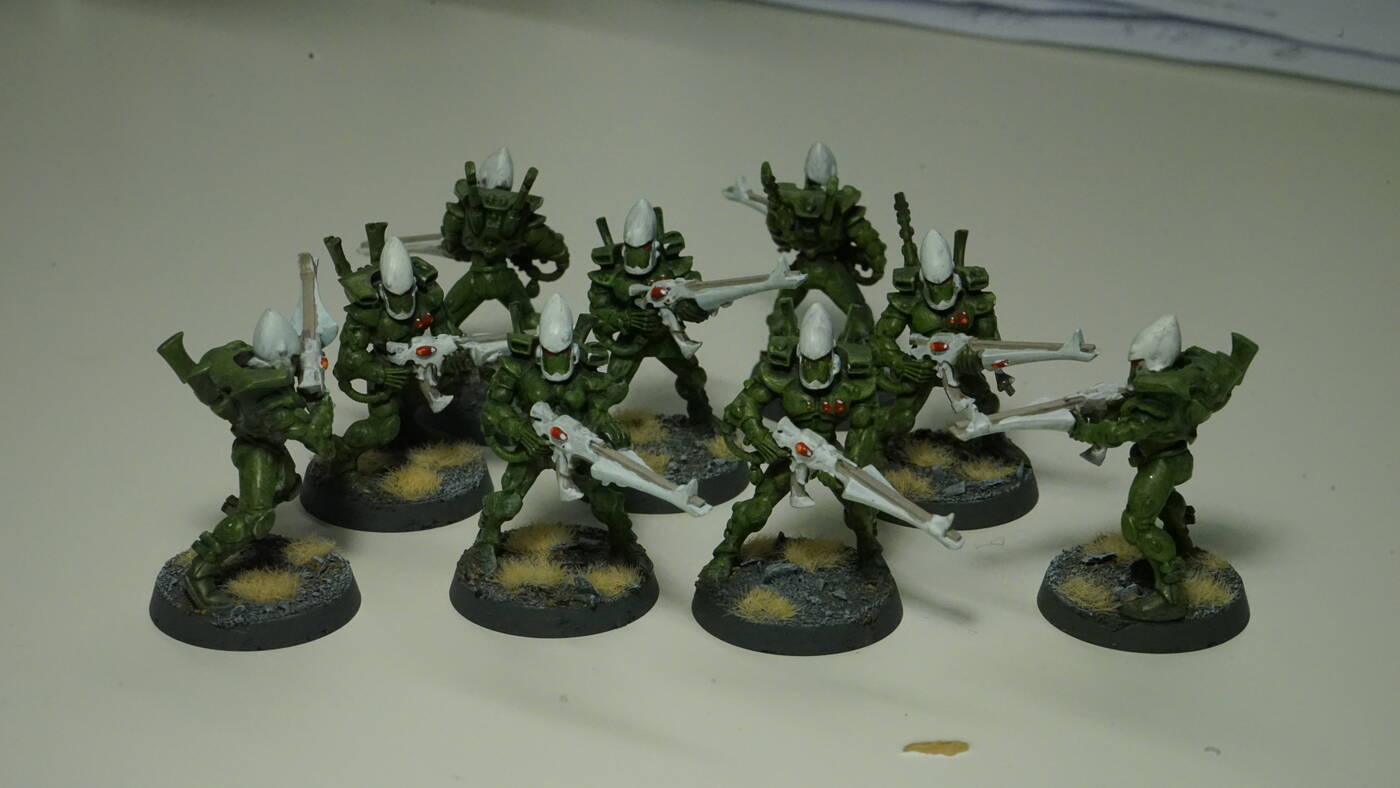
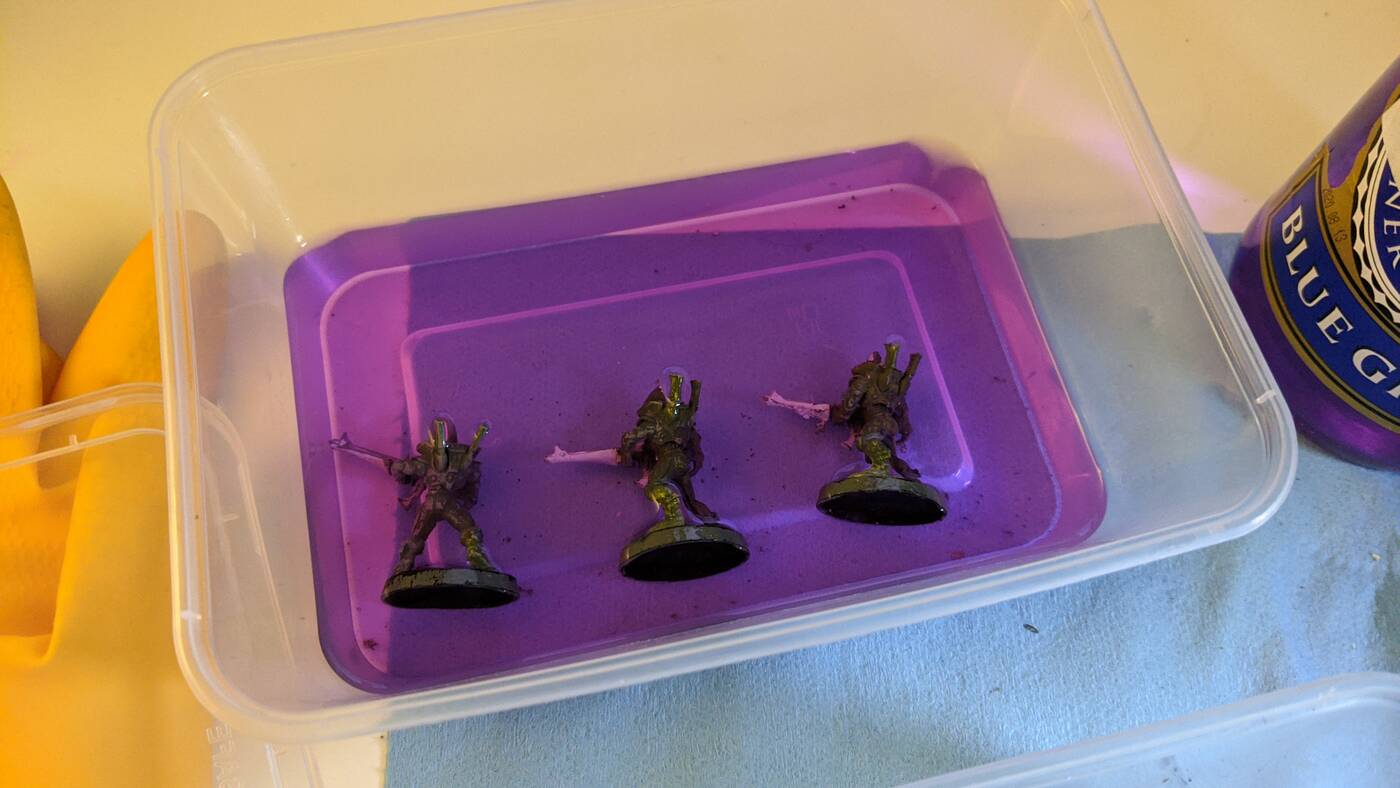
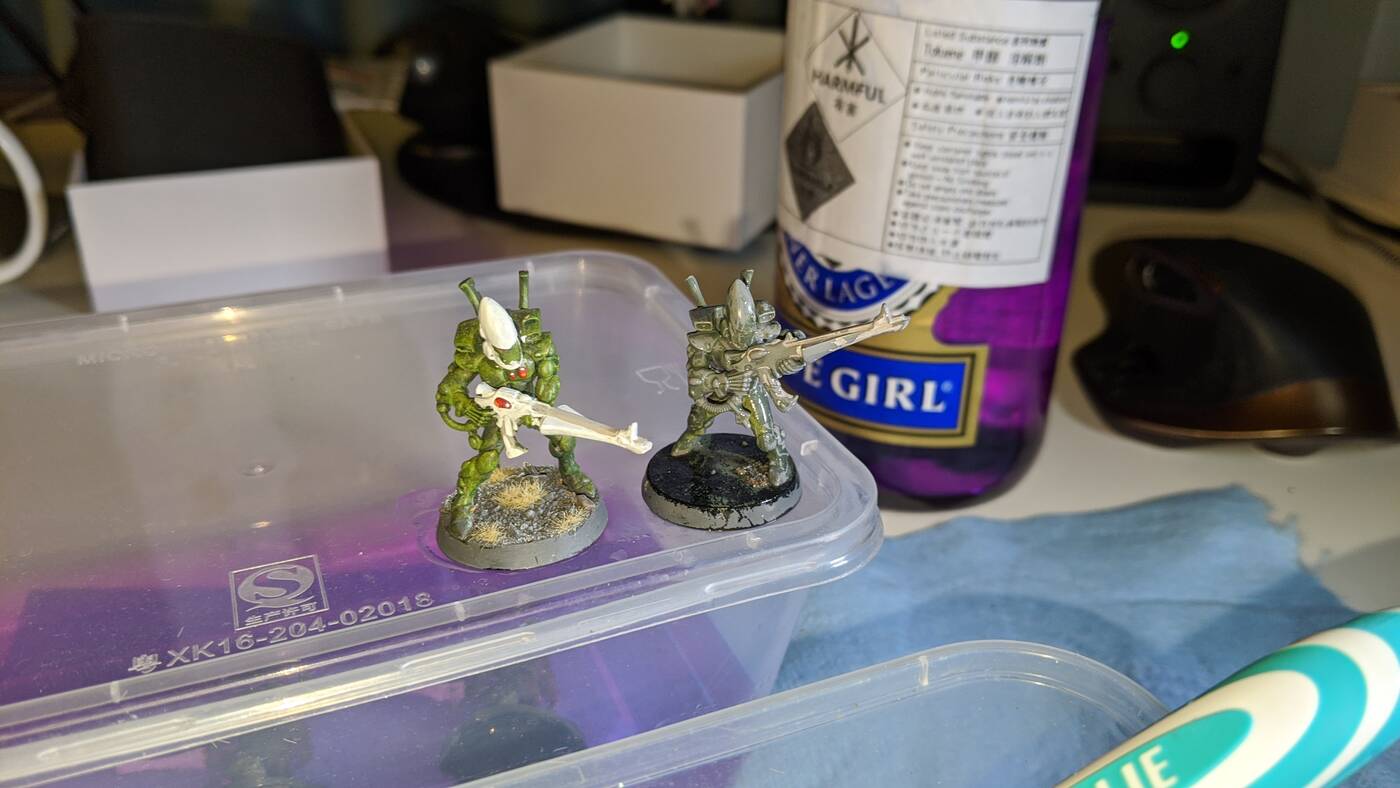
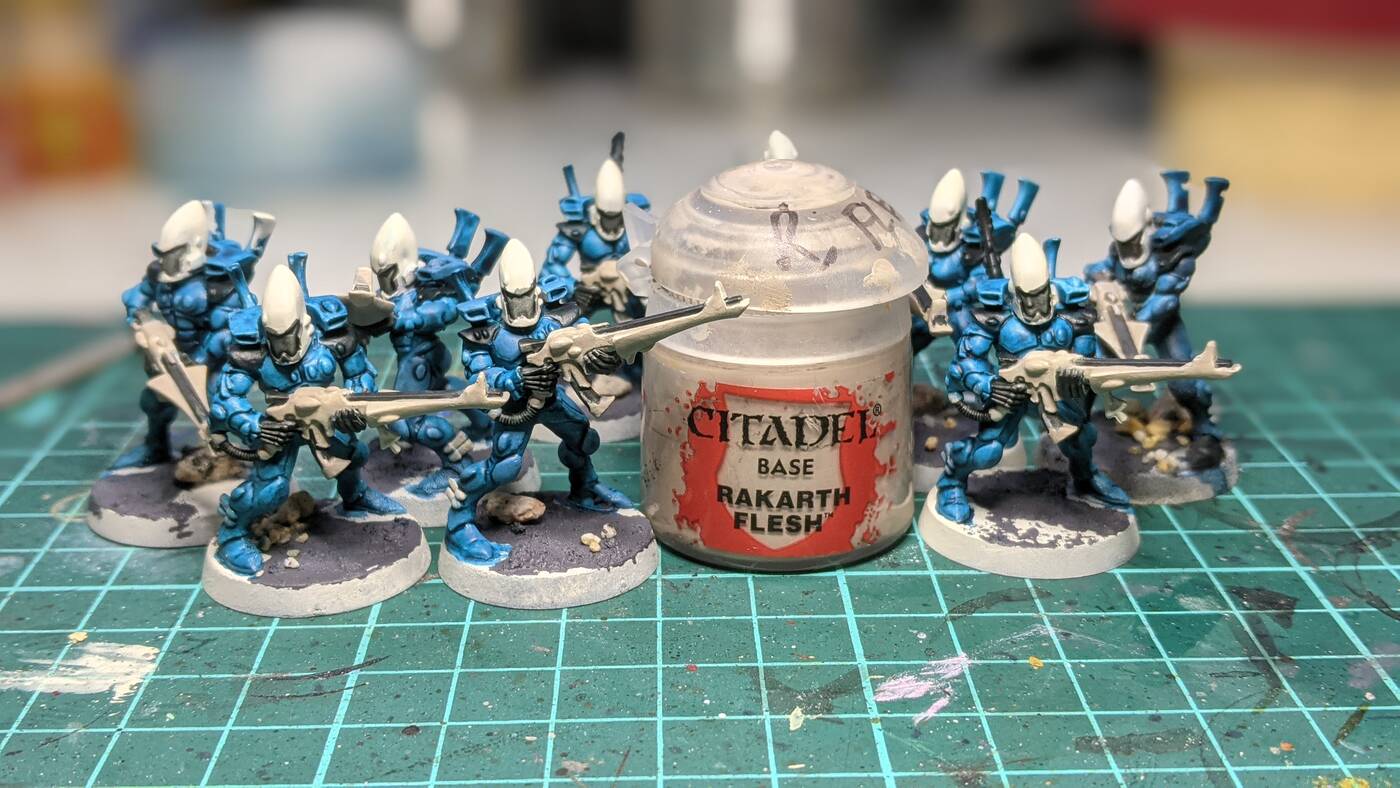
I found a small number of guardians on Ebay to start me off and decided on Craftworld Iybraesil for the colour scheme.
They came green, the paintjob was okay, but the poses were really off.
I had hoped I could repose them, but I think they used plastic cement glue so I left them as-is.
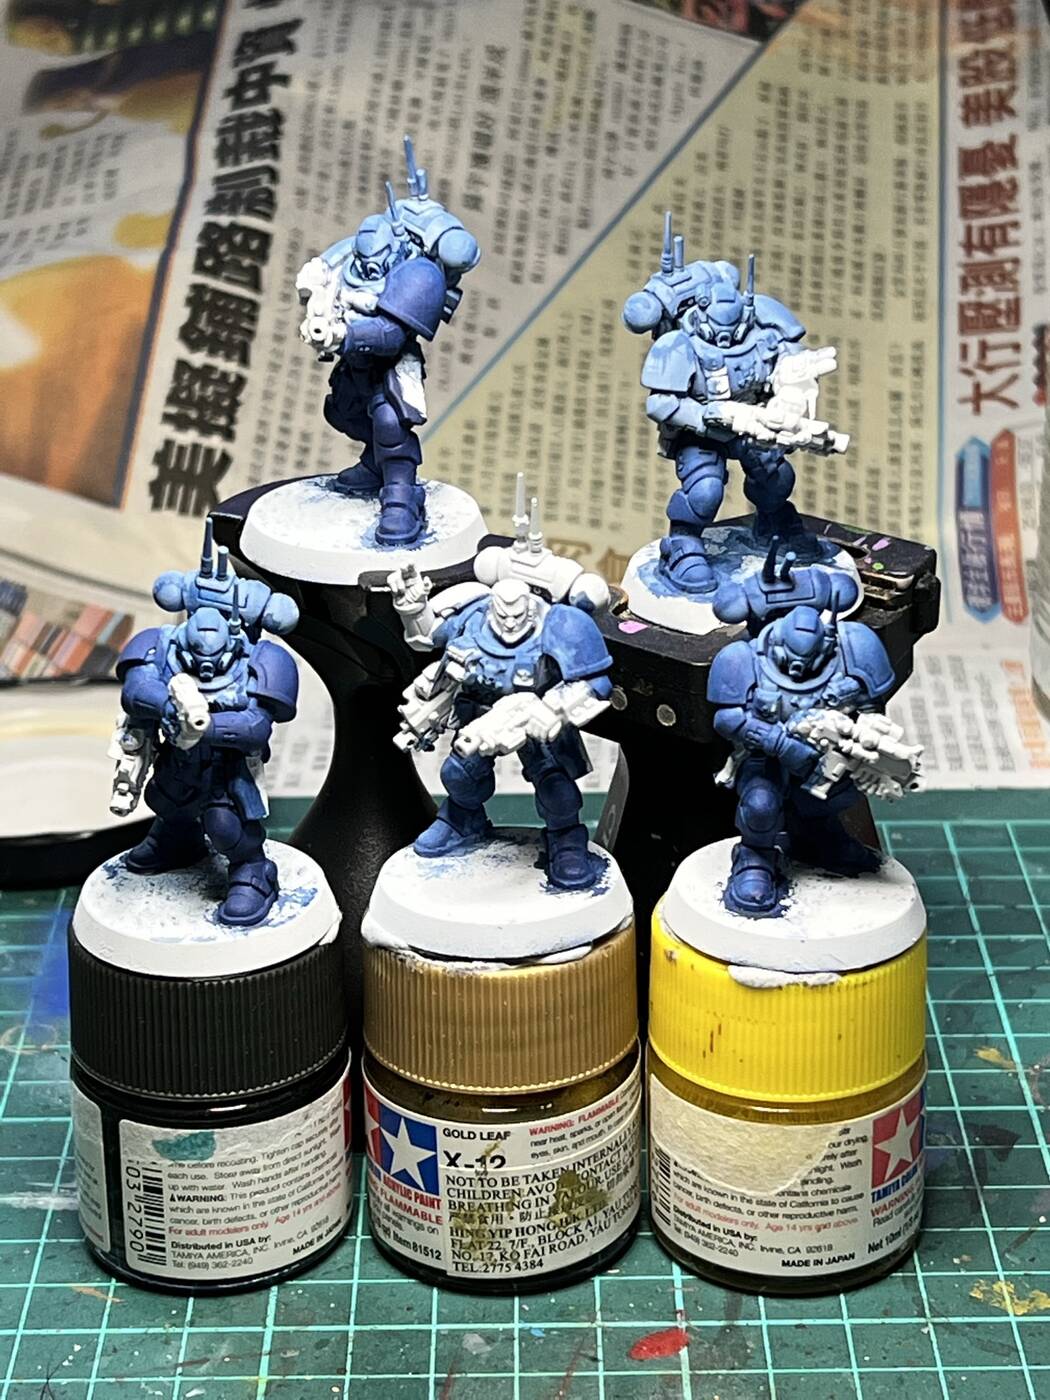
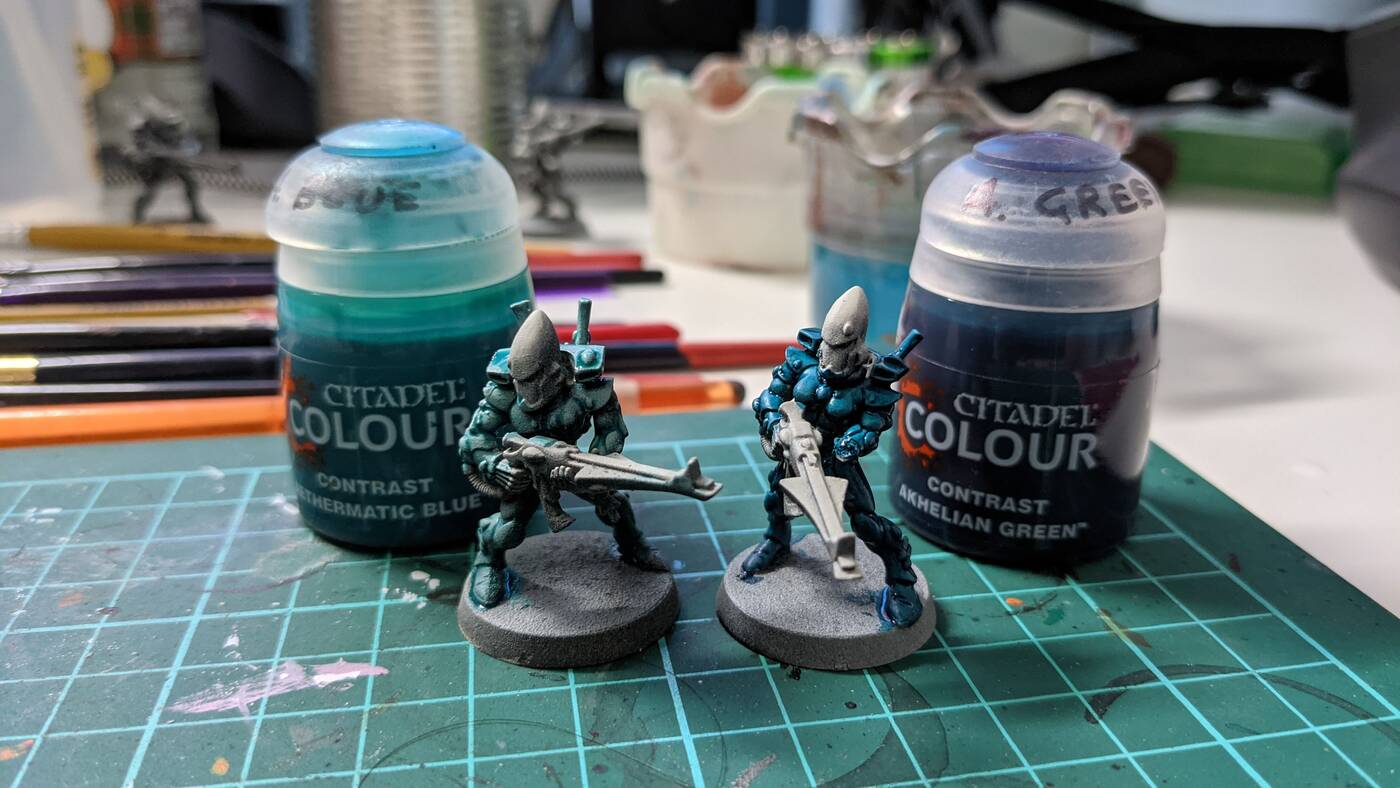
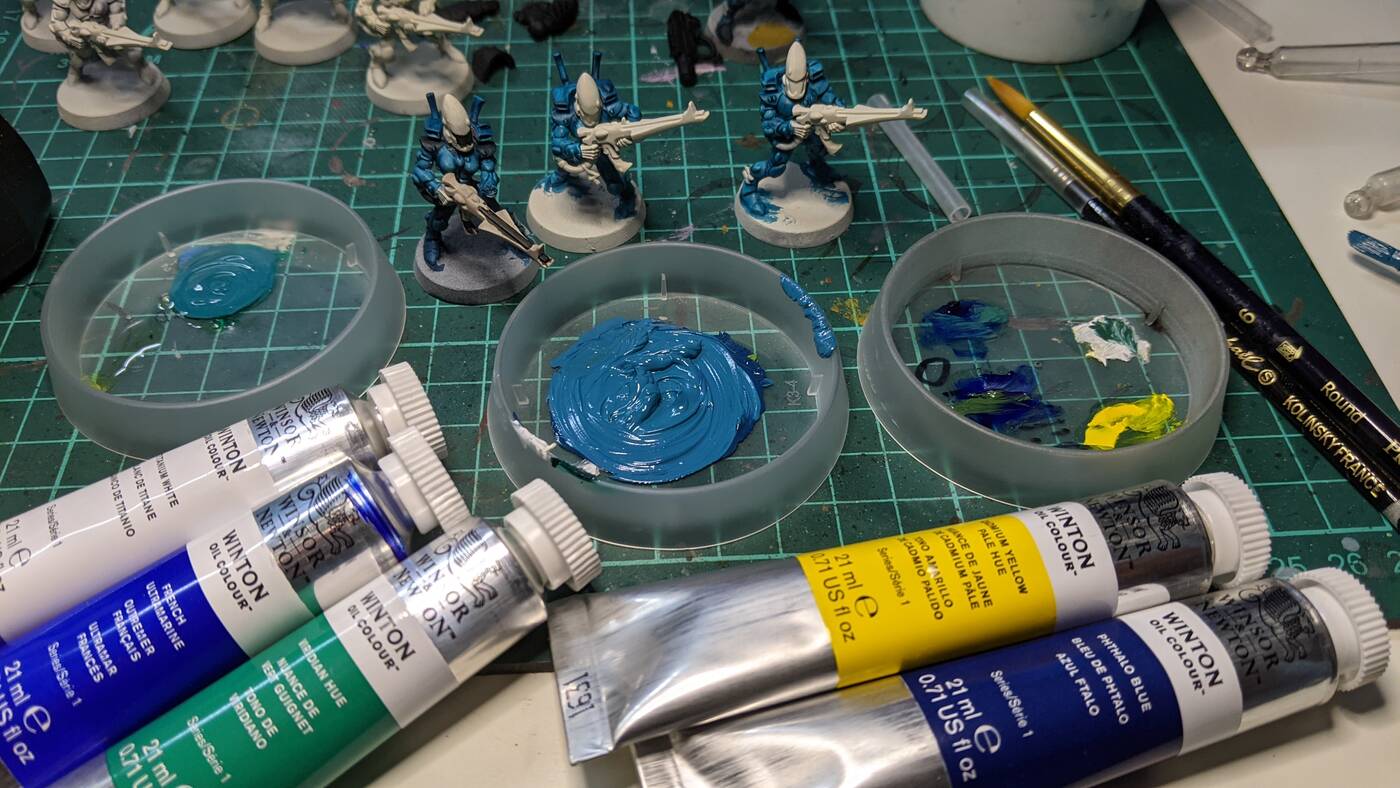
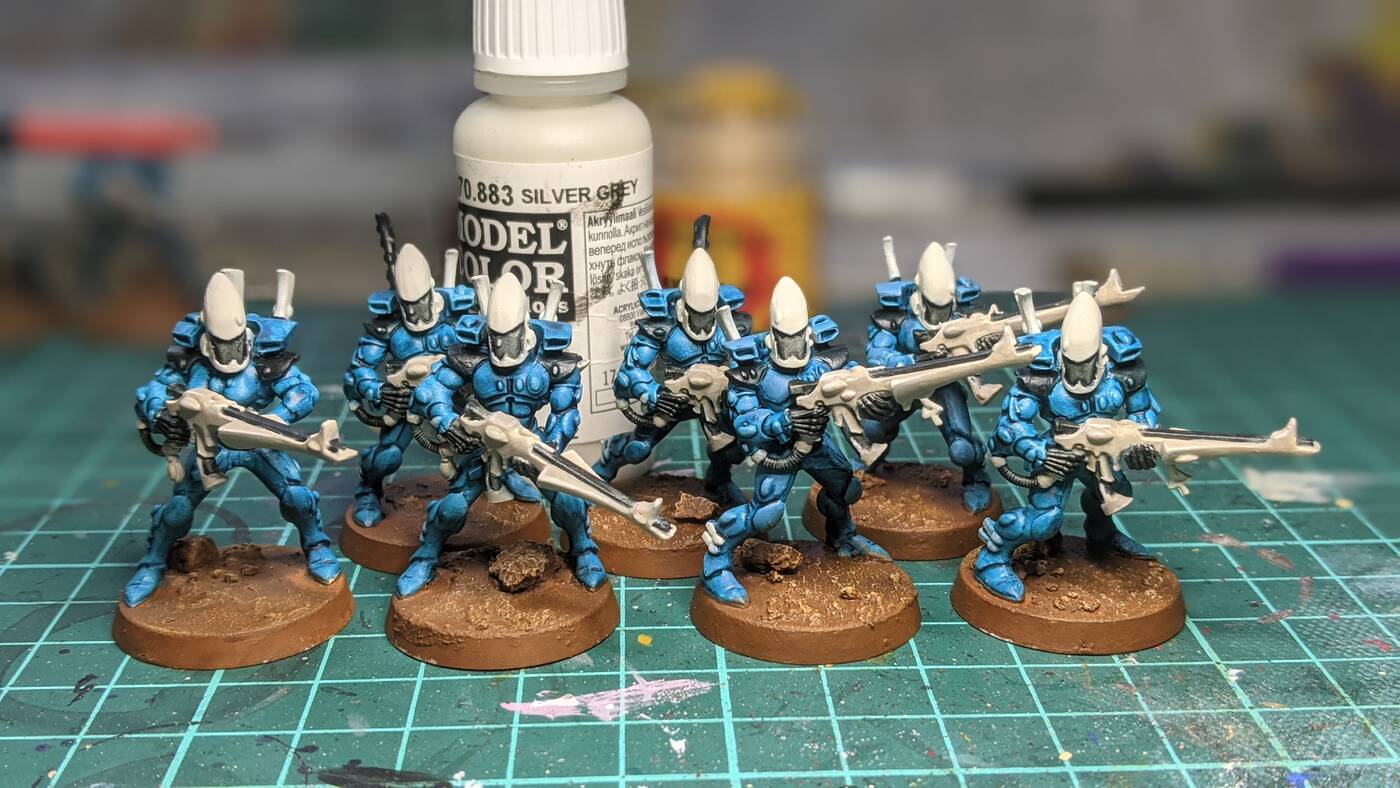
For the blue, I tried contrast paints initially, then ended on oil paint. It took me way longer than I expected to reach the shade I wanted, and wasted a lot of paint in the process, but once I got there, I could keep a batch for a few days. Hope I can make it again in the future… After that had dry, some blue contrast paint did a great job in the recesses.
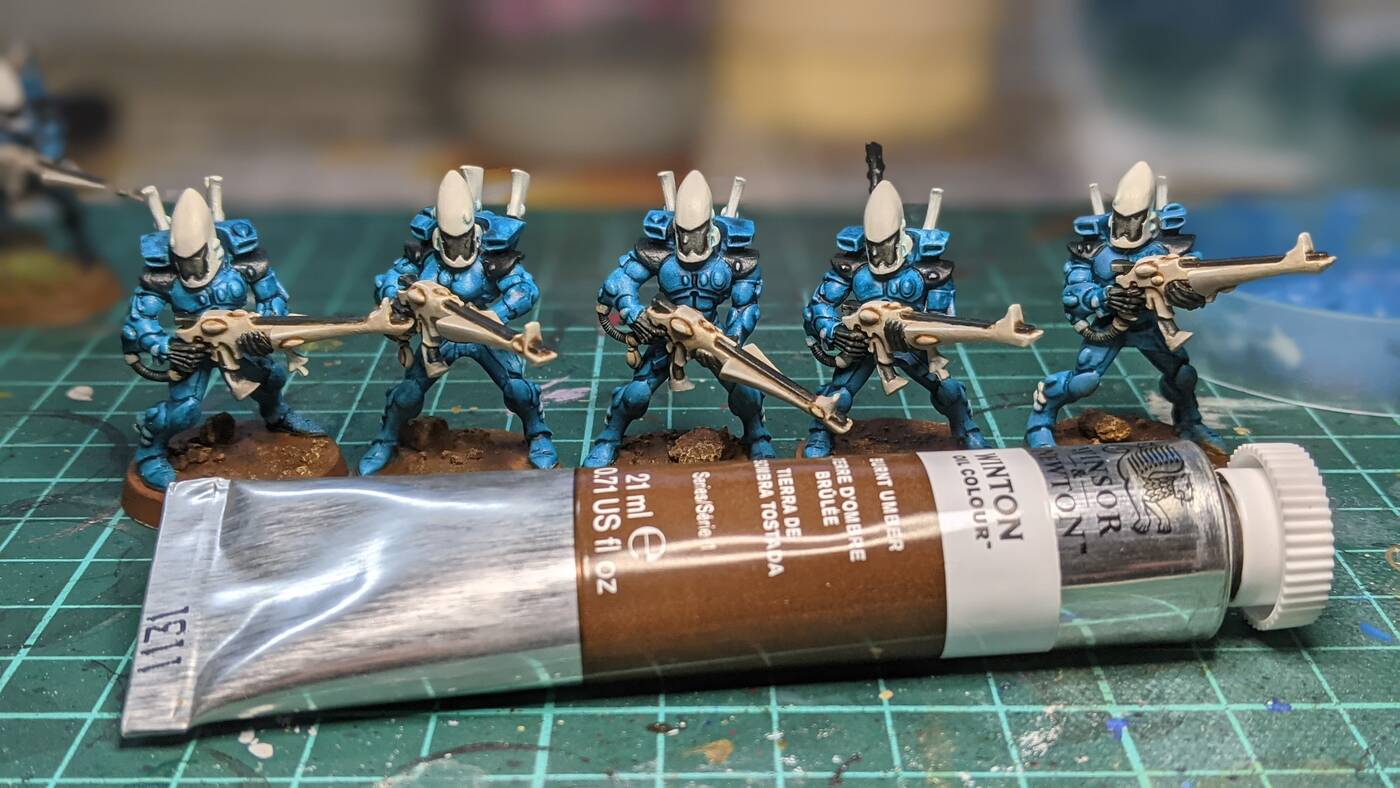
I also used brown oil paint, thinned down, for recess shading the weapons. Most of the rest is painted with acrylics.
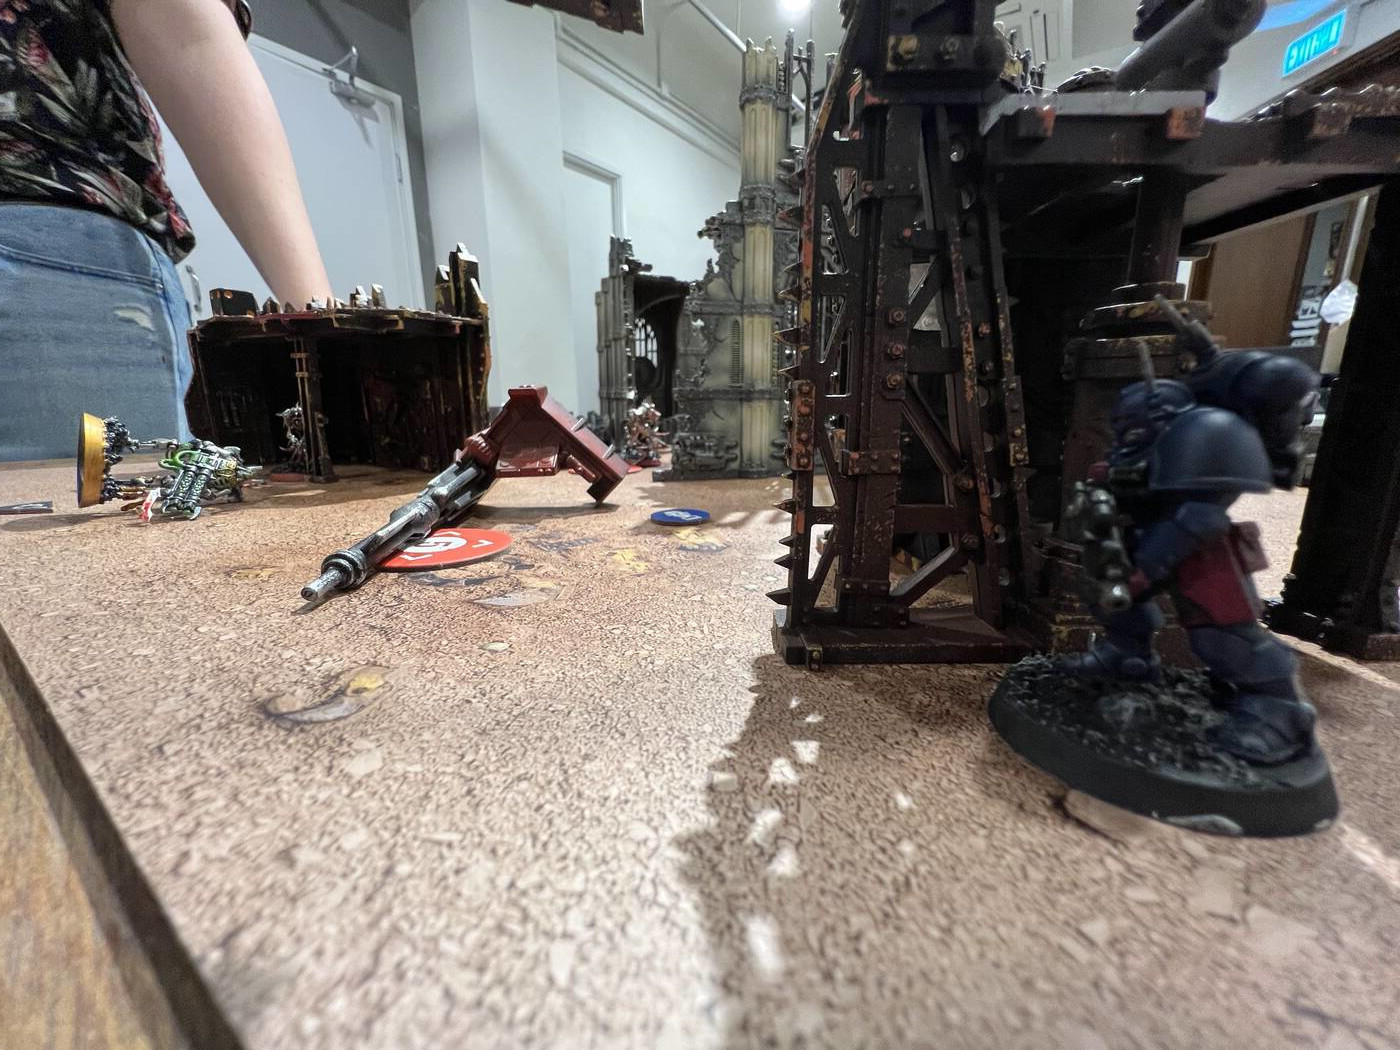
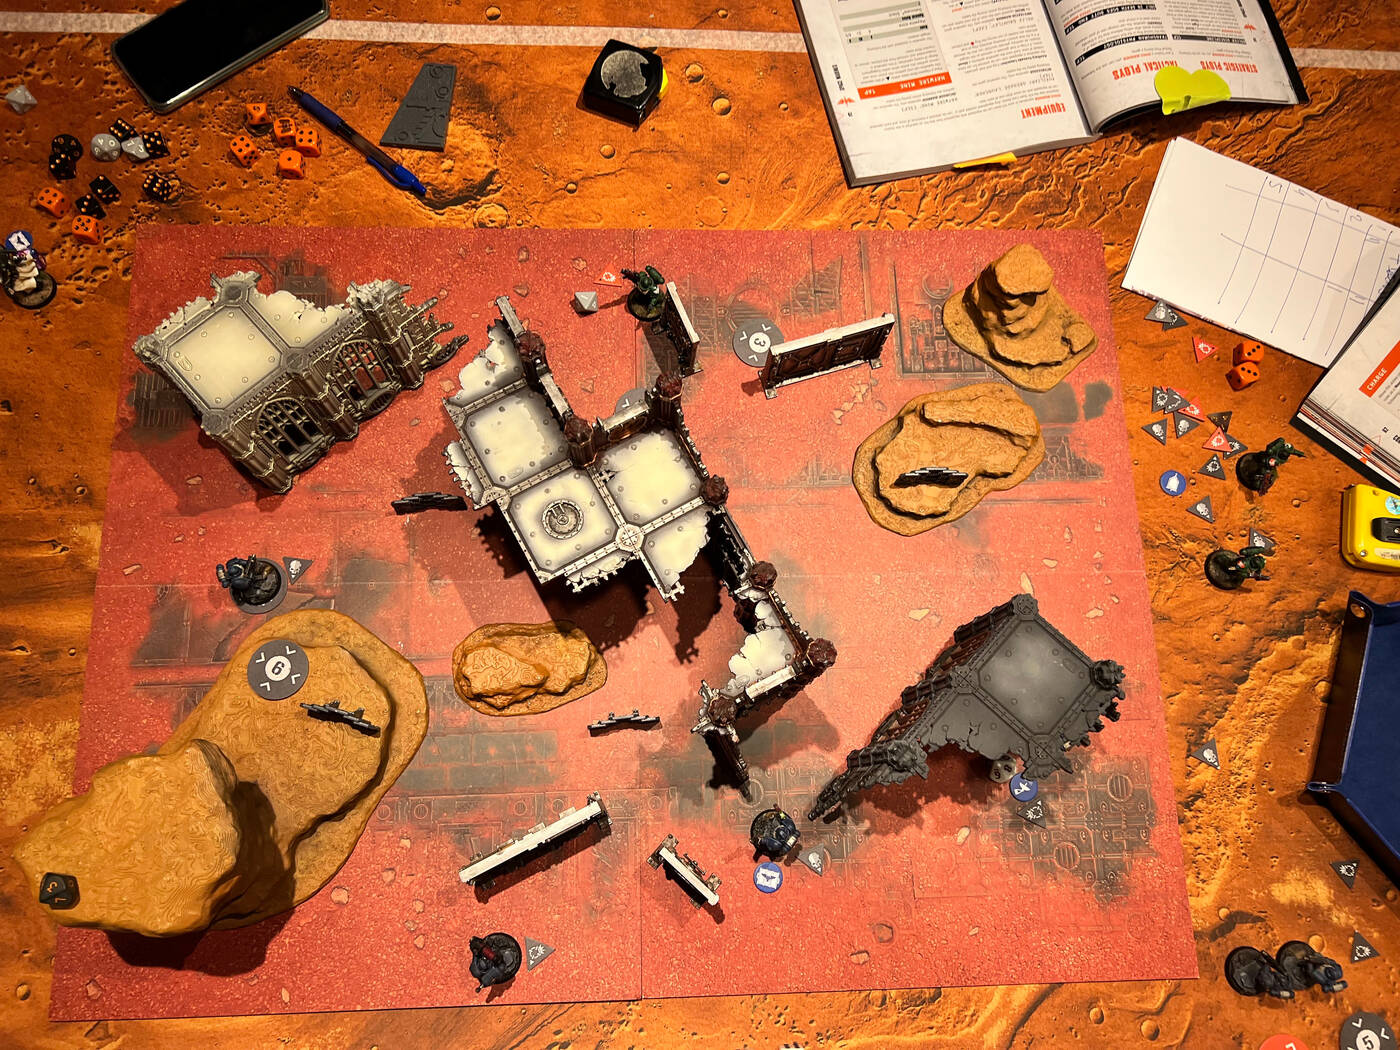
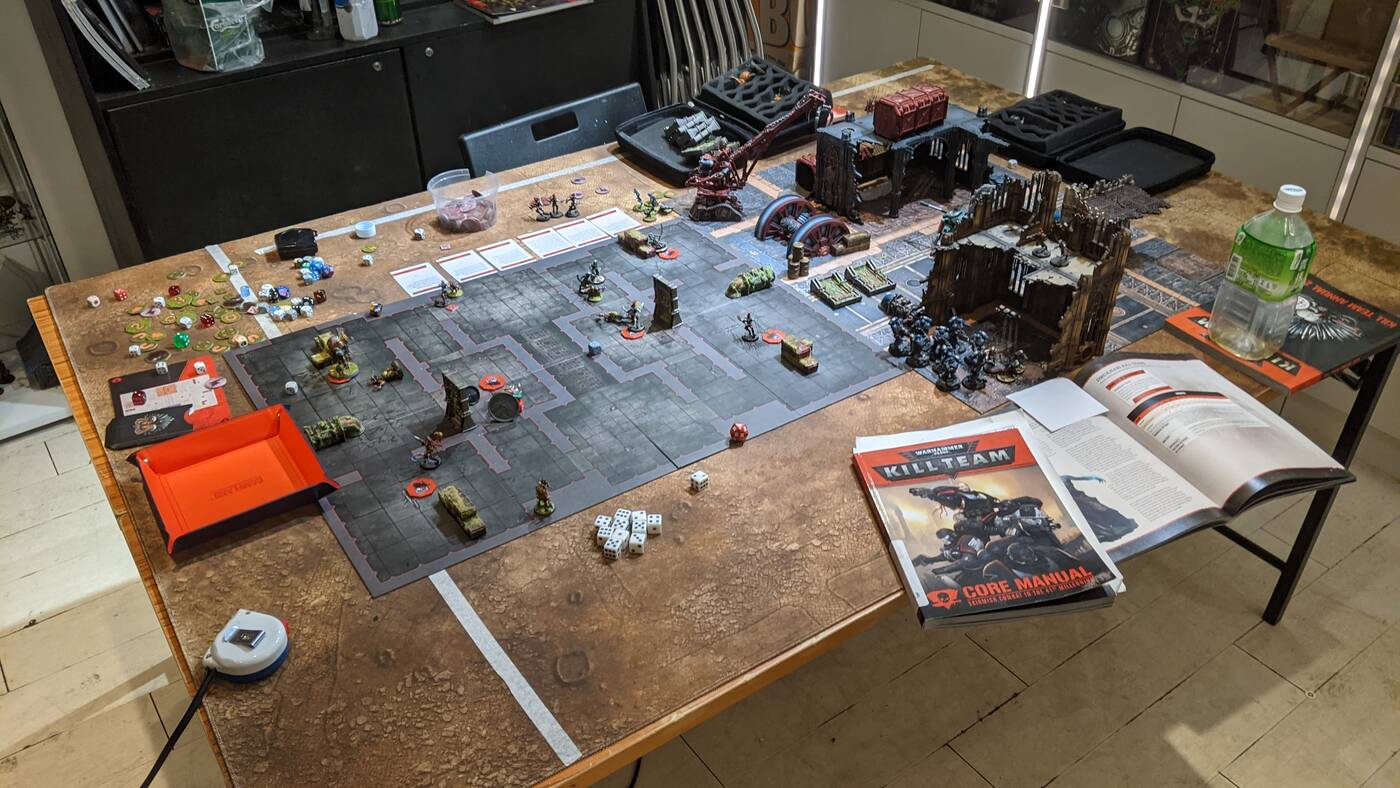
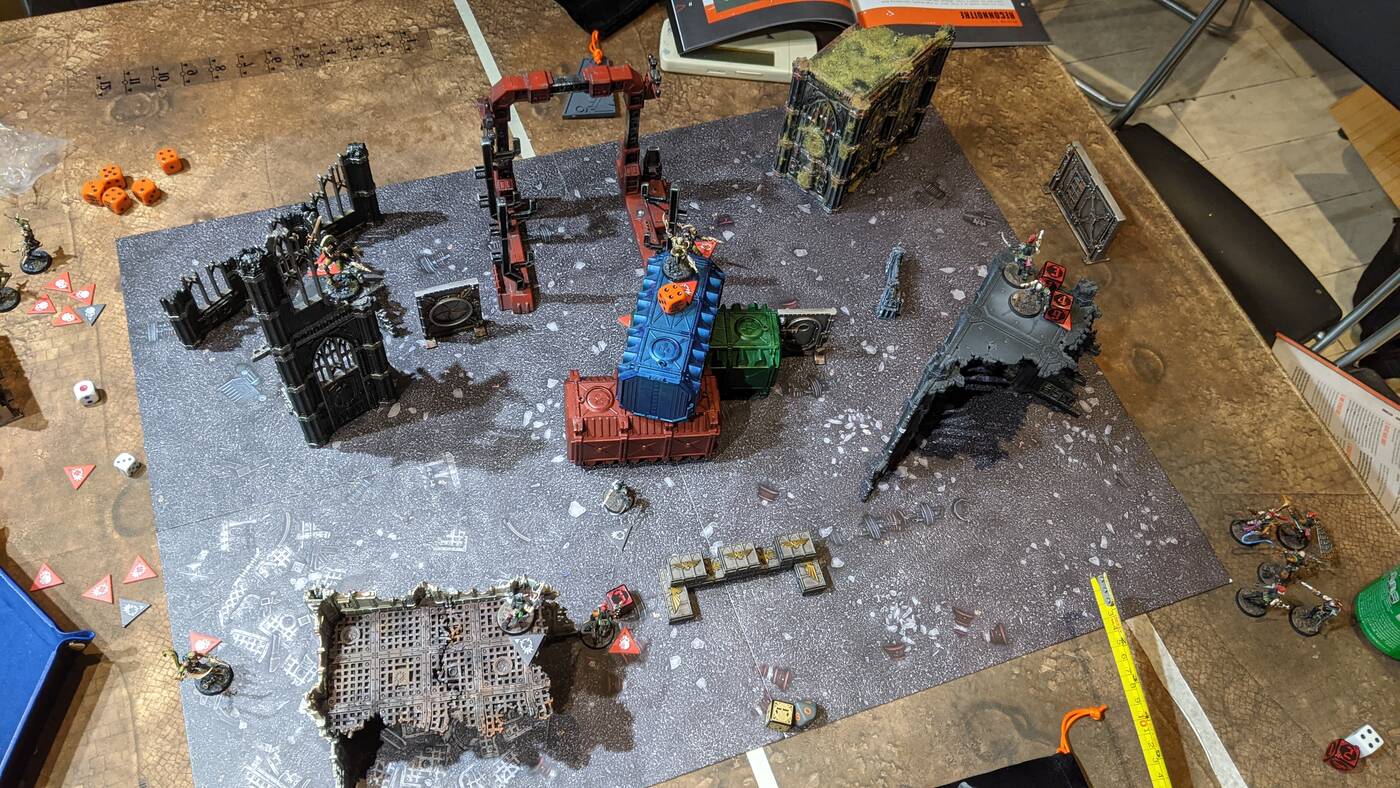
On Reddit I noticed a photo of a game of warhammer being played in Hong Kong.
I never really thought about finding gaming groups to play with before, so reached out to the poster to find out about their gaming group.
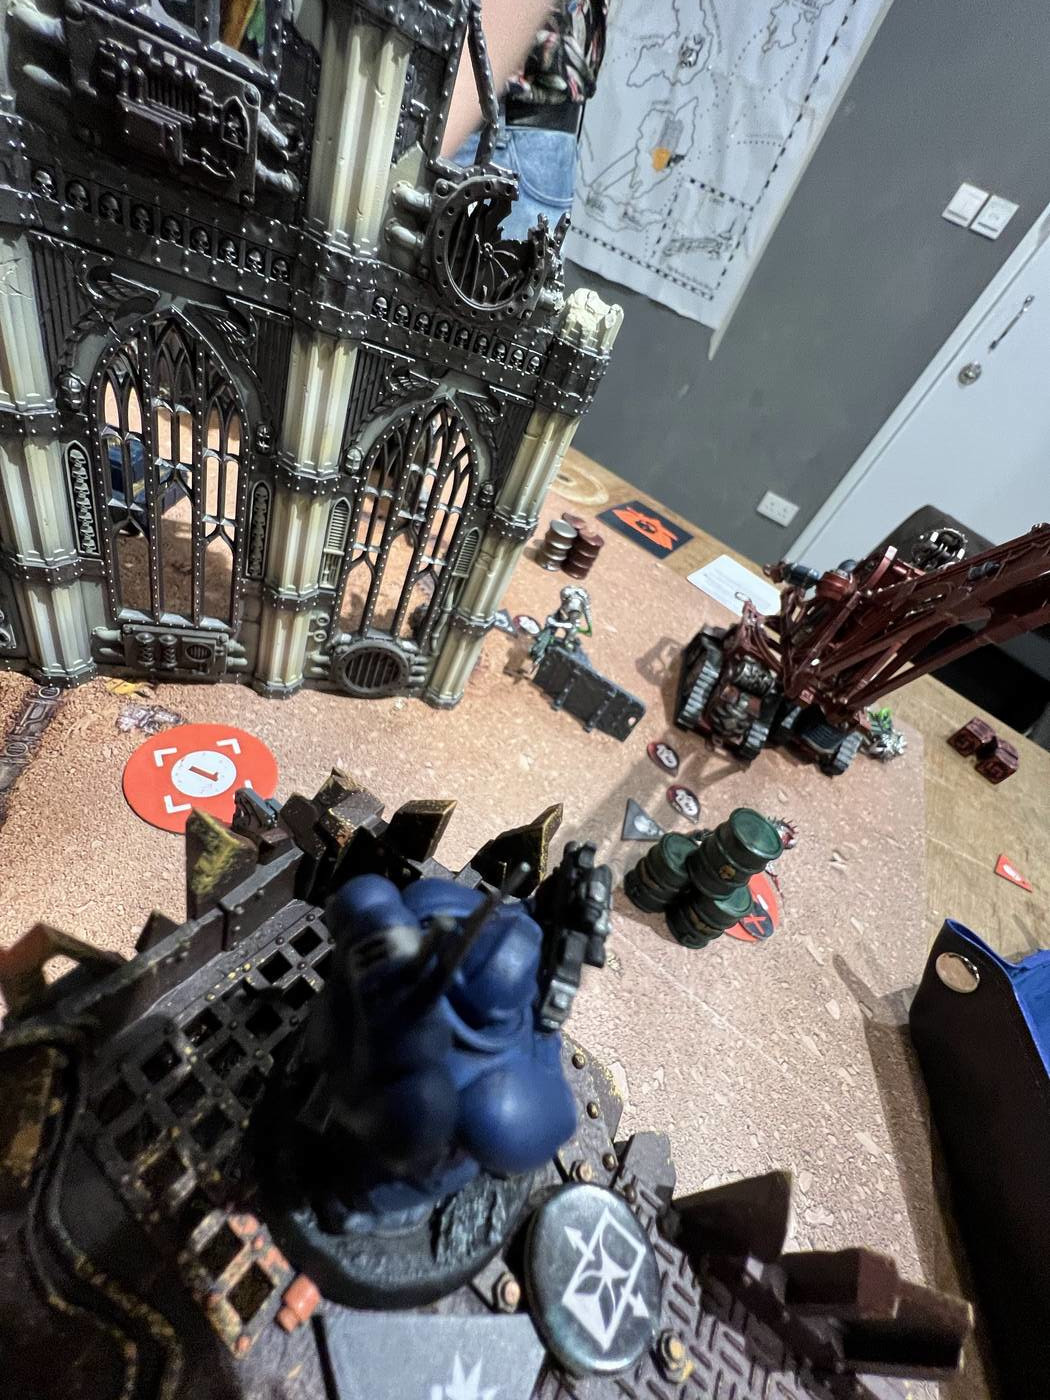
Through this I got to play some games with local and expat players.
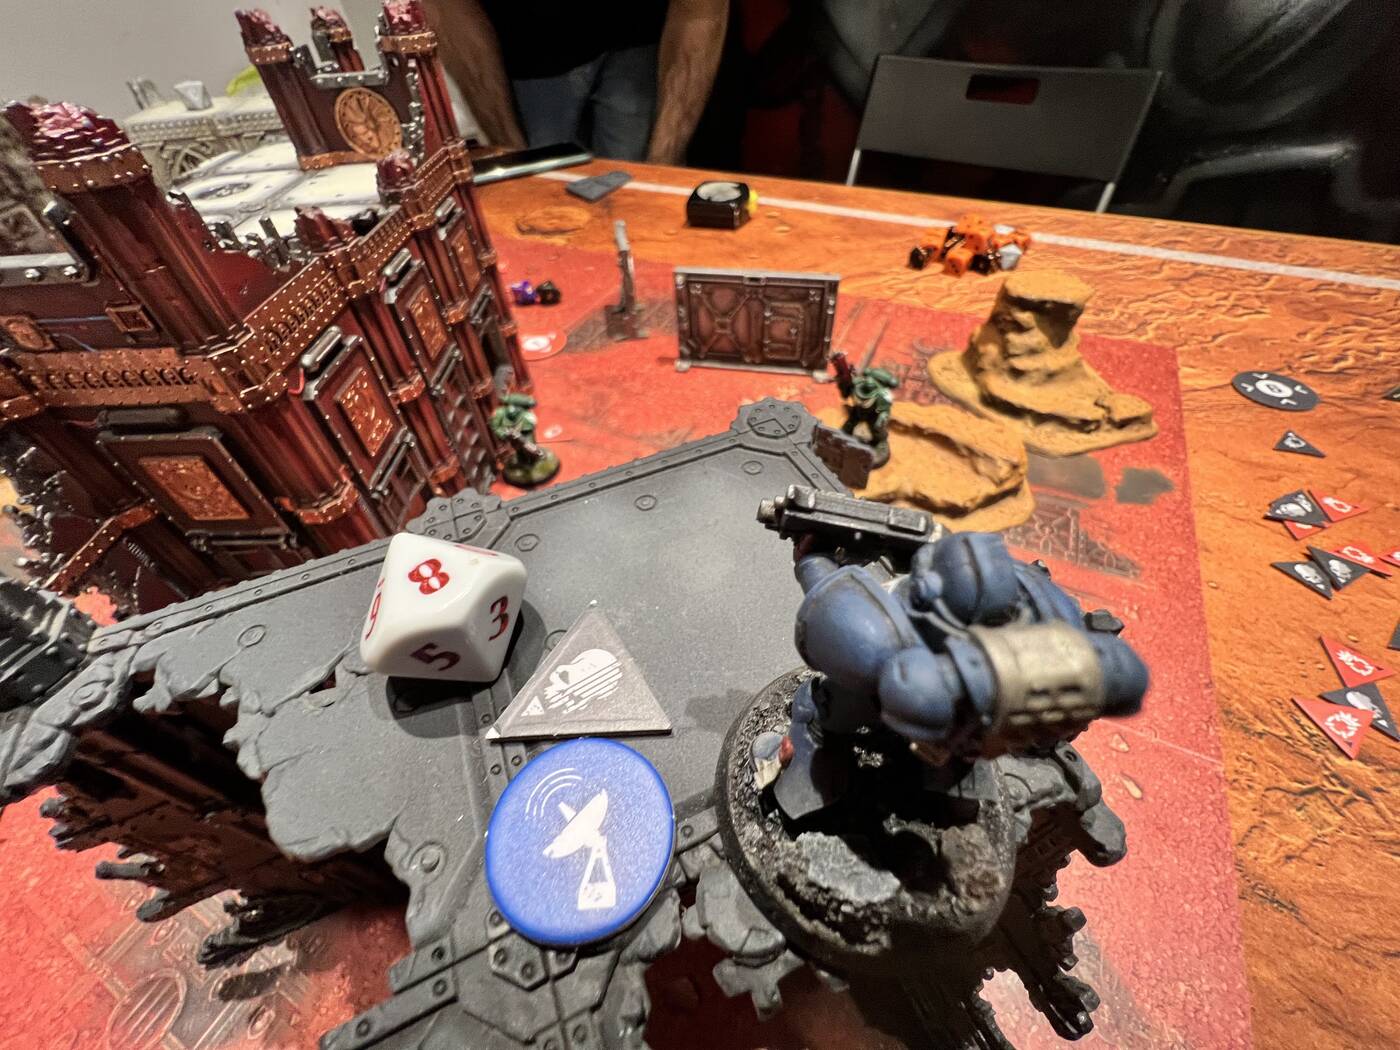
My first game of Kill Team was also my last, as version 2 was released shortly afterwards and I only played 2.0 after that.
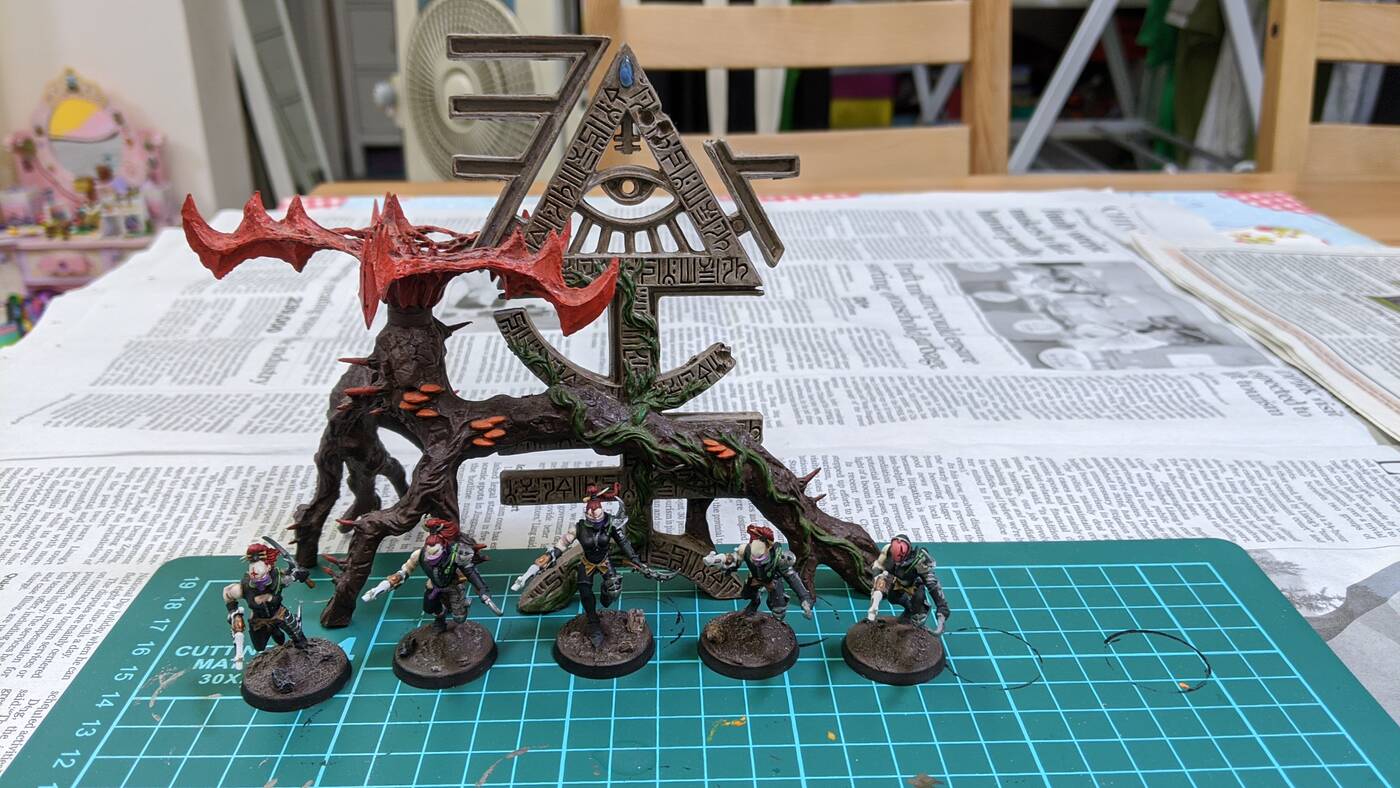
In my first game, I used my Dark Eldar Wyches and Mandrakes against some demons. It’s the first proper warhammer tabletop game I’ve played in over 20 years.
A month later I played the new Kill Team. My Wyches again (no rules for Mandrakes, so they couldn’t join) against Harlequins.
One of the biggest changes is that the original used points to let you build highly customisable teams,
you could bring the units, with the specific loadout you want. While 2.0 limits you to fixed teams with fixed weapons.
Another change is not all units are available, such as my Mandrakes which I bought specifically to compliment my Wyches. They are no longer usable.
I really liked the list building aspect.
But I can understand it has issues: list building takes time, some lists will be highly unbalanced, you need to spend a long time explaining your team to your opponant at the start of a game - what weapons they are carrying etc.
Besides the list building, there have been lot of rule changes, a lot of them really help speed up games, especially alternate activation - players take turns playing one unit at a time, instead of the whole team.
This reduces the waiting time between turns and makes games more fluid.
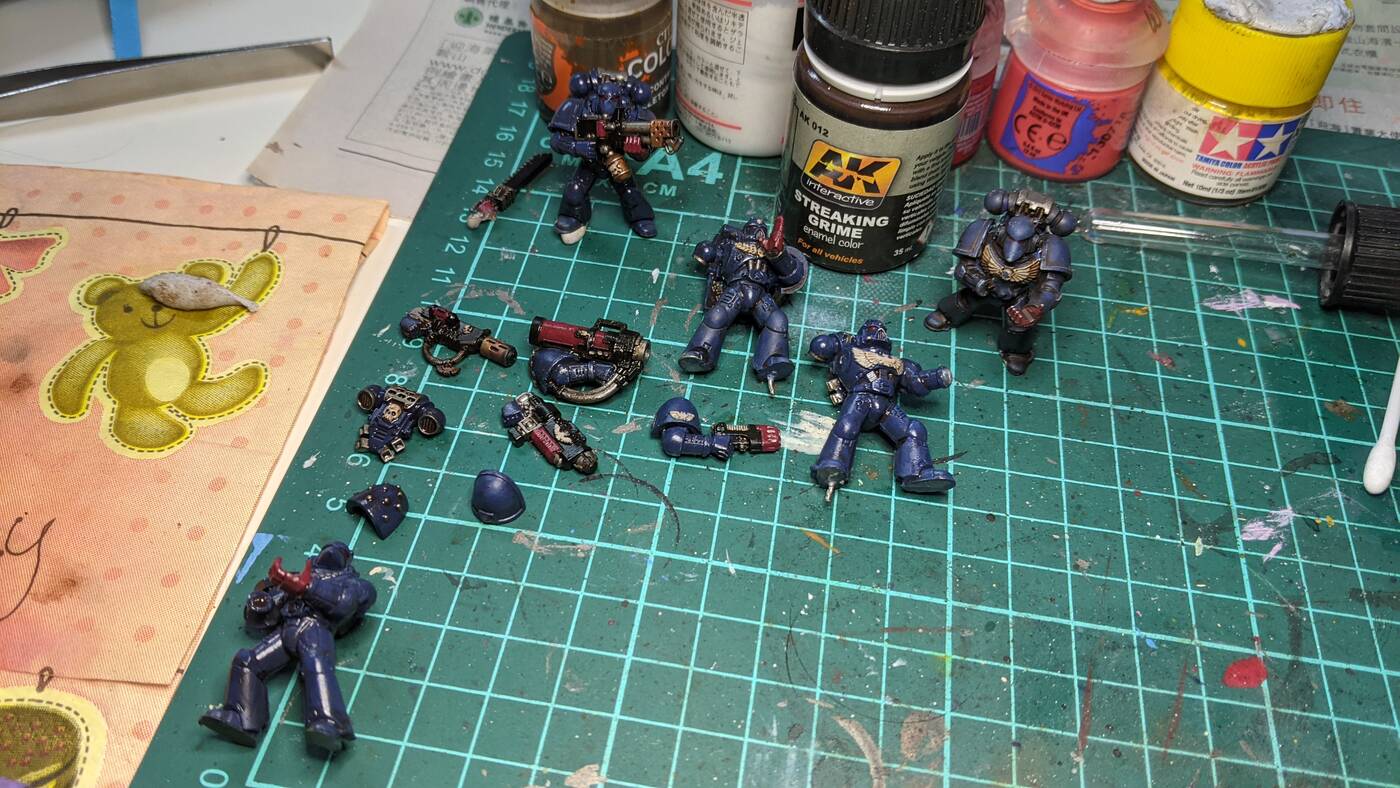
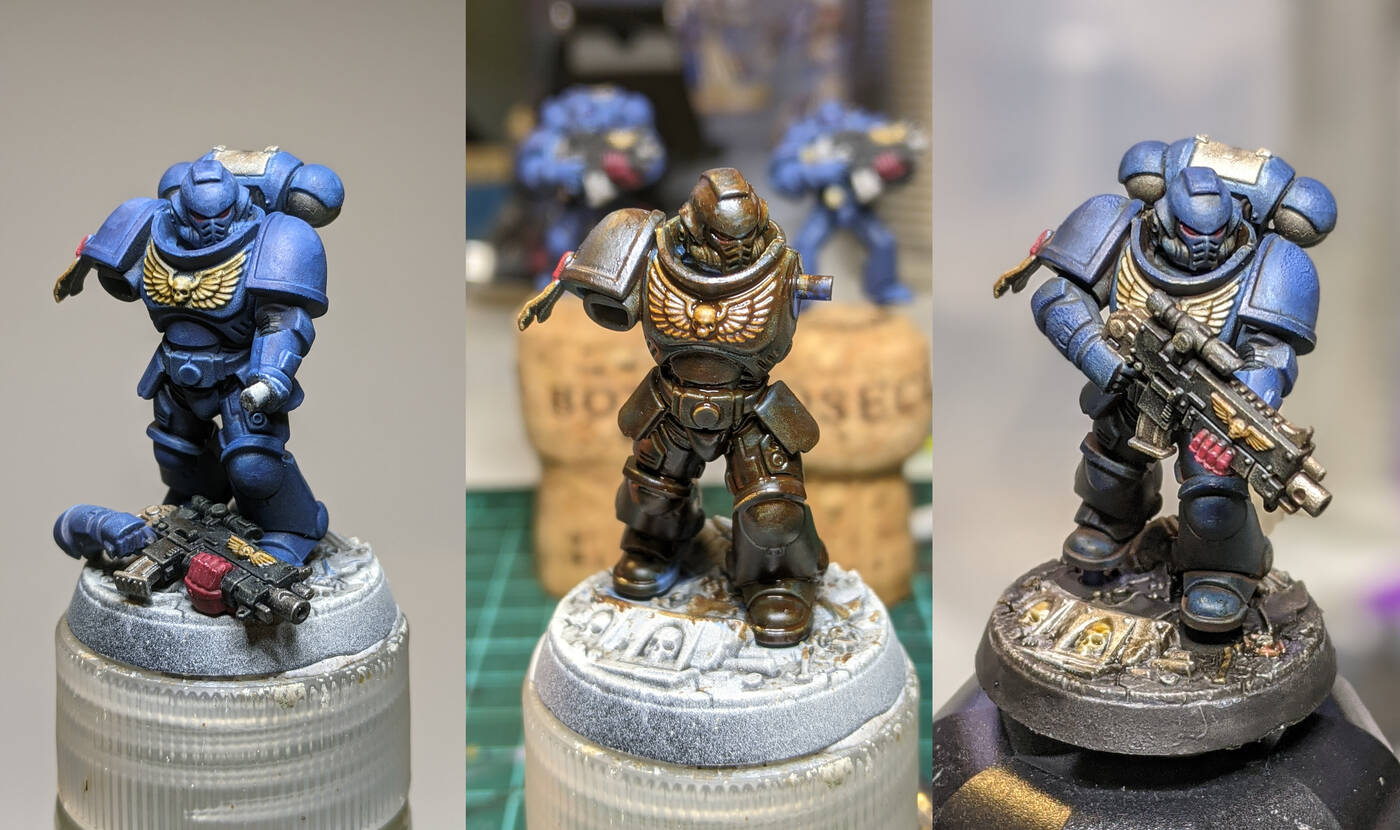
An example of AK Interactive Streaking Grime in three pictures.
Before
Coated in grime
After
Streaking Grime is an enamel effects paint. The use is simple and the result is amazing, but not like the standard acrylic paints.
Ensure the base layer is dry before proceeding. Then apply the Streaking Grime across the whole miniature, ensure it reaches the deepest, hardest to reach crevices. All your hard work painting will look lost at this point.
Remove the grime from raised areas with mineral spirits, gently using a brush, cotton buds or cloth. The shape of cotton buds means they don’t reach recesses, and can soak up a lot, so great for this task. But the cotton is very abrasive and has a tendency to strip away paint, so be gentle. Using a brush is preferable as it doesn’t seem to strip as much paint.
Compare model with other models to ensure grime consistency.
Allow to dry overnight.
In general there should be no need to apply streaking grime on the base. I’m going for a rubble/dusty look. But could be used on metal parts on the base.
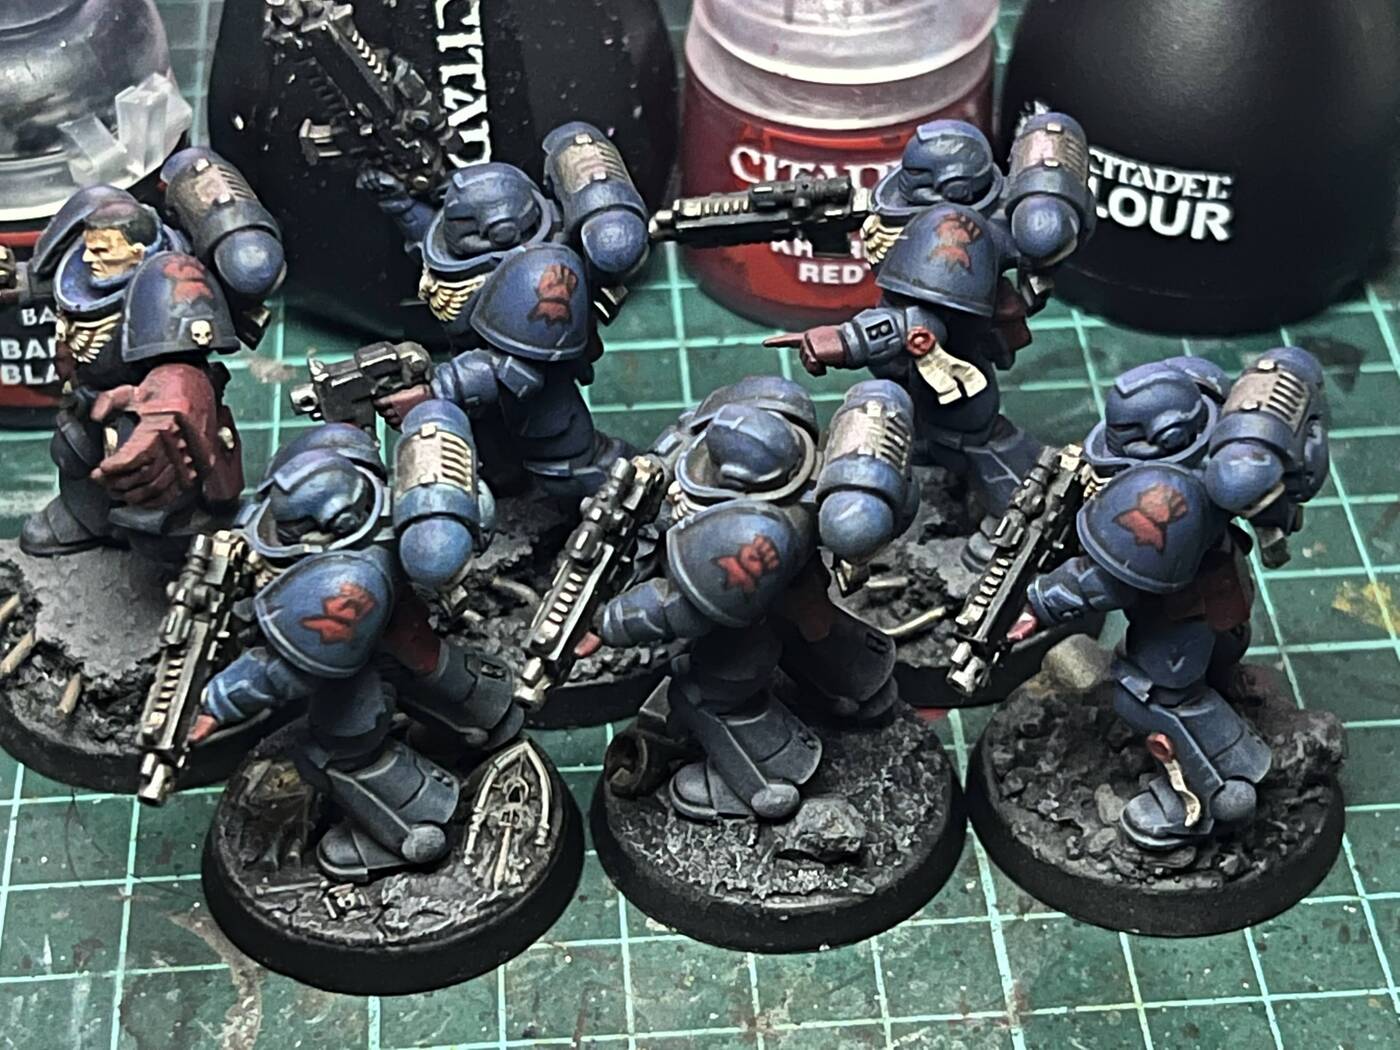
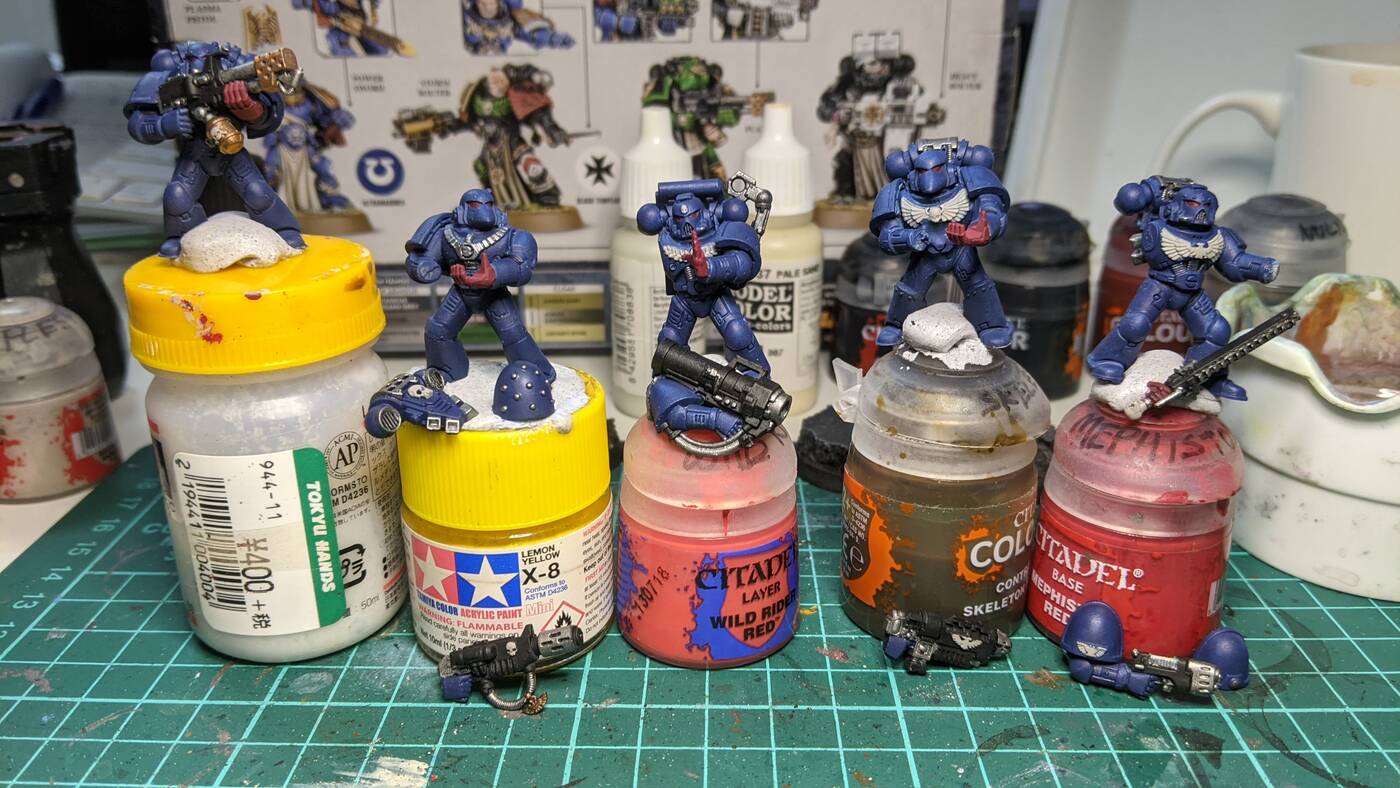
One problem I encountered was that it may desaturate the previous colours.
I only noticed this after I had already finished a lot of models and started painting a new batch.
There is probably a way to avoid this, maybe waiting longer for the enamel to dry or using less mineral spirits.
Since the rest of the models already have this effect, I wanted to maintain it for consistency. And besides, the desaturated Kantor Blue is a good look too.
So now I need to force the desaturation effect in some cases. For example when removing enamels more carefully, now the Kantor Blue is still its normal self.
Or when touching up with the original colour, those touch ups will look different.
To create a desaturated blue, add orange. So for touch ups I use the following:
Kantor Blue + Vallejo Bright Orange
Add Vallejo Glaze Medium.
Apply enough coats as needed.
Avoid paint seeping into crevices. Use a separate brush, dry, to wick up excess paint.
This is not ideal, it is more steps. So I hope to avoid doing that, but have the technique for when I need it.
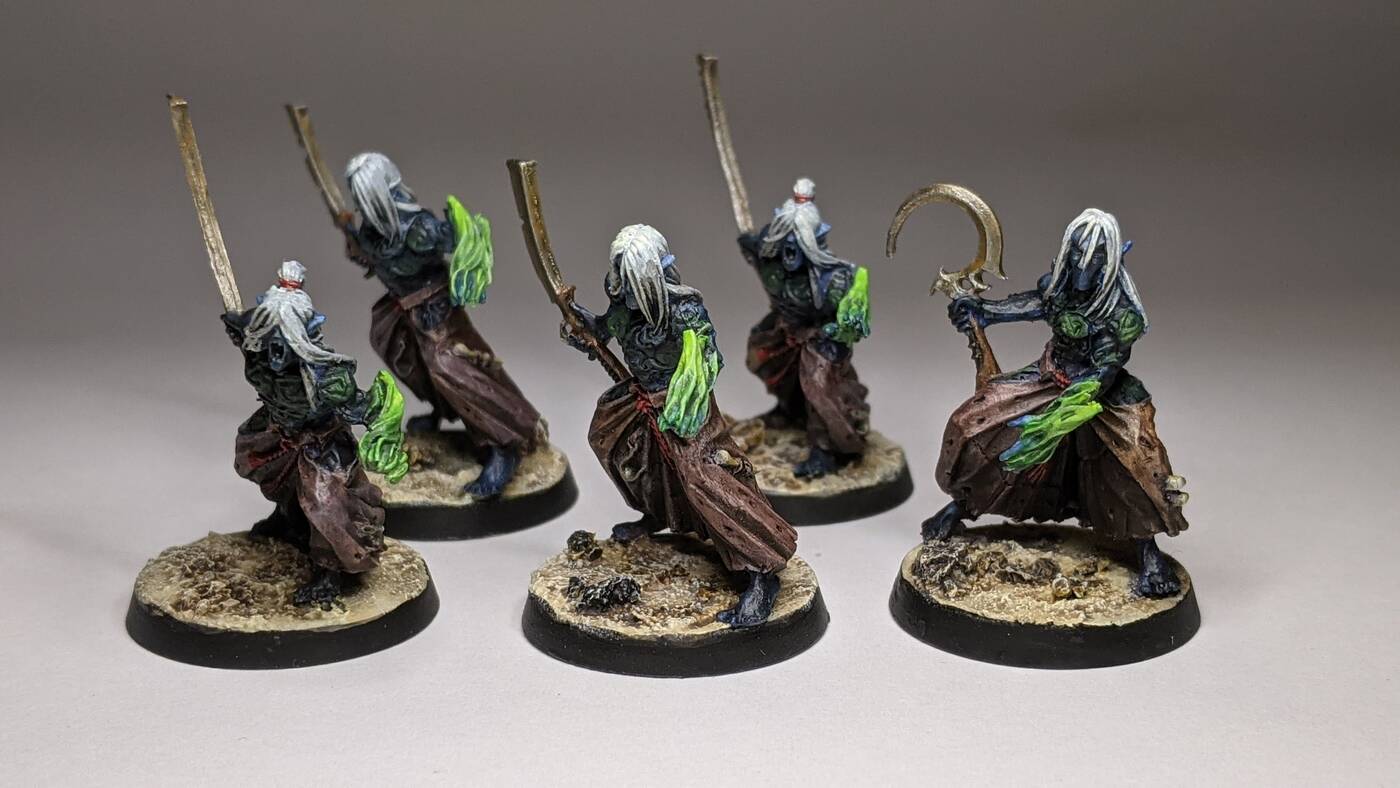
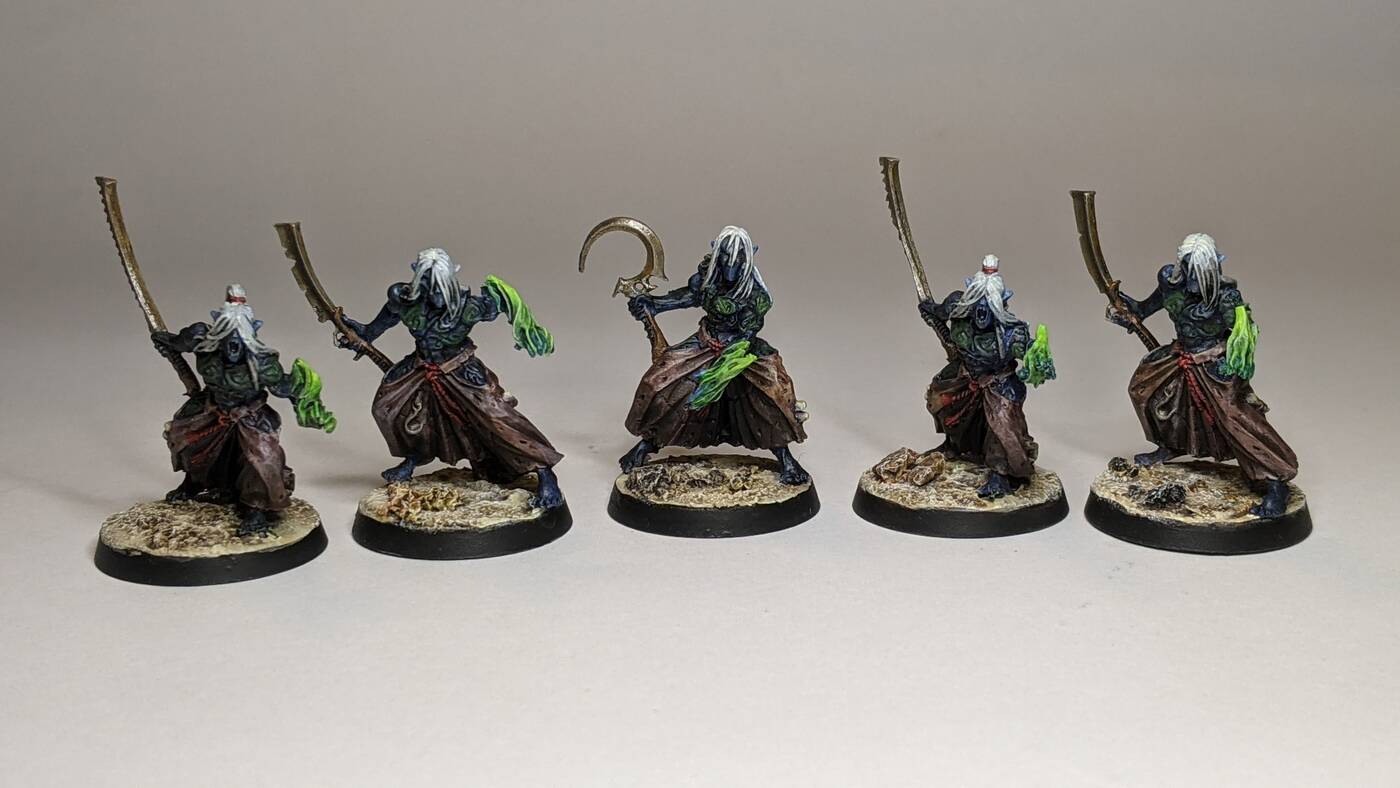
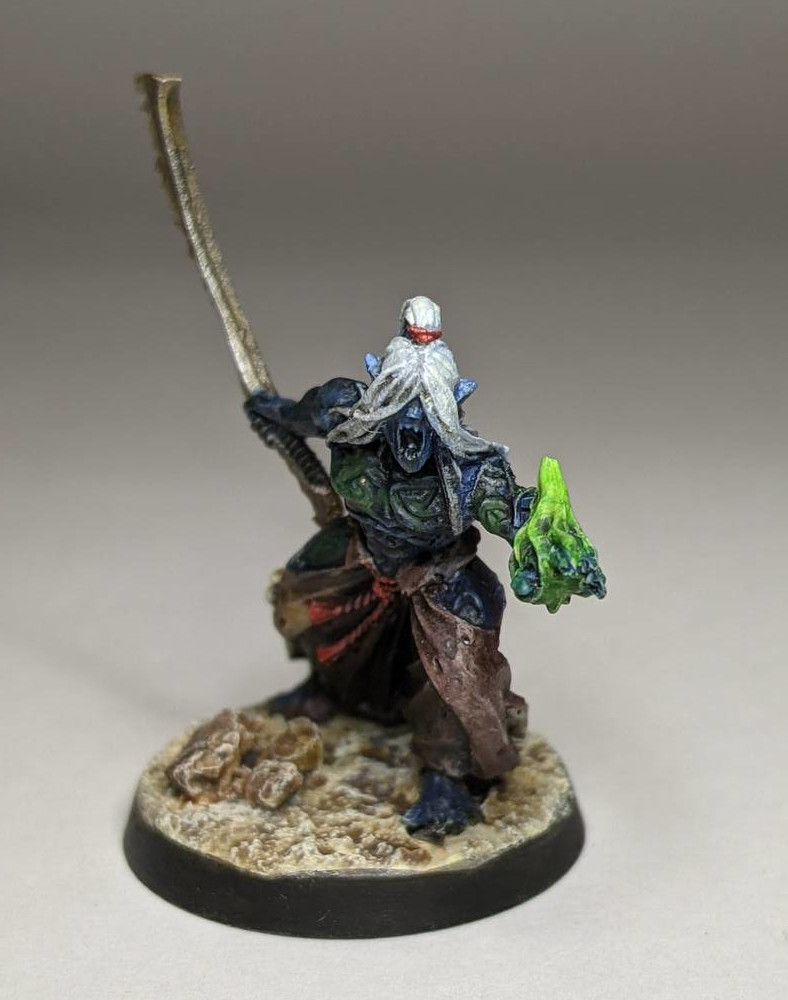
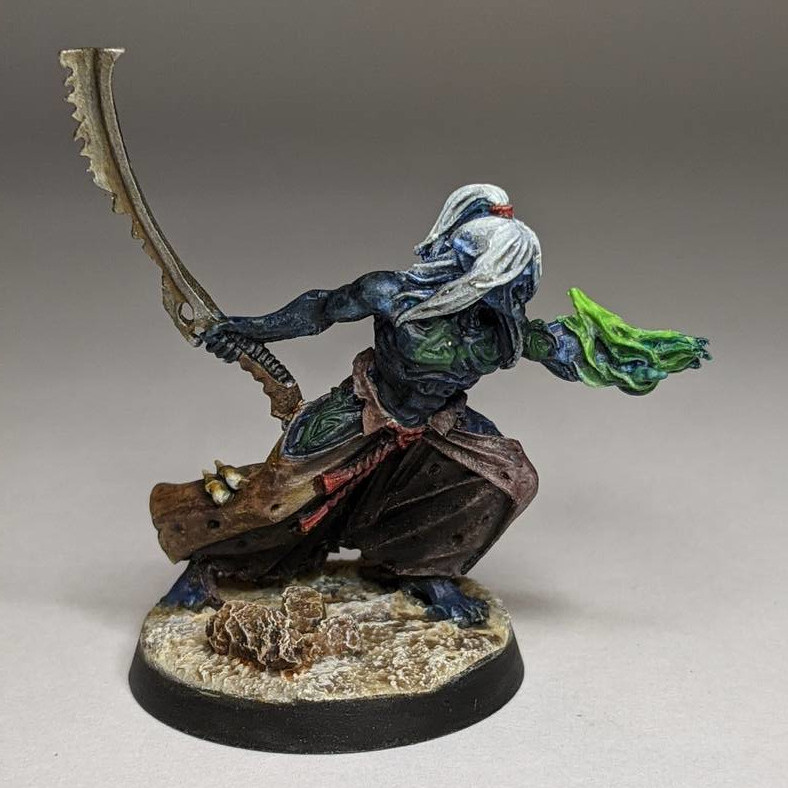
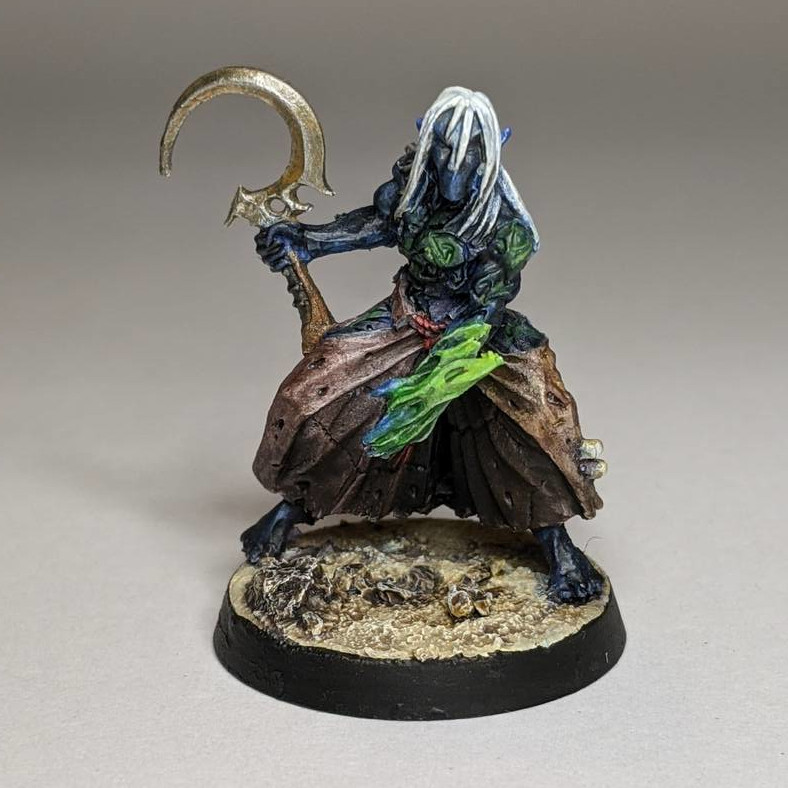
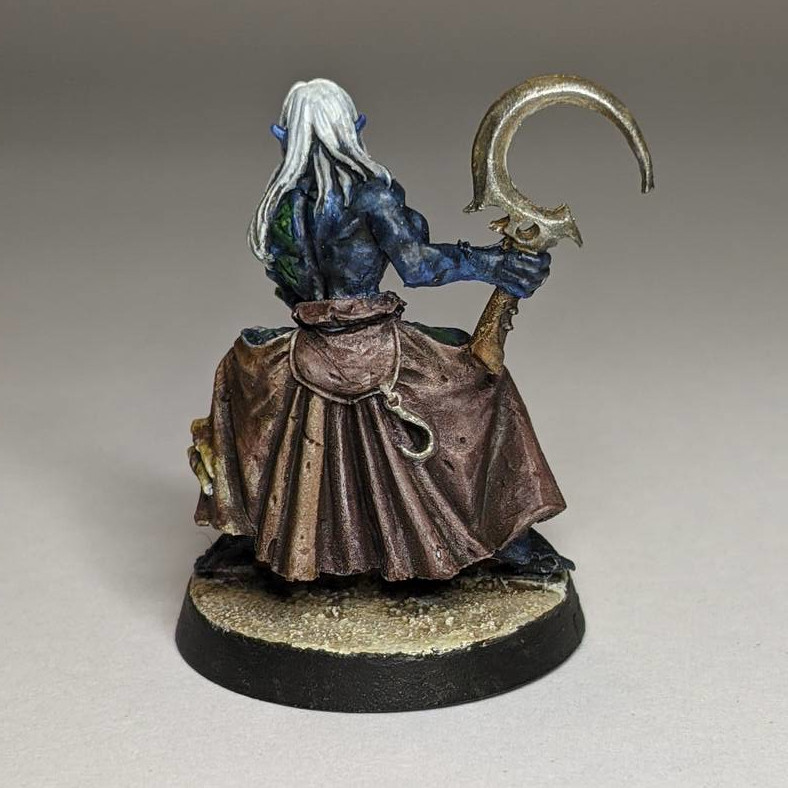
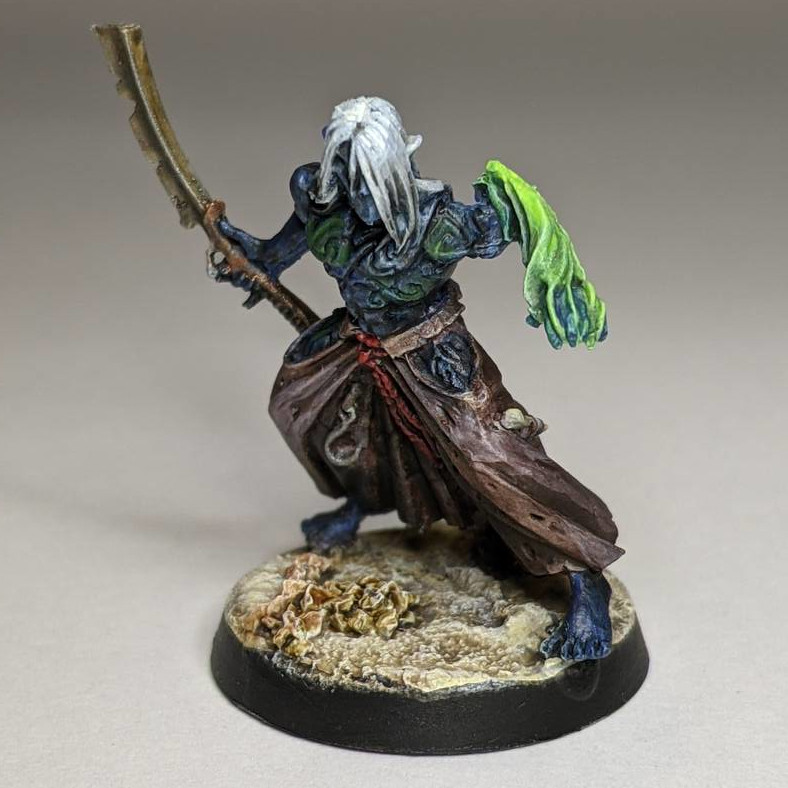
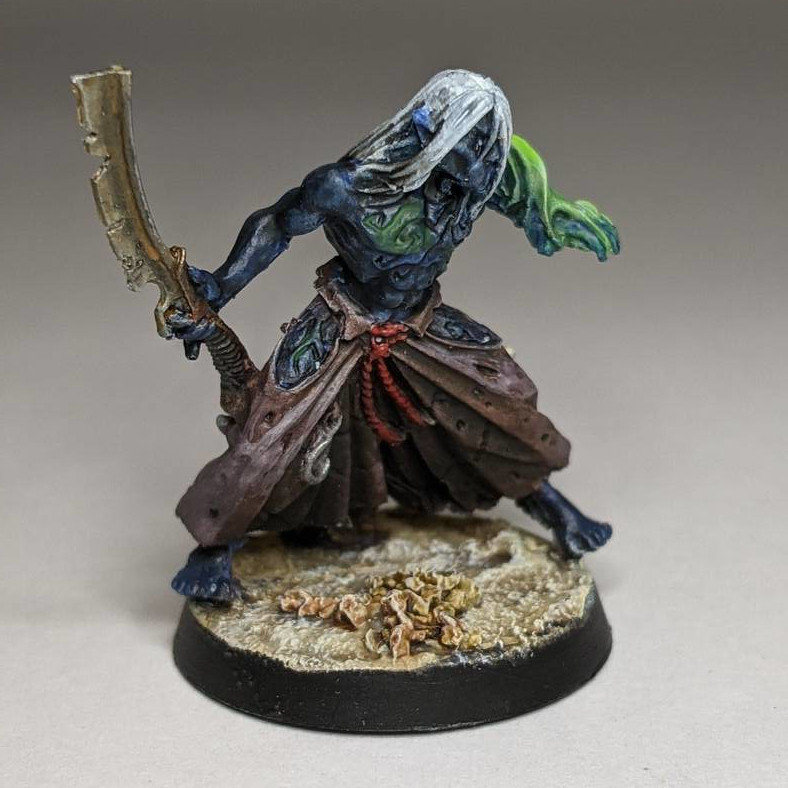
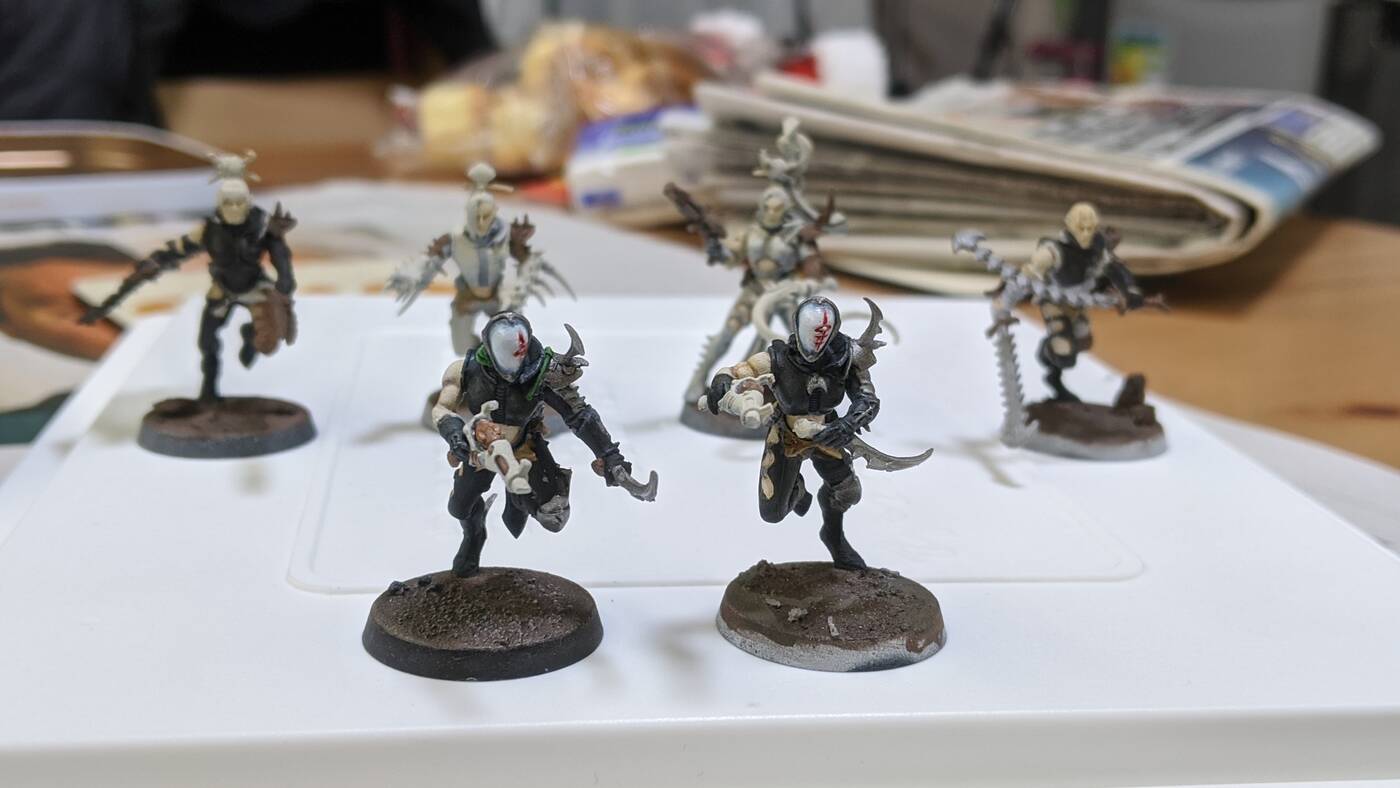
To compliment the Wyches I got some Mandrakes.
Their lore is quite interesting and they can teleport onto the board after the first turn, so can add some surprise.
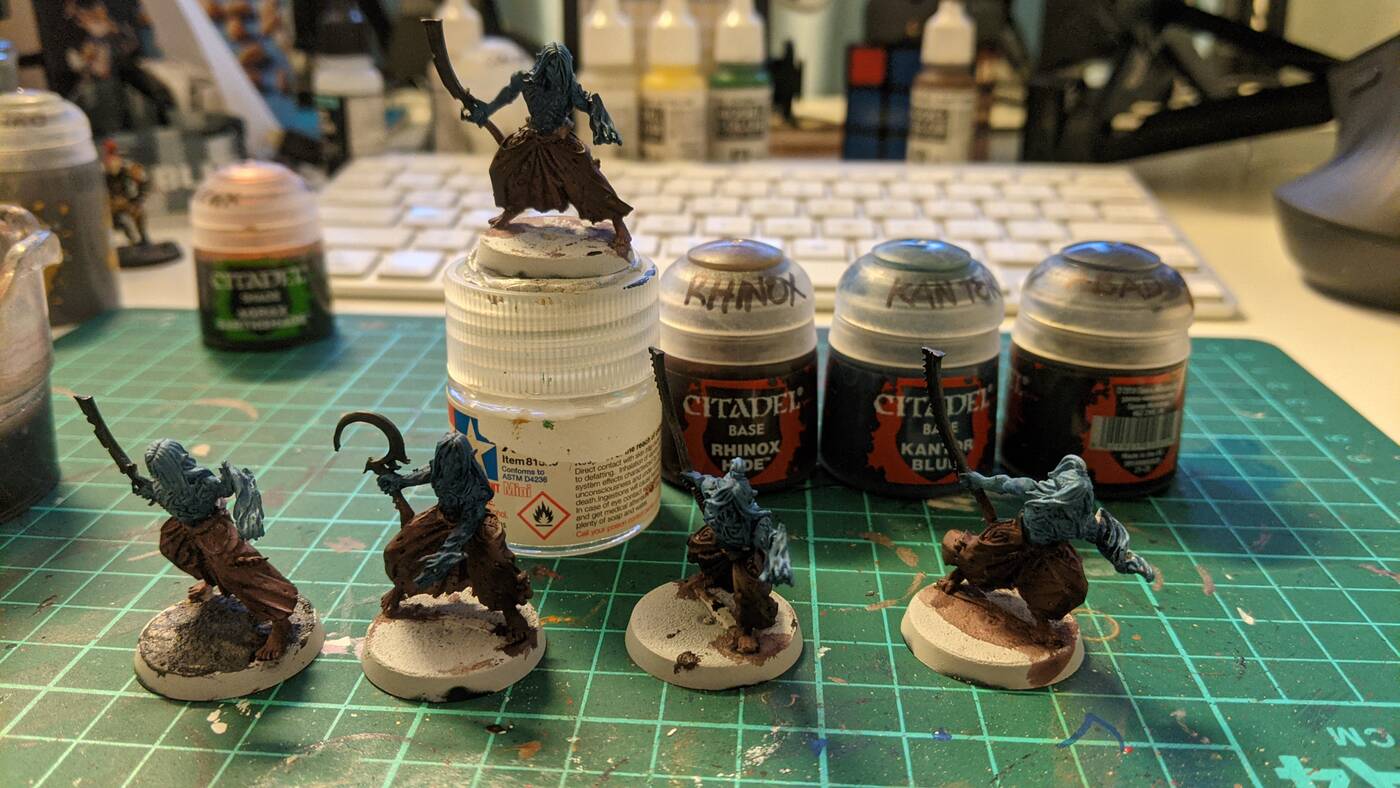
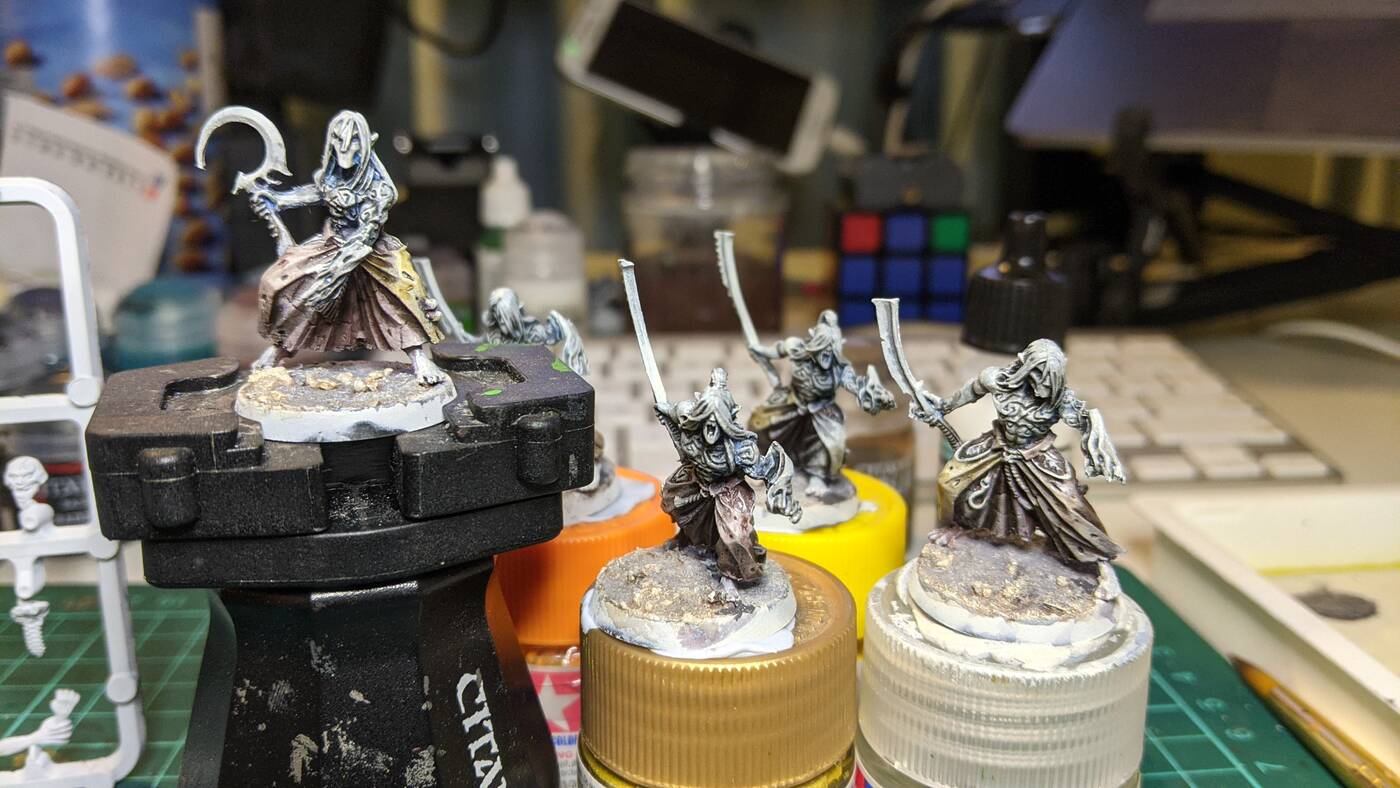
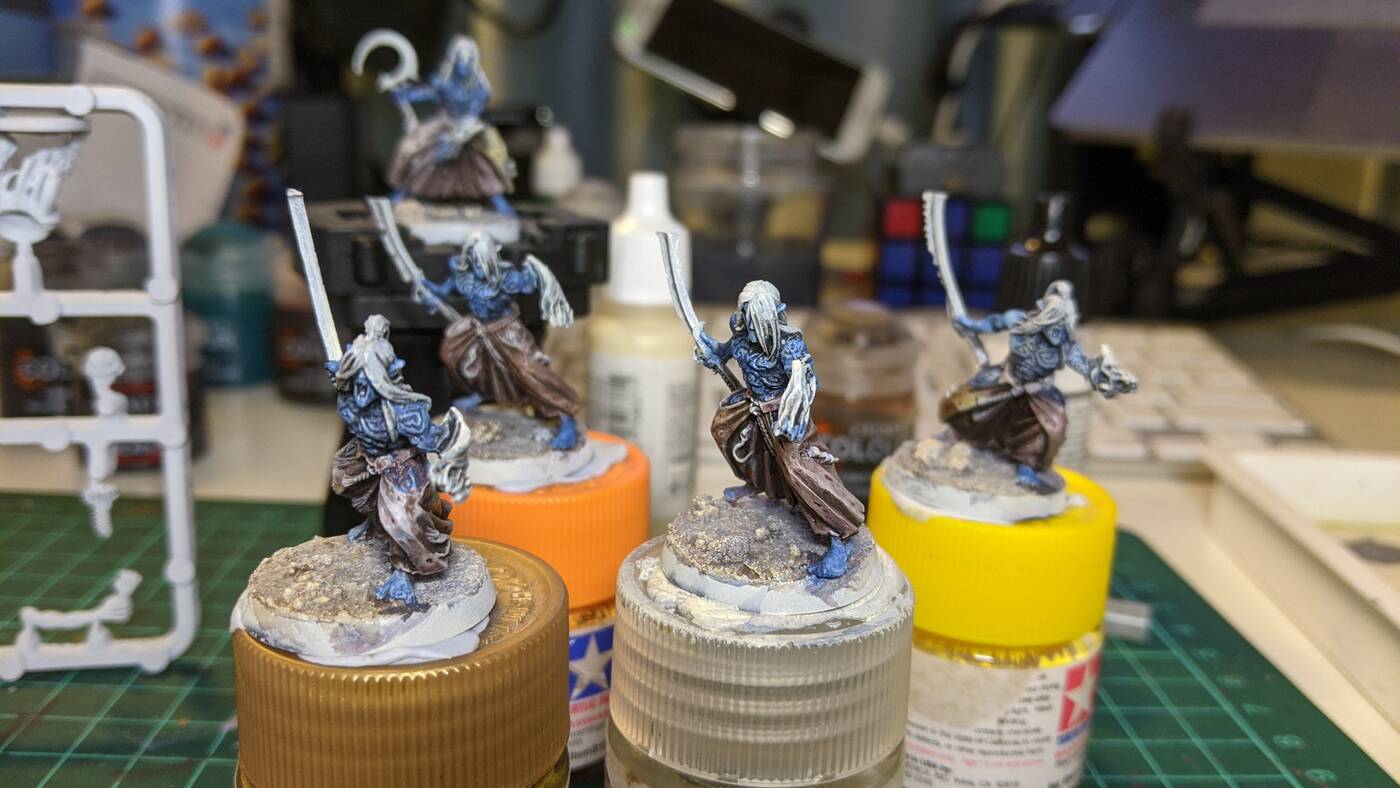
I started painting them,
but after watching Dana Howl’s Glazing and Underpainting technique I decided to have another go using that technique to give them a more natural organic look and think it came out quite well.
Especially their Baleblast flame.
I will definitely be trying the technique again in the future.
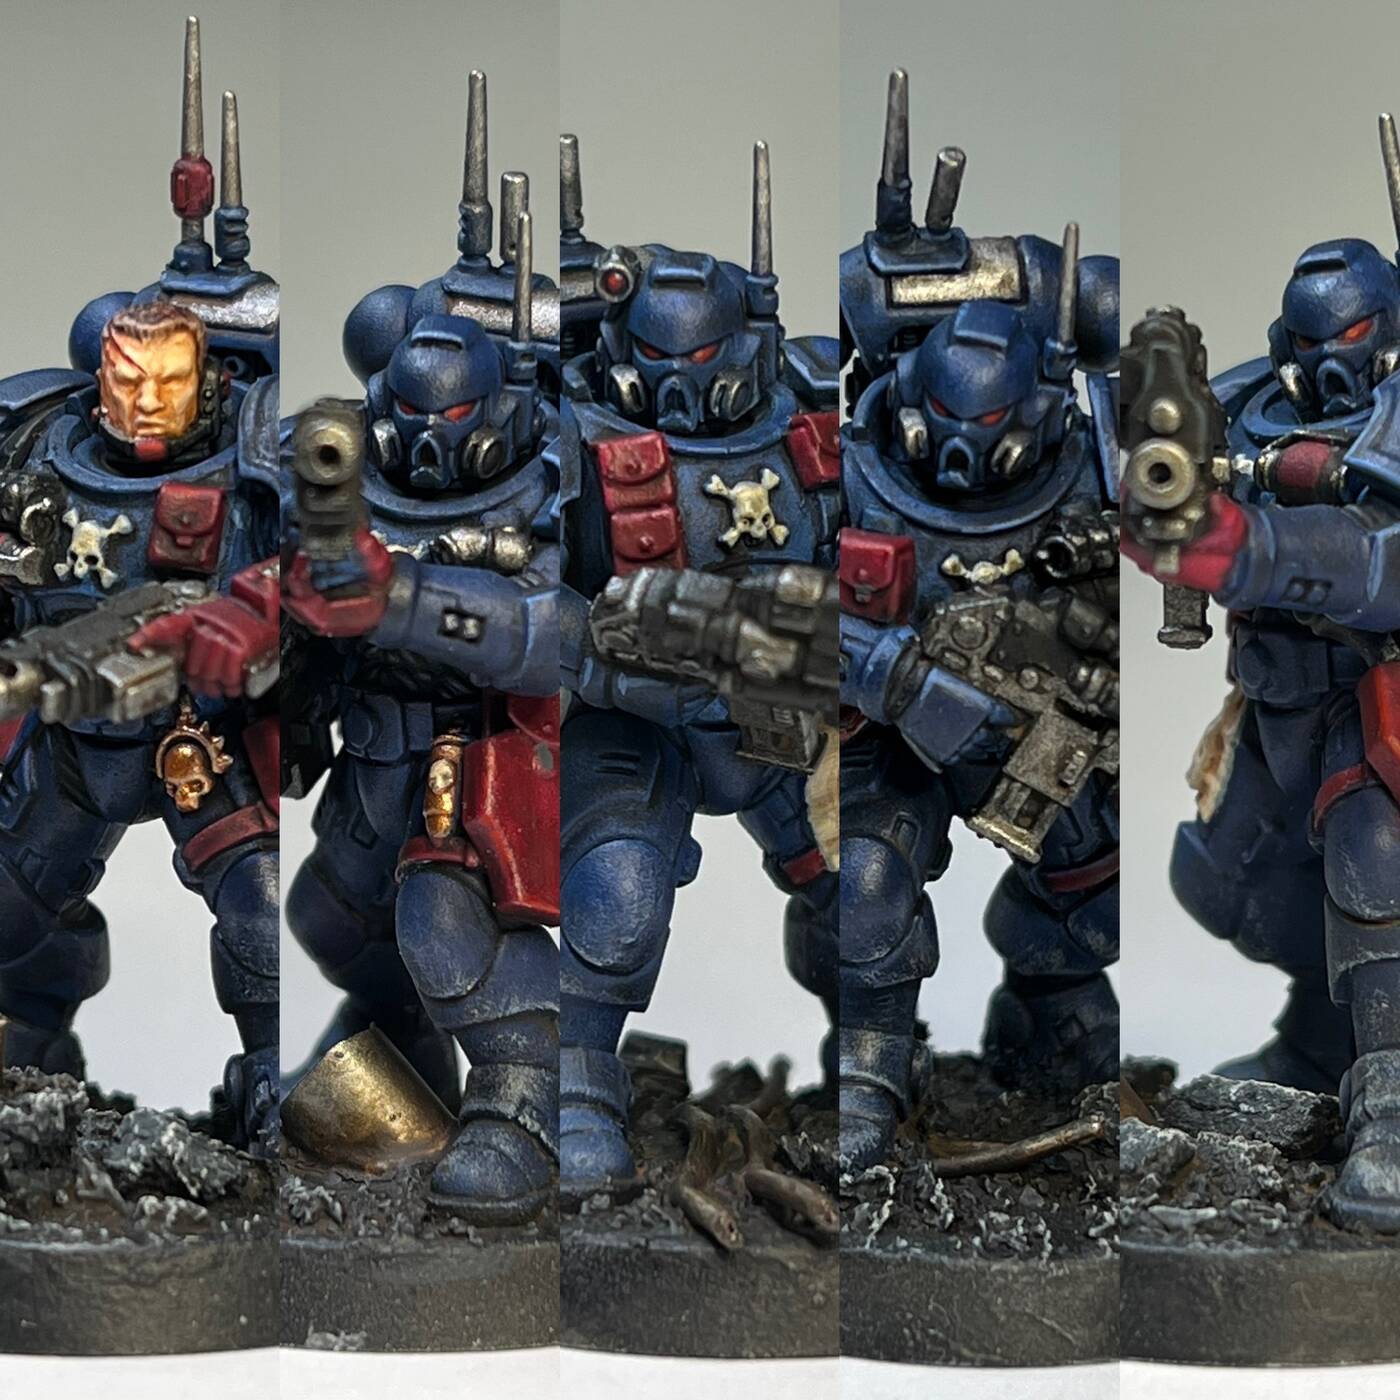
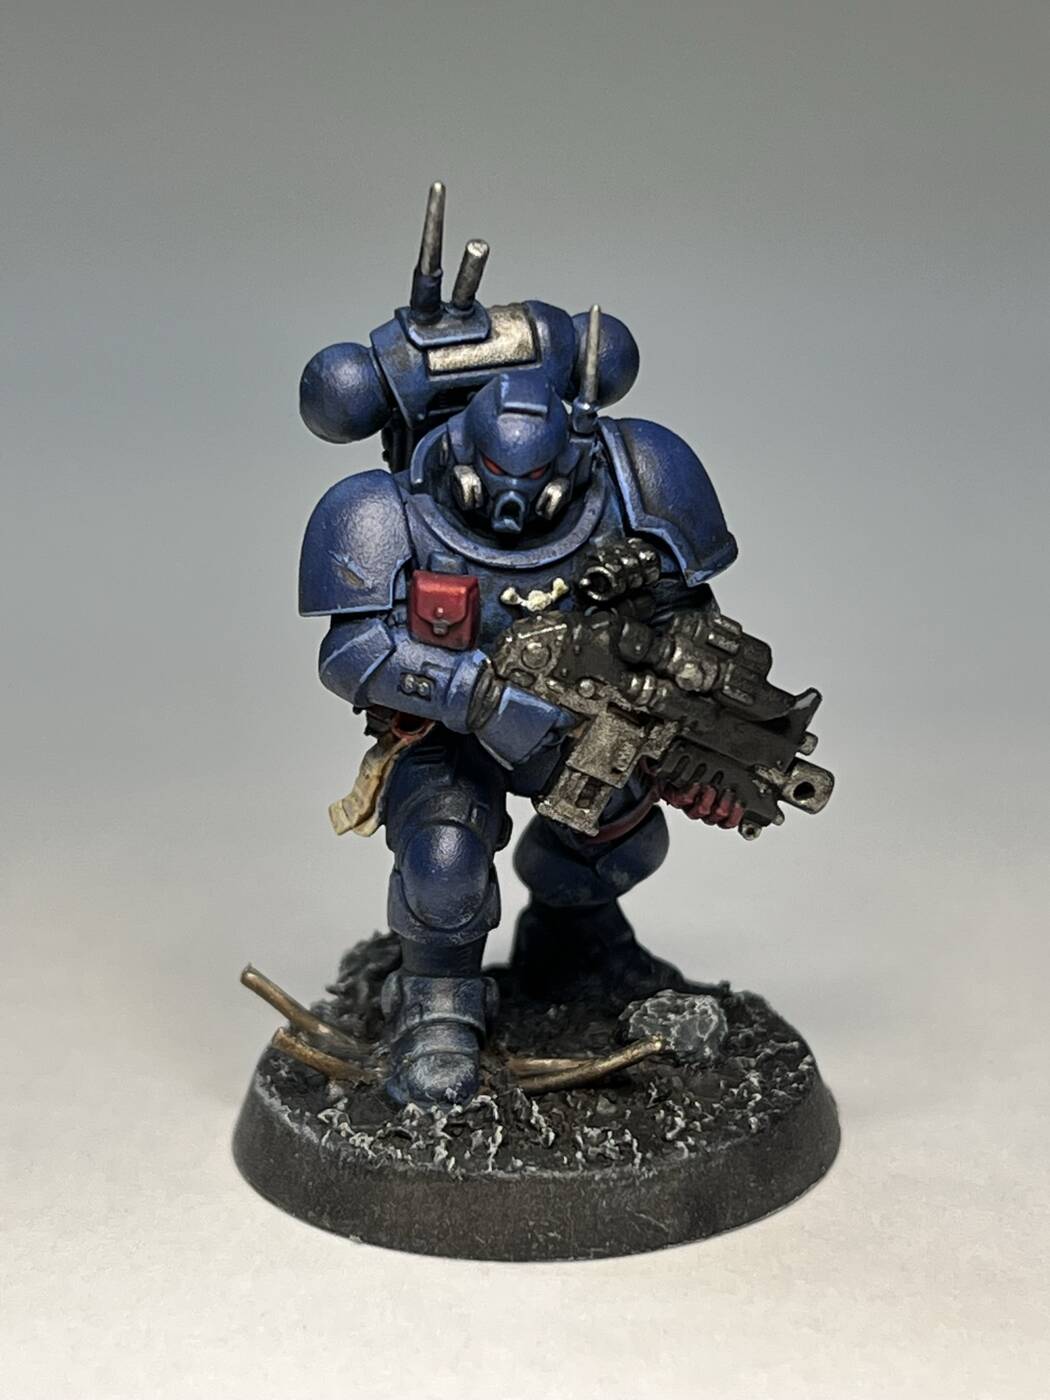
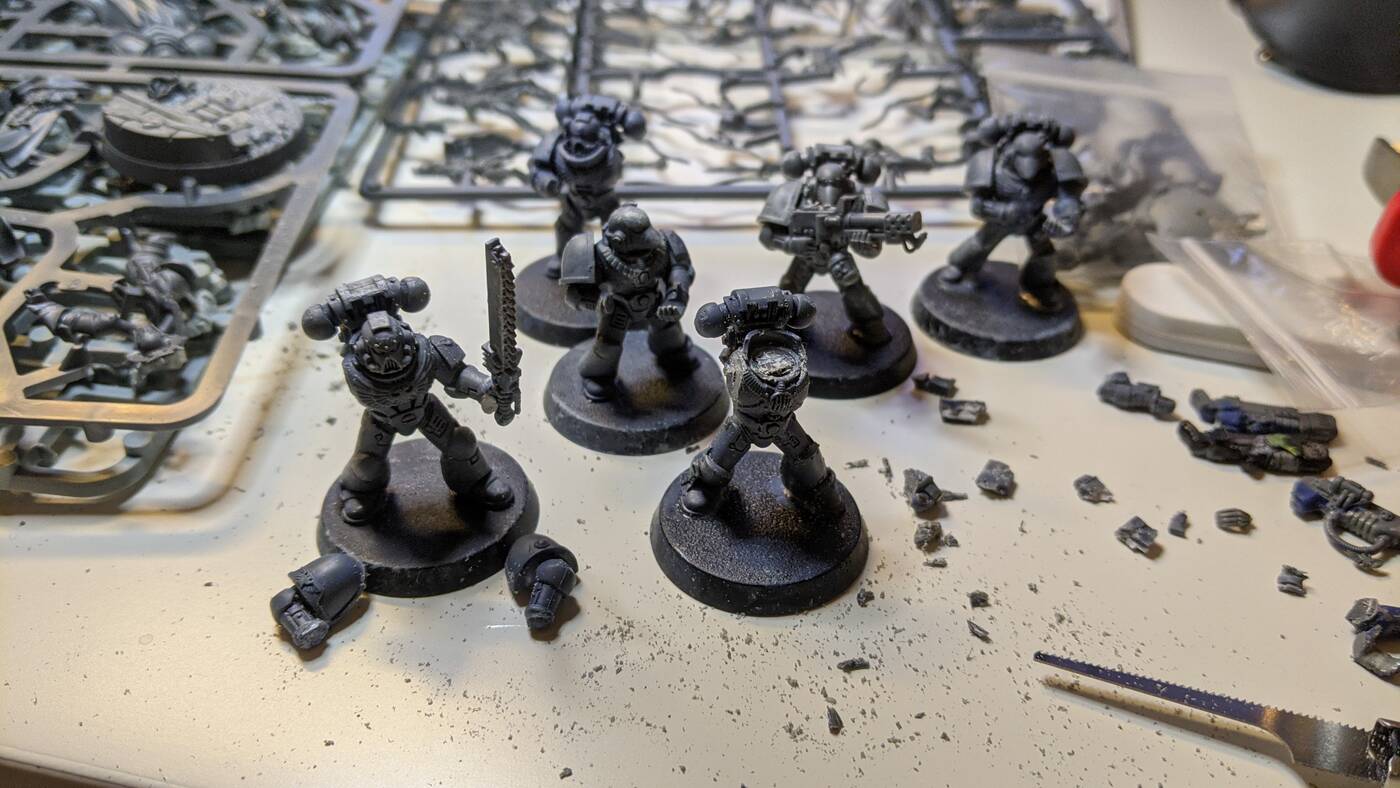
Gotta have some space marines. As a kid I had Ultramarines, this time round I thought I’d go for Crimson Fists.
My general scheme for them is to look battle ravaged, with urban rubble bases. Streaking Grime is going to be well used.
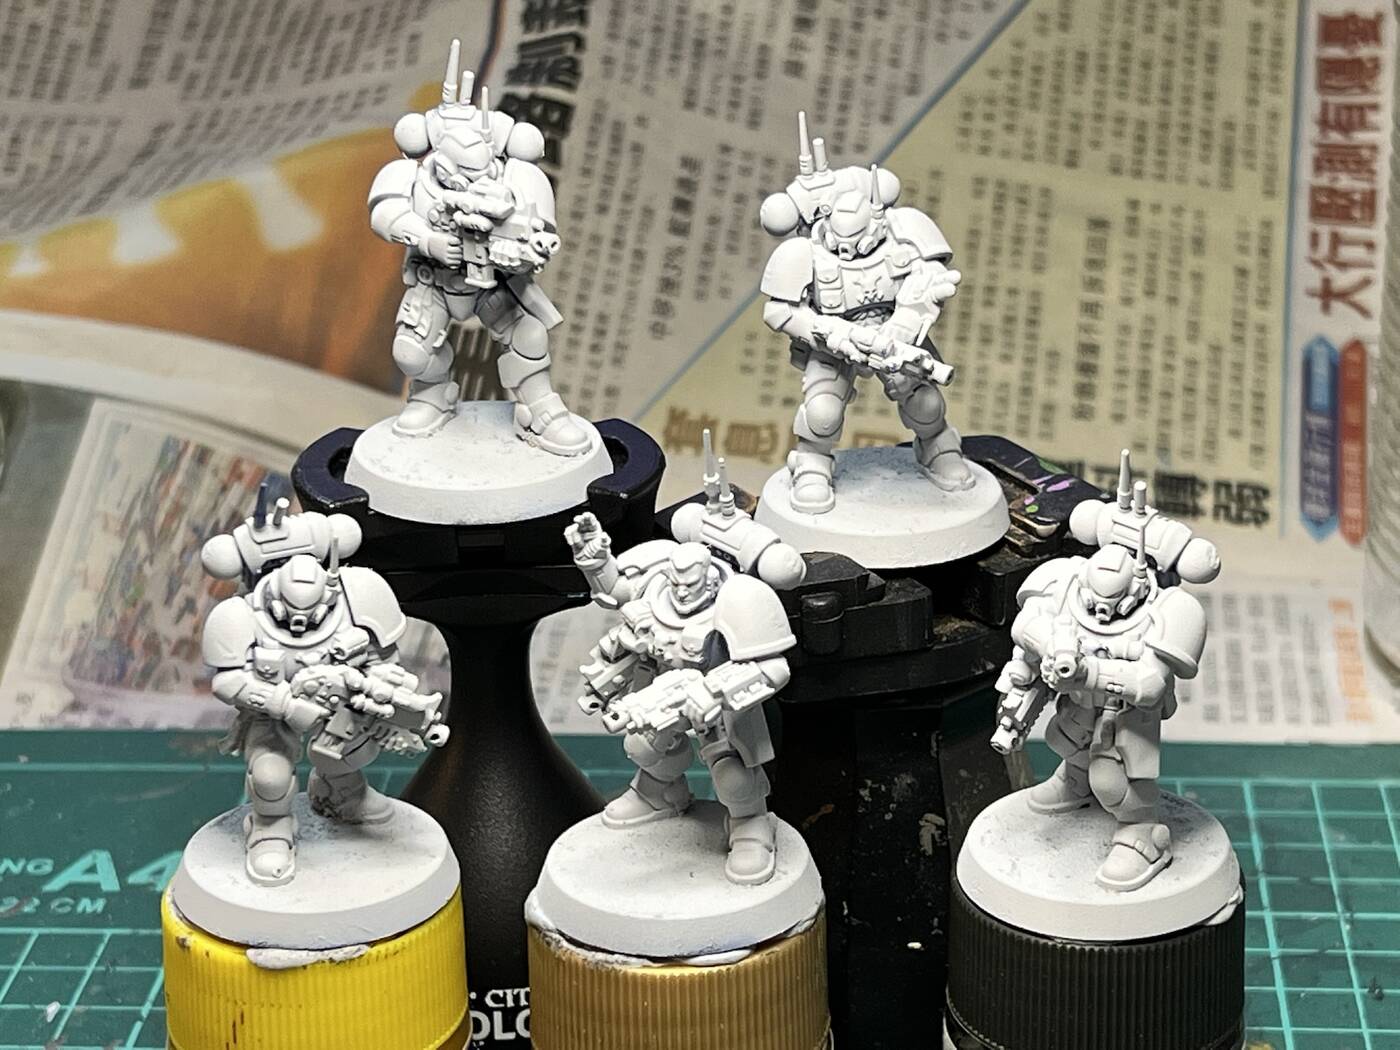
I got a selection of space marines off Ebay, a mix of firstborn and Primaris.
A few were partially painted as Ultramarines, most were just primed blue. Since there wasn’t much paint already, I stripped them with isopropyl alcohol.
I cut what I could with a hobby saw to try and improve the poses or swap heads/weapons.
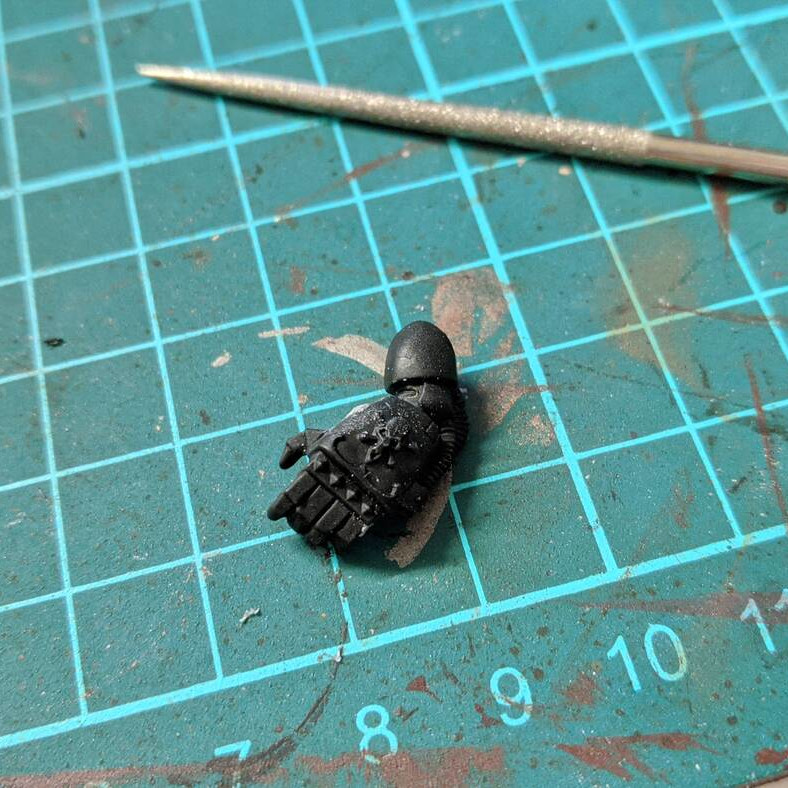
The Primaris sergeant came with a lightning claw, which I love and painted expecting to use it, but thought since these are Crimson Fists a power fist would be more appropriate.
Originally the power fist came as part of some Space Wolves bits.
I shaved off the Space Wolves designs to make it suitable for other chapters.
It’s been a while…
Kill Team looks like a great way to get back into the game. Small teams, shorter games.
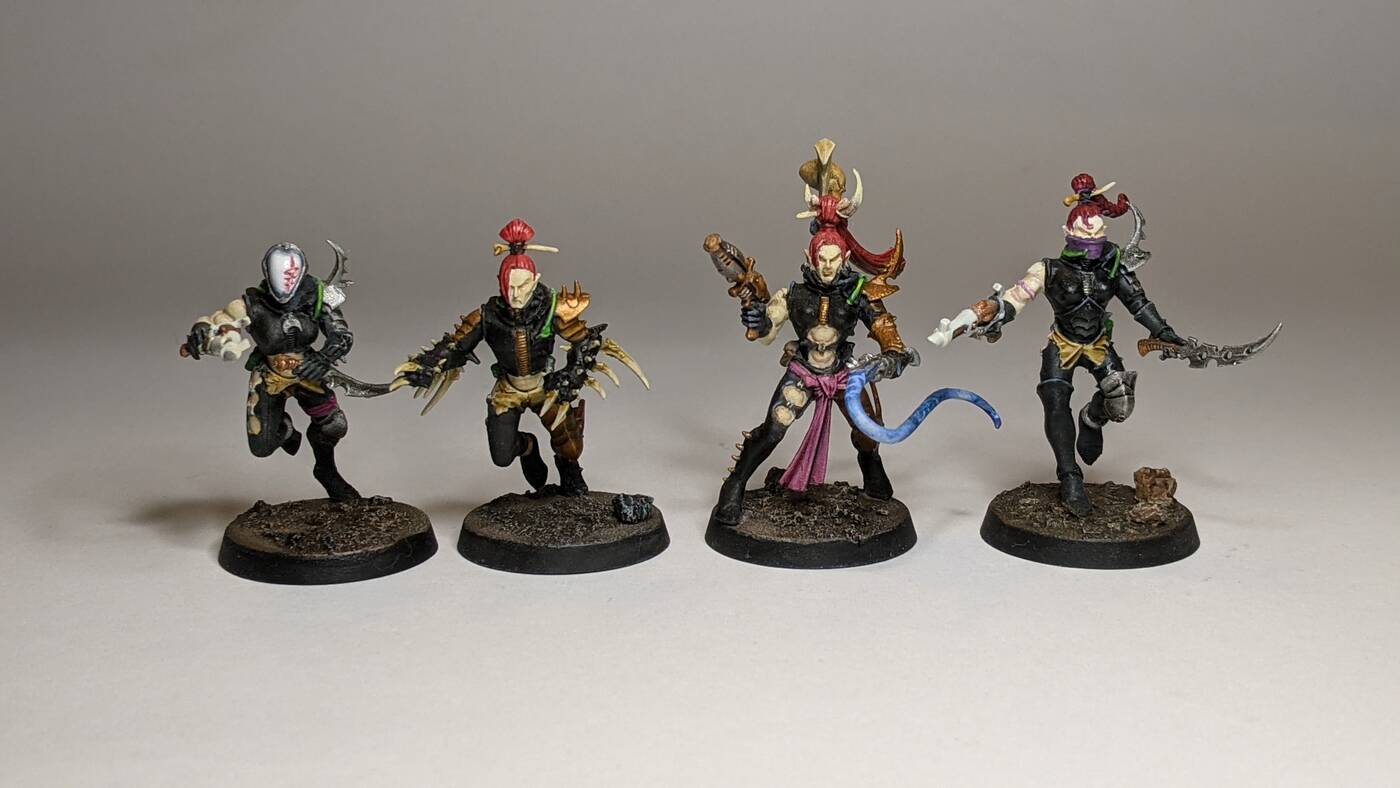
I decided to pick up some Dark Eldar, they hadn’t been introduced when I last played.
I had always like Eldar, so thought the Wyches box set would be a good start.
It was probably a mistake to choose a race that is as small. It was very hard to put together and very hard to paint.
The colour scheme is okay… but could be better. I didn’t bother with the faces. I’ll probably redo them in the future.